Sharepoint Configuration
EnterpriseBacula Enterprise Only
This solution is only available for Bacula Enterprise. For subscription inquiries, please reach out to sales@baculasystems.com.
Credentials Settings
Important
In order to access and backup Sharepoint site collections, the delegation of the User credentials must be enabled on the Sharepoint server and the Bacula file daemon must be logged as an authorized user within the Sharepoint server. Read access are sufficient to backup. Full read-write access is mandatory for restore.
Enable Delegation of User Credentials on the Hyper-V Server
Run gpedit.msc (normally in C:\Windows\System32) on the Hyper-V server and look at the following policy: Computer Configuration -> Administrative Templates -> System -> Credentials Delegation -> Allow Delegating Fresh Credentials.
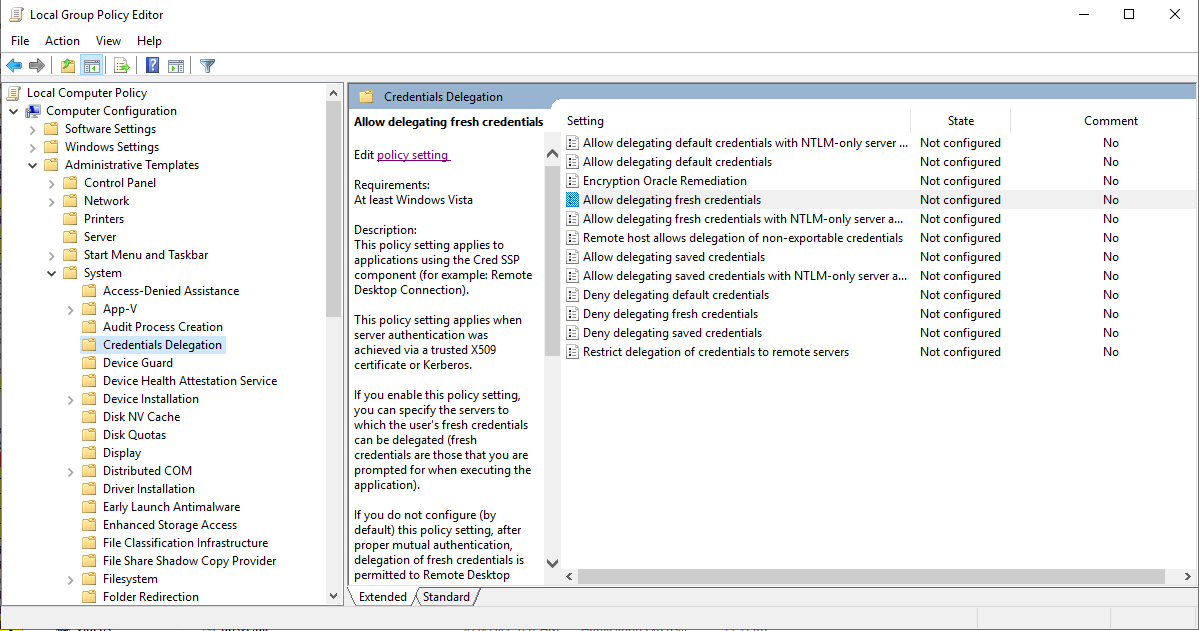
Verify that it is enabled and configured with the WSMAN SPN appropriate for the target computer.
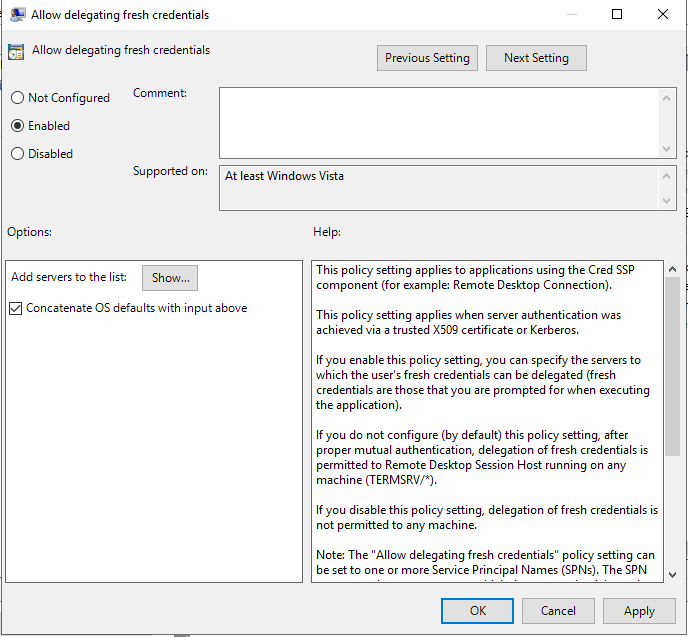
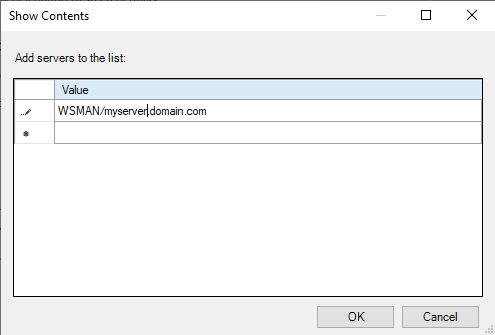
For example, for a target computer name “myserver.domain.com”, the SPN can be one of the following: WSMAN//myserver.domain.com or WSMAN//*.domain.com. Introduce it in the “Add servers to the list”: “Show” dialog box.
Finally run a powershell console on the Hyper-V server (normally in C:\Windows\Systeme32\WindowsPowerShellv1.0powershell.exe) and enter the following commands:
Enable-WSManCredSSP -Role Server -Force
Enable-WSManCredSSP -Role "Client" -DelegateComputer myserver.domain.com -Force
Impersonation of the Sharepoint Plugin
The impersonation of the Sharepoint plugin can be achieved in different ways.
Specify the user name and password locally on the sharepoint server. This is the recommanded method. In a
bacula-sharepoint.pwdfile, located by thebacula-fd.confconfig file (typically C:\Program Files\Bacula).
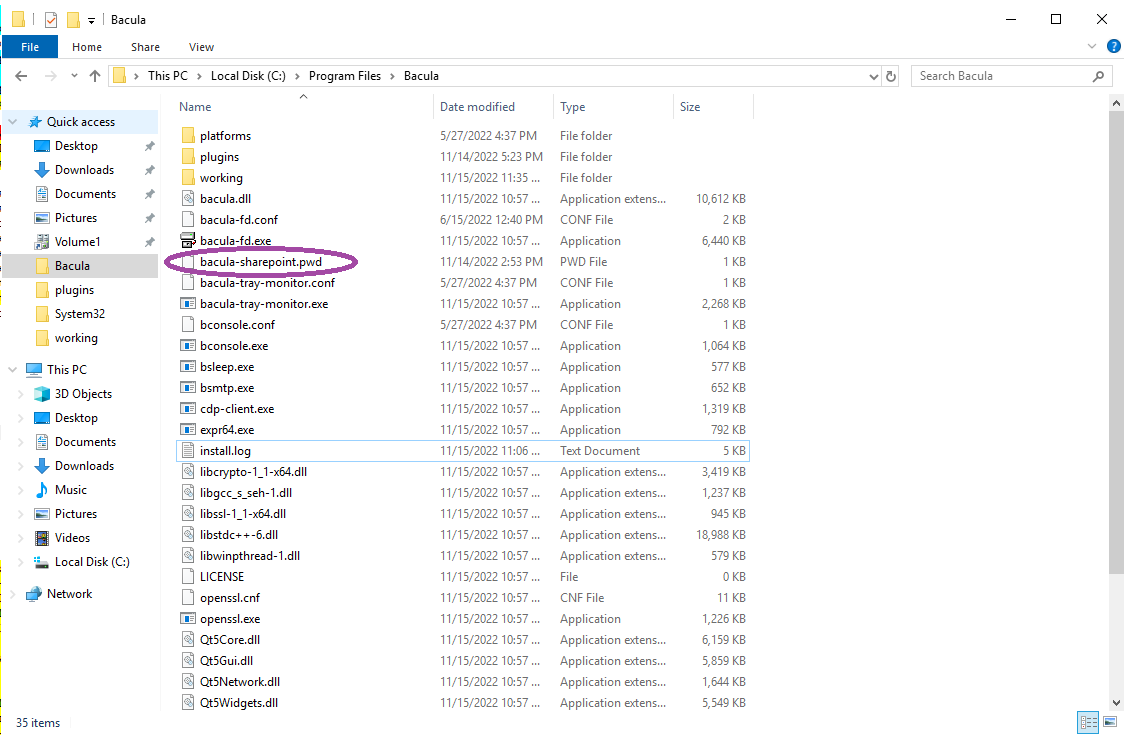
bacula-sharepoint.pwd contains the user name followed by the user password, separated by a colon.
name@domain.com:mypassword
or
DOMAIN\name:mypassword
Impersonate the Sharepoint plugin by passing user and password, as plugin options See Job Configuration for user_name and user_password options.
Manually change the Bacula File Daemon default login account.
Log on to the Sharepoint server with administrative privileges.
From the Windows Start menu, type “Services” and press enter - this will show a list of the installed services.
Find the Bacula File Backup Service and right-click on it. Choose Properties, select the Log On tab. By default it should look like this:
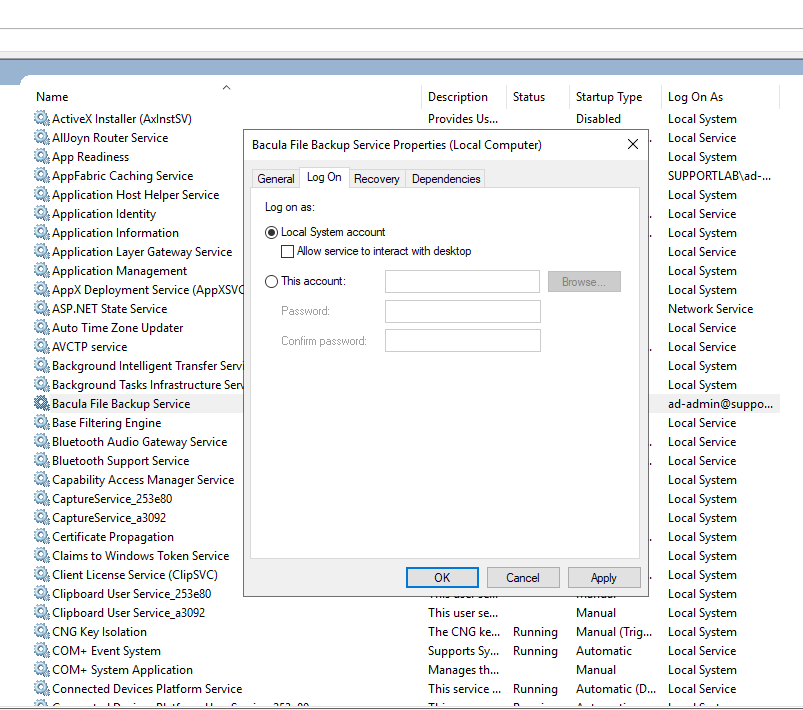
Toggle the selection from “Local System account” to “This account”.
Enter the credentials of a Sharepoint administrator user (either read only or read-write). Click OK.
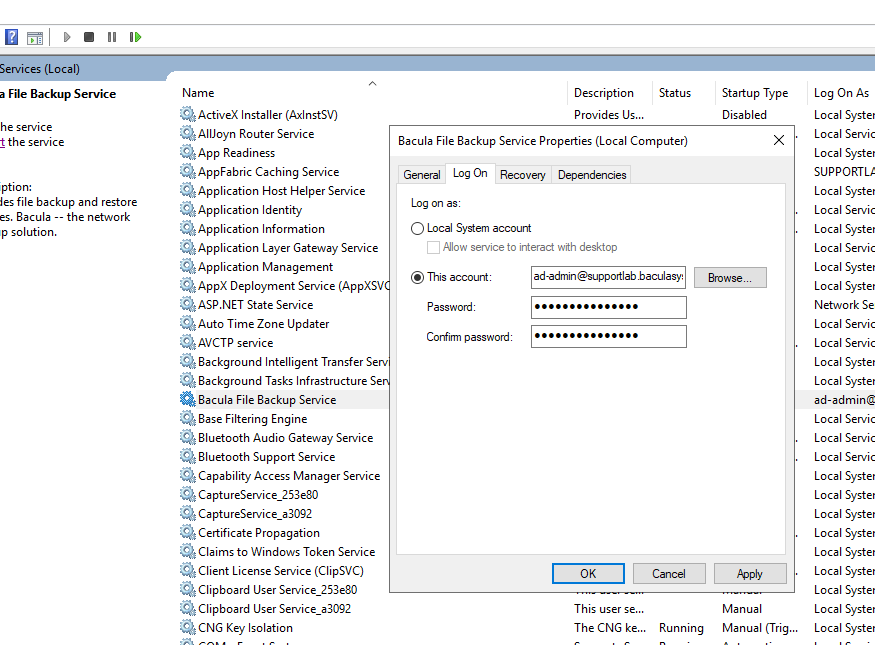
Right-click on the Bacula File Backup Service entry again, and click “Restart”, so the changes are applied.
Add the default Bacula file daemon login as Sharepoint site Collection user
By default the Bacula file daemon is logged as “NT Authority\System”.
With Sharepoint administrator privilege, do the following:
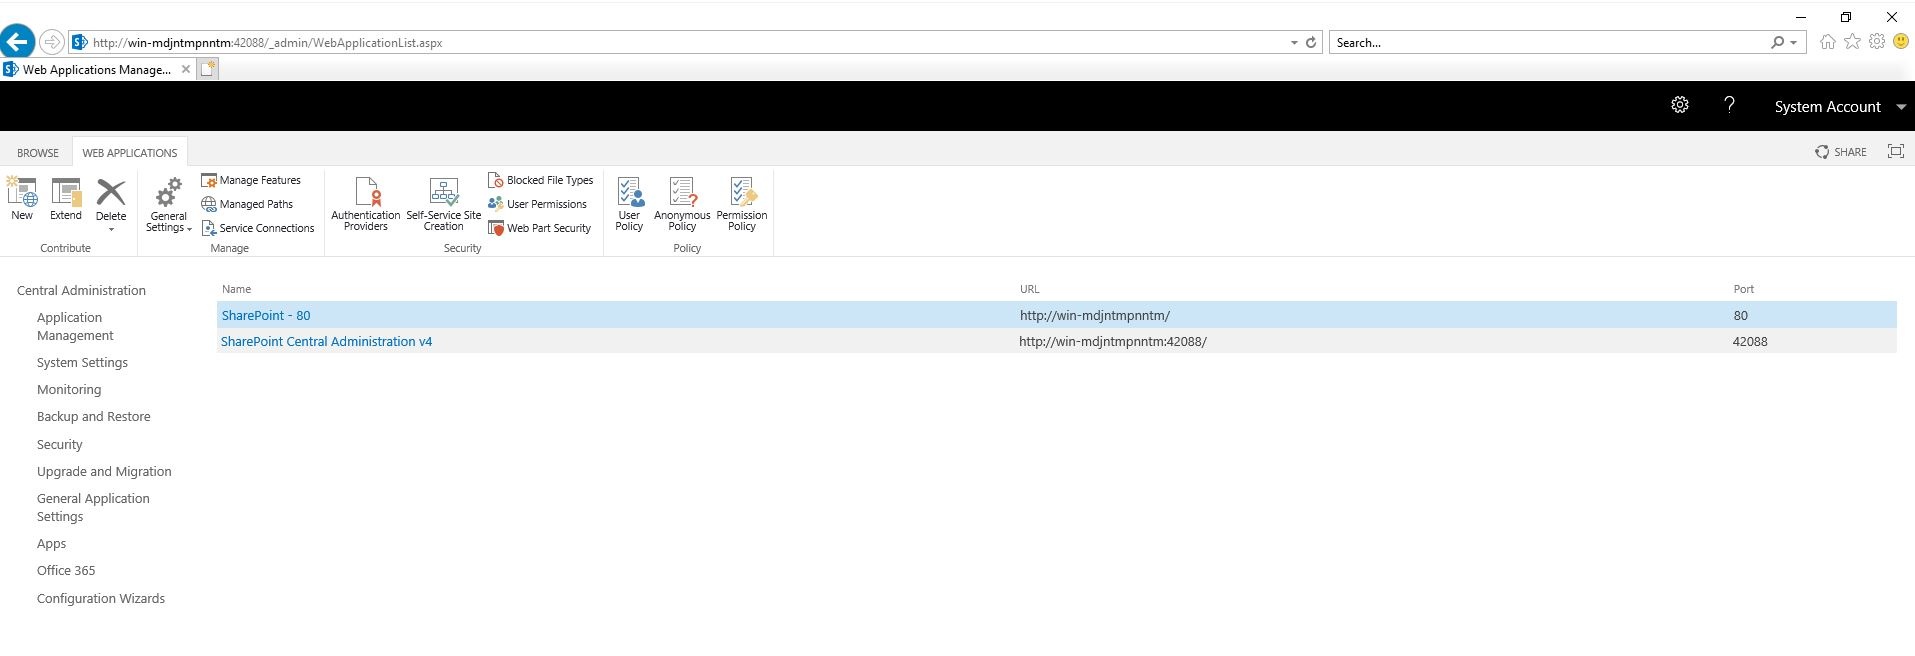
From the Windows start menu, launch the SharePoint Central Administration.
Under Application Management, select “Manage web applications” and you should see the list of available site collections.
For each backup target collection, select it, then choose User Policy from the ribbon menu.
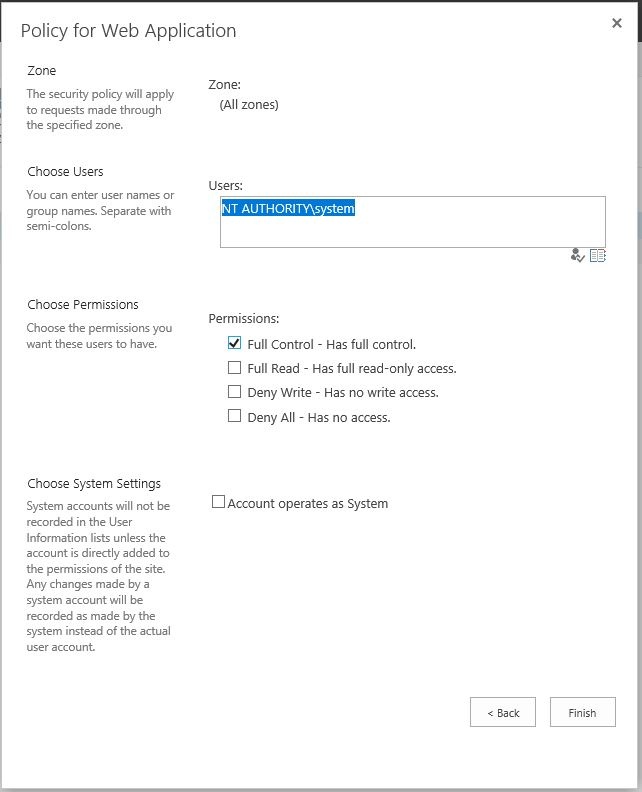
The Policy for Web Application windows is displayed. Click “Add Users”.
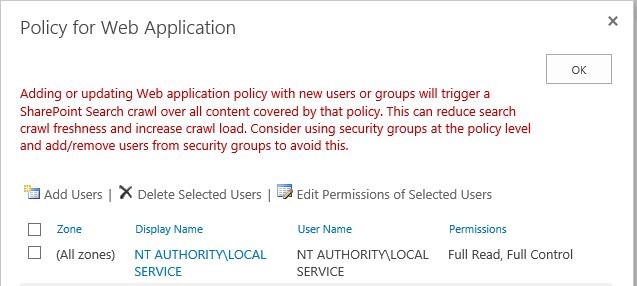
Add “NT AUTHORITY\SYSTEM” in the Users box and check “Full Read” for backup only, or “Full Control” for backup and restore.
Press the finish button.
In addition, you also need to grant access to the Sharepoint MSSQL databases to Bacula File Daemon.
From the Windows start menu, launch the SQL server Management Studio and log in with MSSQL administrator privileges.
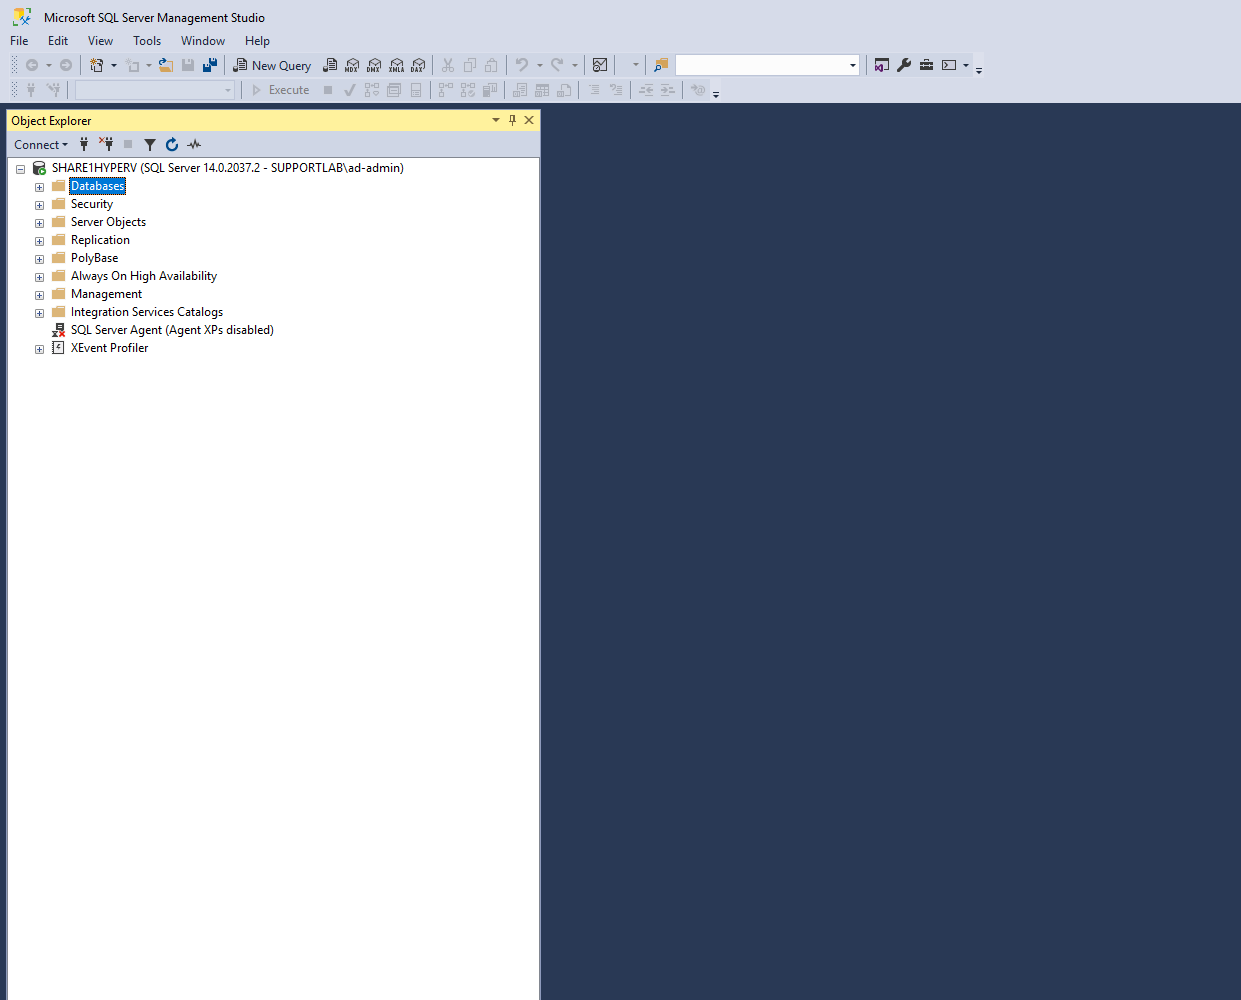
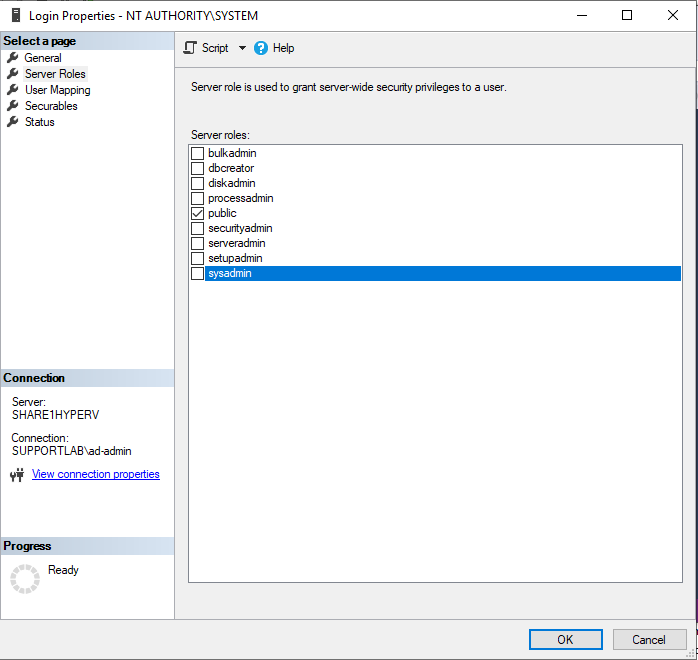
Under Security/Logins, find “NT AUTHORITY\SYSTEM”, right click on it and select properties. Select the Server Roles page, check sysadmin.
Job Configuration
Once the Bacula File Daemon and the Sharepoint plugin are correctly installed and configured, setting a backup job up is as simple as adding the job and the fileset within the Bacula Director configuration file.
Important
The Enable VSS parameter must be set to no in the Fileset (see
examples below).
The following plugin options are supported :
Name |
Status |
Default |
Description |
|---|---|---|---|
include |
Optional |
Include all (*) |
a Unix shell-style wildcards pattern for including a site, bases on its URL |
exclude |
Optional |
Exclude none |
a Unix shell-style wildcards pattern for excluding a site, bases on its URL |
tmp_dir |
Optional |
Working |
locate the working folder for the Sharepoint plugin. Make sure there’s enough space in this location to create sites snapshots and exports. |
user_name |
Optional |
None |
the user name that will run the backup/restore operation.
This is not the recommended method. The user name can be specified
locally on the hyper-v node in a |
user_password |
Optional |
None |
the user password that will run the backup/restore operation.
This is not the recommended method. The user password can be specified
locally on the hyper-v node in a |
Examples
Example 1: Backup All Sites Using Bacula’s Default Working Directory
Job {
  Name = "SharepointBackupAll"
  Type = Backup
  Client= w2019-sp01-fd
  Fileset="SimplestSharepointFileset"
  Storage = File
  Messages = Standard
  Pool = Default
}

Fileset {
  Name = "SimplestSharepointFileset"
  Enable VSS = no
  Include {
    Options {
      signature=MD5
    }
    Plugin = "sharepoint:"
  }
}
Example 2: Backup Only Sites Which URLs Contain «Linux», Using Bacula’s Default Working Directory
Job {
  Name = "SharepointBackupOnlyLinux"
  Type = Backup
  Client= w2019-hv01-fd
  Fileset="LinuxSharepointFileset"
  Storage = File
  Messages = Standard
  Pool = Default
}
Fileset {
  Name = "LinuxSharepointFileset"
  Enable VSS = no
  Include {
    Options {
      signature=MD5
    }
    Plugin = "sharepoint: include=\"*Linux*\""
  }
}
Example 3: Backup Any Site Having «Windows» in Its Name, Using a Custom Working Directory
Job {
  Name = "SharepointBackupOnlyWindowsOnF"
  Type = Backup
  Client= w2019-hv01-fd
  Fileset="WindowsOnSiteFileset"
  Storage = File
  Messages = Standard
  Pool = Default
}
Fileset {
  Name = "WindowsOnSiteFileset"
  Enable VSS = no
  Include {
    Options {
      signature=MD5
    }
    Plugin = "sharepoint: include=\"*Windows*\" tmp_dir=\"F:/backup\""
  }
}
See also
Previous articles:
Next articles:
Go back to: Sharepoint Plugin.