Linux: Install File Daemon (Client) and its Plugins
Note
When installing a plugin, BIM also manages the packages for its associated Bacula component (Director, File Daemon, or Storage Daemon). BIM installs the component if it is missing and may update it if it is already installed.
The following article aims at presenting the reader with instructions on how to install a File Daemon (Client), how to install chosen FD plugins, and manage firewall rules.
The File Daemon allows backing up any data stored in the system on which it is installed via the Client resource defined in the Director.
Important
If you wish to modify arguments, run: bee_installation_manager --help.
Prerequisites
General Prerequisites apply here.
Steps
Note
The versions and plugins shown in this example reflect those available when this documentation was last updated. This example shows all plugins; the Installation Manager displays only the plugins included in your subscription. Available options may also change as new versions and plugins are released. These differences are expected and do not indicate a problem with your installation.
Run BIM:
./bee_installation_manager
Confirm the File Daemon and plugins installation with
Y.
===========================================================
Installation of File Daemon (Client) and associated plugins
===========================================================
Proceed with Installation of Director and associated plugins? [Y/n] Y
Provide your download area address.
Note
To get your Download Area URL, go to your Customer Portal, click Your Subscription from the left menu, scroll down to the very bottom. You may copy your Download Area from Your Download Area section.
Please enter your Download Area URL. This information can be found in your Customer Portal in the "Your Subscription"
menu : https://www.baculasystems.com/dl/@@customer-id@@
Choose the version to be installed.
Important
The version of the File Daemon must not be higher than the version of the Bacula Director.
Available versions found on your Download Area for your current operating system [rhel7-64]:
---------------------------------------------------------------------------------------------
1 : 10.0.8     2 : 10.2.4     3 : 12.0.5     4 : 12.2.5     5 : 12.4.4
6 : 12.6.5     7 : 12.8.4     8 : 14.0.9     9 : 16.0.16   10 : 18.0.9
11 : 18.2.5
---------------------------------------------------------------------------------------------
Please, select the version of your Bacula Client ('18.2.5' by default) :
Choose the plugins to be installed (optional).
The following plugins available for the Client can be installed at version 18.2.5 :
-------------------------------------------------------------------------------------
1 : acsls         2 : antivirus     3 : autosplit     4 : azure-vm
5 : bsnapdiff     6 : cdp           7 : db2           8 : delta
9 : docker        10 : hdfs         11 : inventory    12 : kvm
13 : ldap         14 : m365         15 : mysql        16 : ndmp
17 : netapp-hfc   18 : oracle       19 : postgresql   20 : quobyte
21 : rhv          22 : s3           23 : sap          24 : sap-hana
25 : security     26 : snapshot     27 : swift        28 : sybase
29 : vaultiq      30 : vsphere      31 : xenserver
-------------------------------------------------------------------------------------

Select the number(s) of the plugins you want to install, separated by commas.
Leave empty and just press <Enter> to skip plugin selection :
Confirm the process with
Y.
=============================================
Registration of File Daemon (Client) via Bweb
=============================================
Proceed with Installation of Director and associated plugins? [Y/n] Y
Please enter the Automatic Configuration URL provided by Bweb :
Along with the File Daemon (Client) installation, you can proceed to register the File Daemon via Bweb. You must have the Director and BWeb installed for this. See File Daemon (Client) Creation and Registration.
Confirm your Director address.
If you have a Director installed:
A potential Director address is detected and will be used by default: 10.0.XX.XXX
Press Enter to use 10.0.XX.XXX, or type a new Director address or type * to accept any incoming
address [10.0.XX.XXX|dir-addr|*] :
If no Director is found on the current server:
Enter a new Director address or * to accept any incoming address [dir-addr|*] :
Any incoming address will be accepted
Proceed with Managing Firewall rules.
Note
Choose the default options proposed for the firewall setting, unless the policies of your company require different rules.
=======================
Managing Firewall rules
=======================
Proceed with Managing Firewall rules? [Y/n]

Available Firewalls
--------------------
  1 : iptables        2 : firewall-cmd
--------------------
Please, make your selection :  ('firewall-cmd' by default) :
Confirm the operations with
Y.
=========================================
Ready to process the following operations
=========================================
[X] Installation of : bacula
[X] Registration of File Daemon (Client) via BWeb
[X] Managing Firewall rules

Continue or (r)etry? [Y/n/r]
Result:
Bacula remote File Daemon is installed (and optionally registered on the Director).
Installation of File Daemon (Client) Successfully completed
===========================================================
Installation Manager. Done.
===========================
Post-installation Suggestions
Verify Access to the Newly Installed Client
Go to BWeb.
Click “Clients” –> “Client Overview”.
Select the newly installed Client and click “Status”.
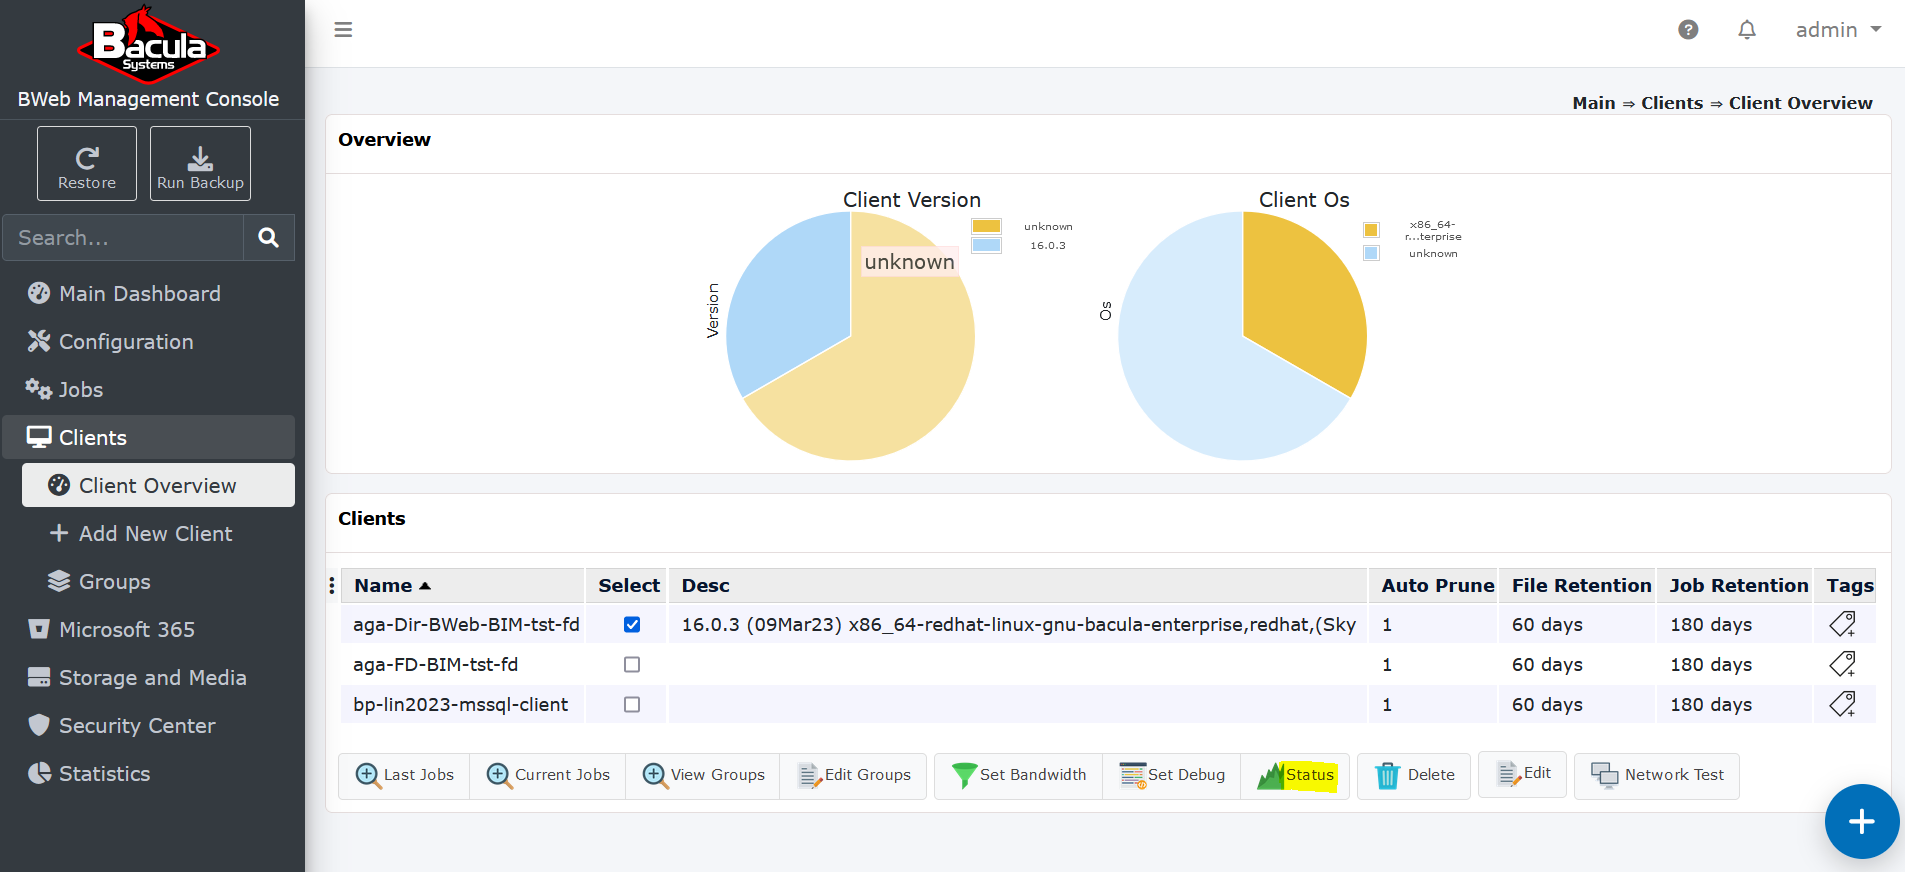
You should reach the following page:
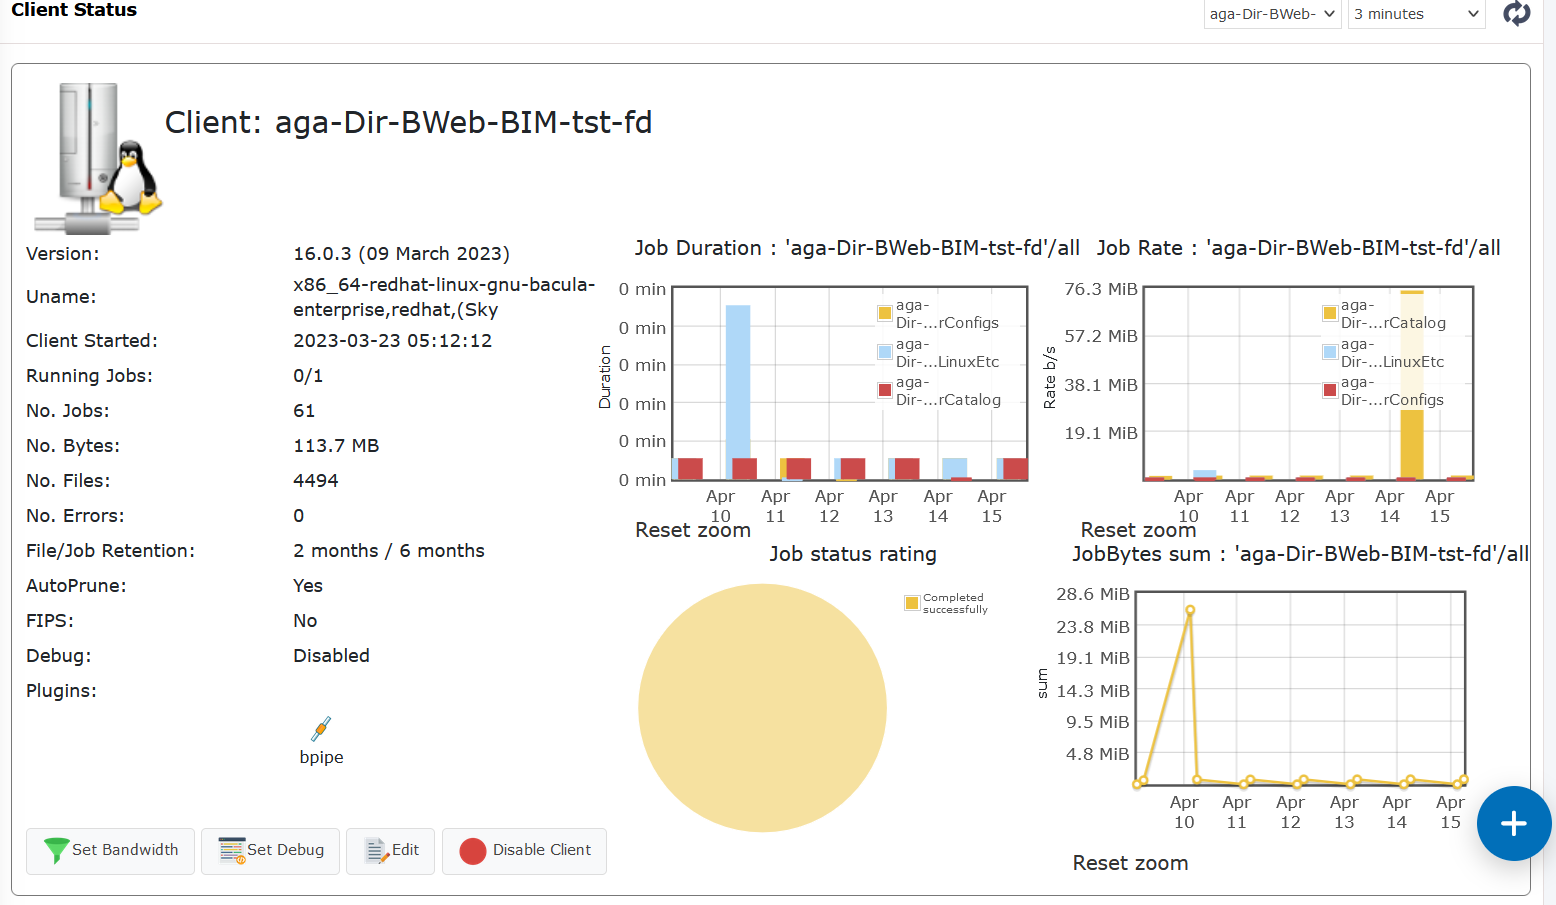
If you can read the Client name and its Version, then it means you can start backing up and restoring this Client.
Note
The same operation is possible also from bconsole with the use of the command: status client=ClientName.
Verify the Plugin Loading on the Client
After installing File Daemon (FD) plugins, use BWeb to check that the expected plugins are loaded on the Client.
In the BWeb navigation menu, expand Clients and click Client Overview.
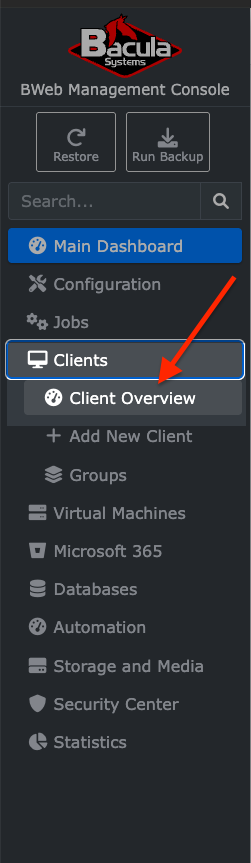
Open Client Overview.
In the Clients list, locate the Client you want to check and select its checkbox. Then click Status at the bottom of the list. This example uses
dc-win-2025-fd.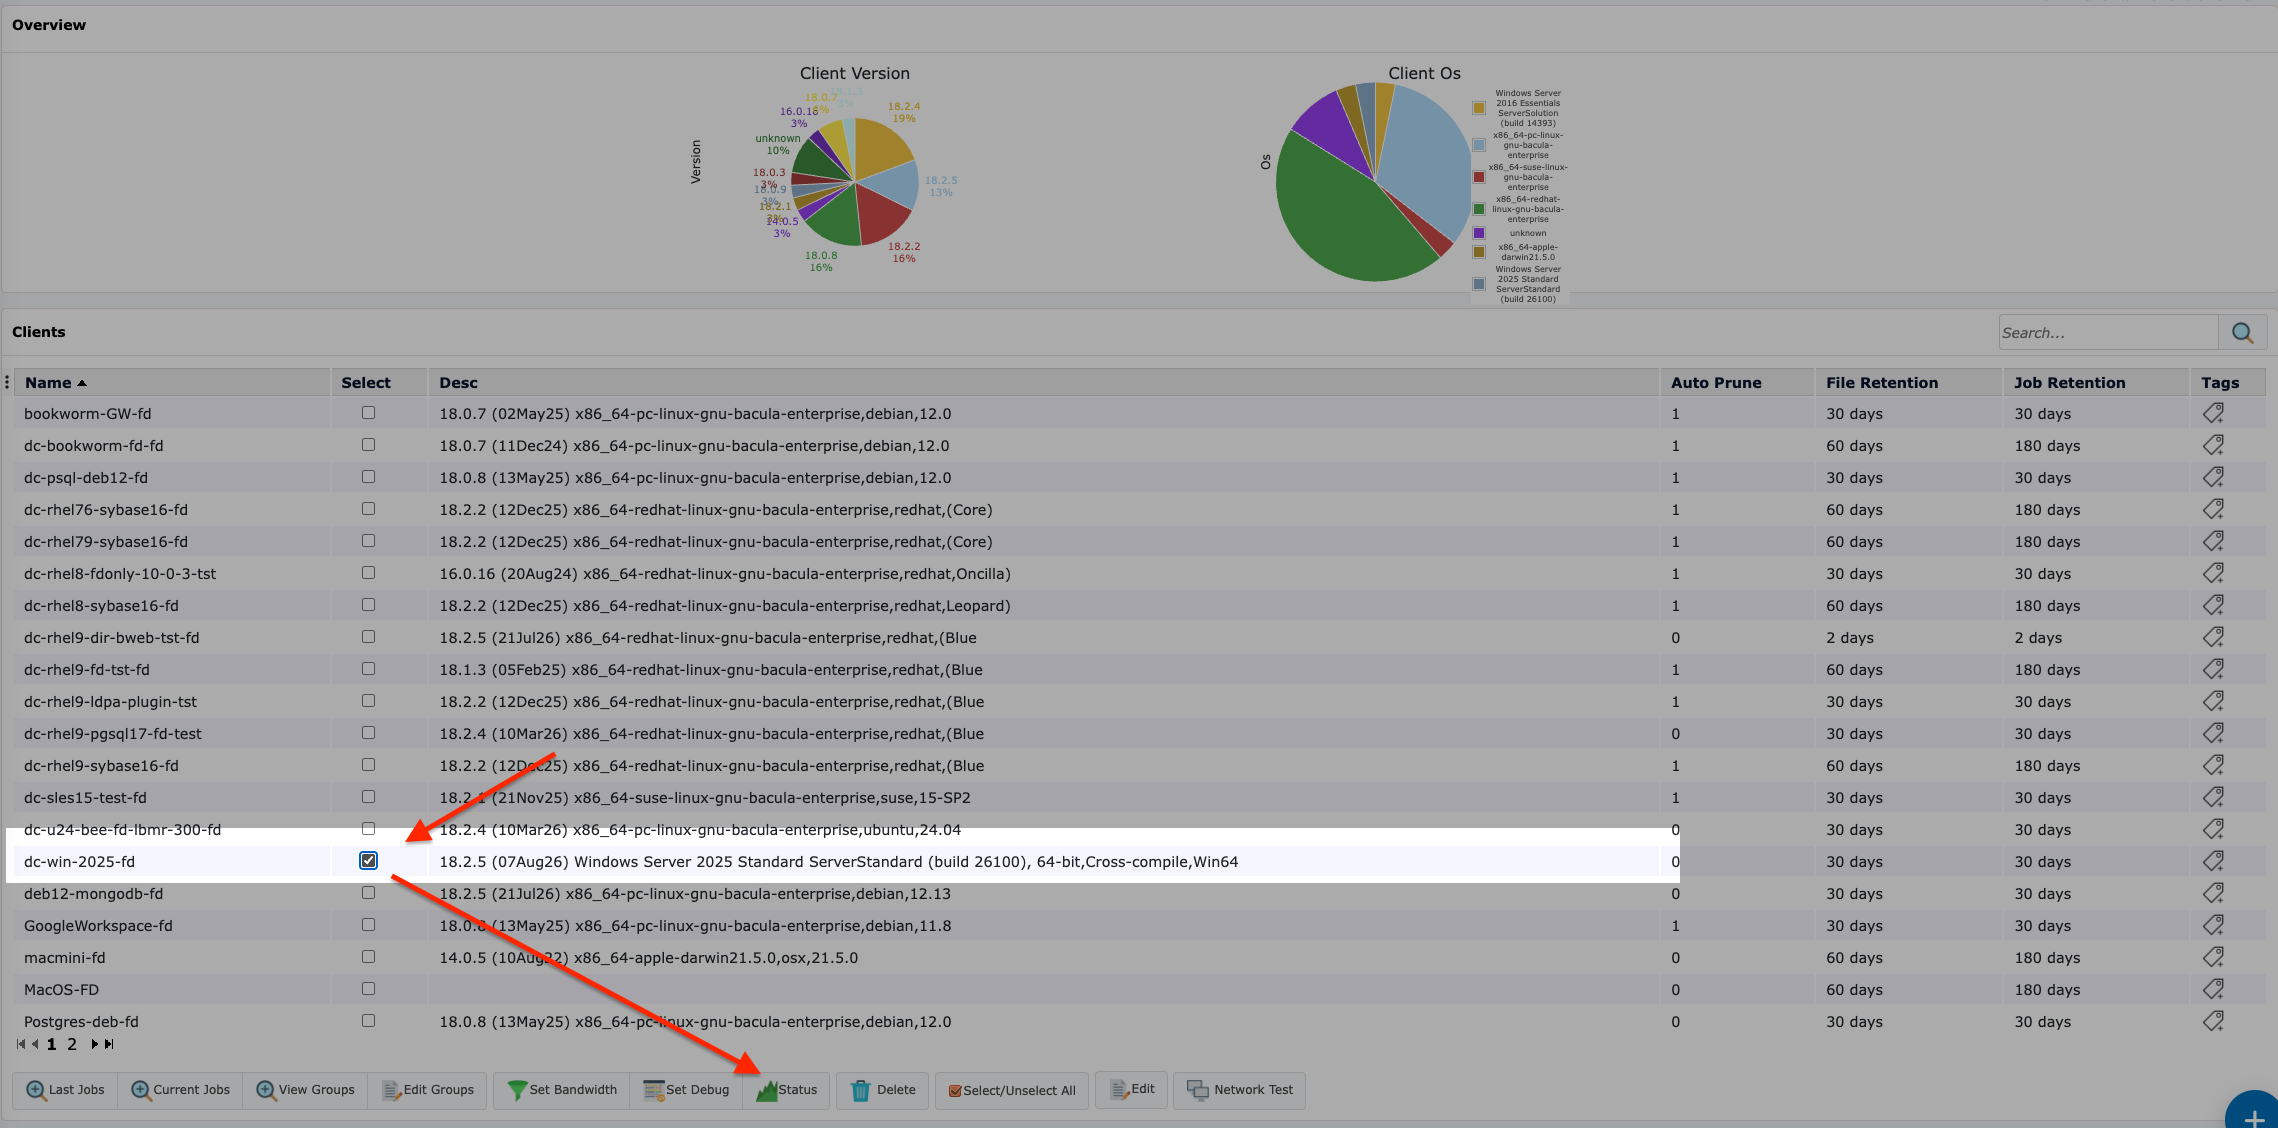
Select the Client and open its status.
On the Client Status page, check the Plugins area. Verify that the plugins you installed appear in the list.
In this example, the Client reports
alldrives,autosplit,cdp,inventory,security, andwinbmr.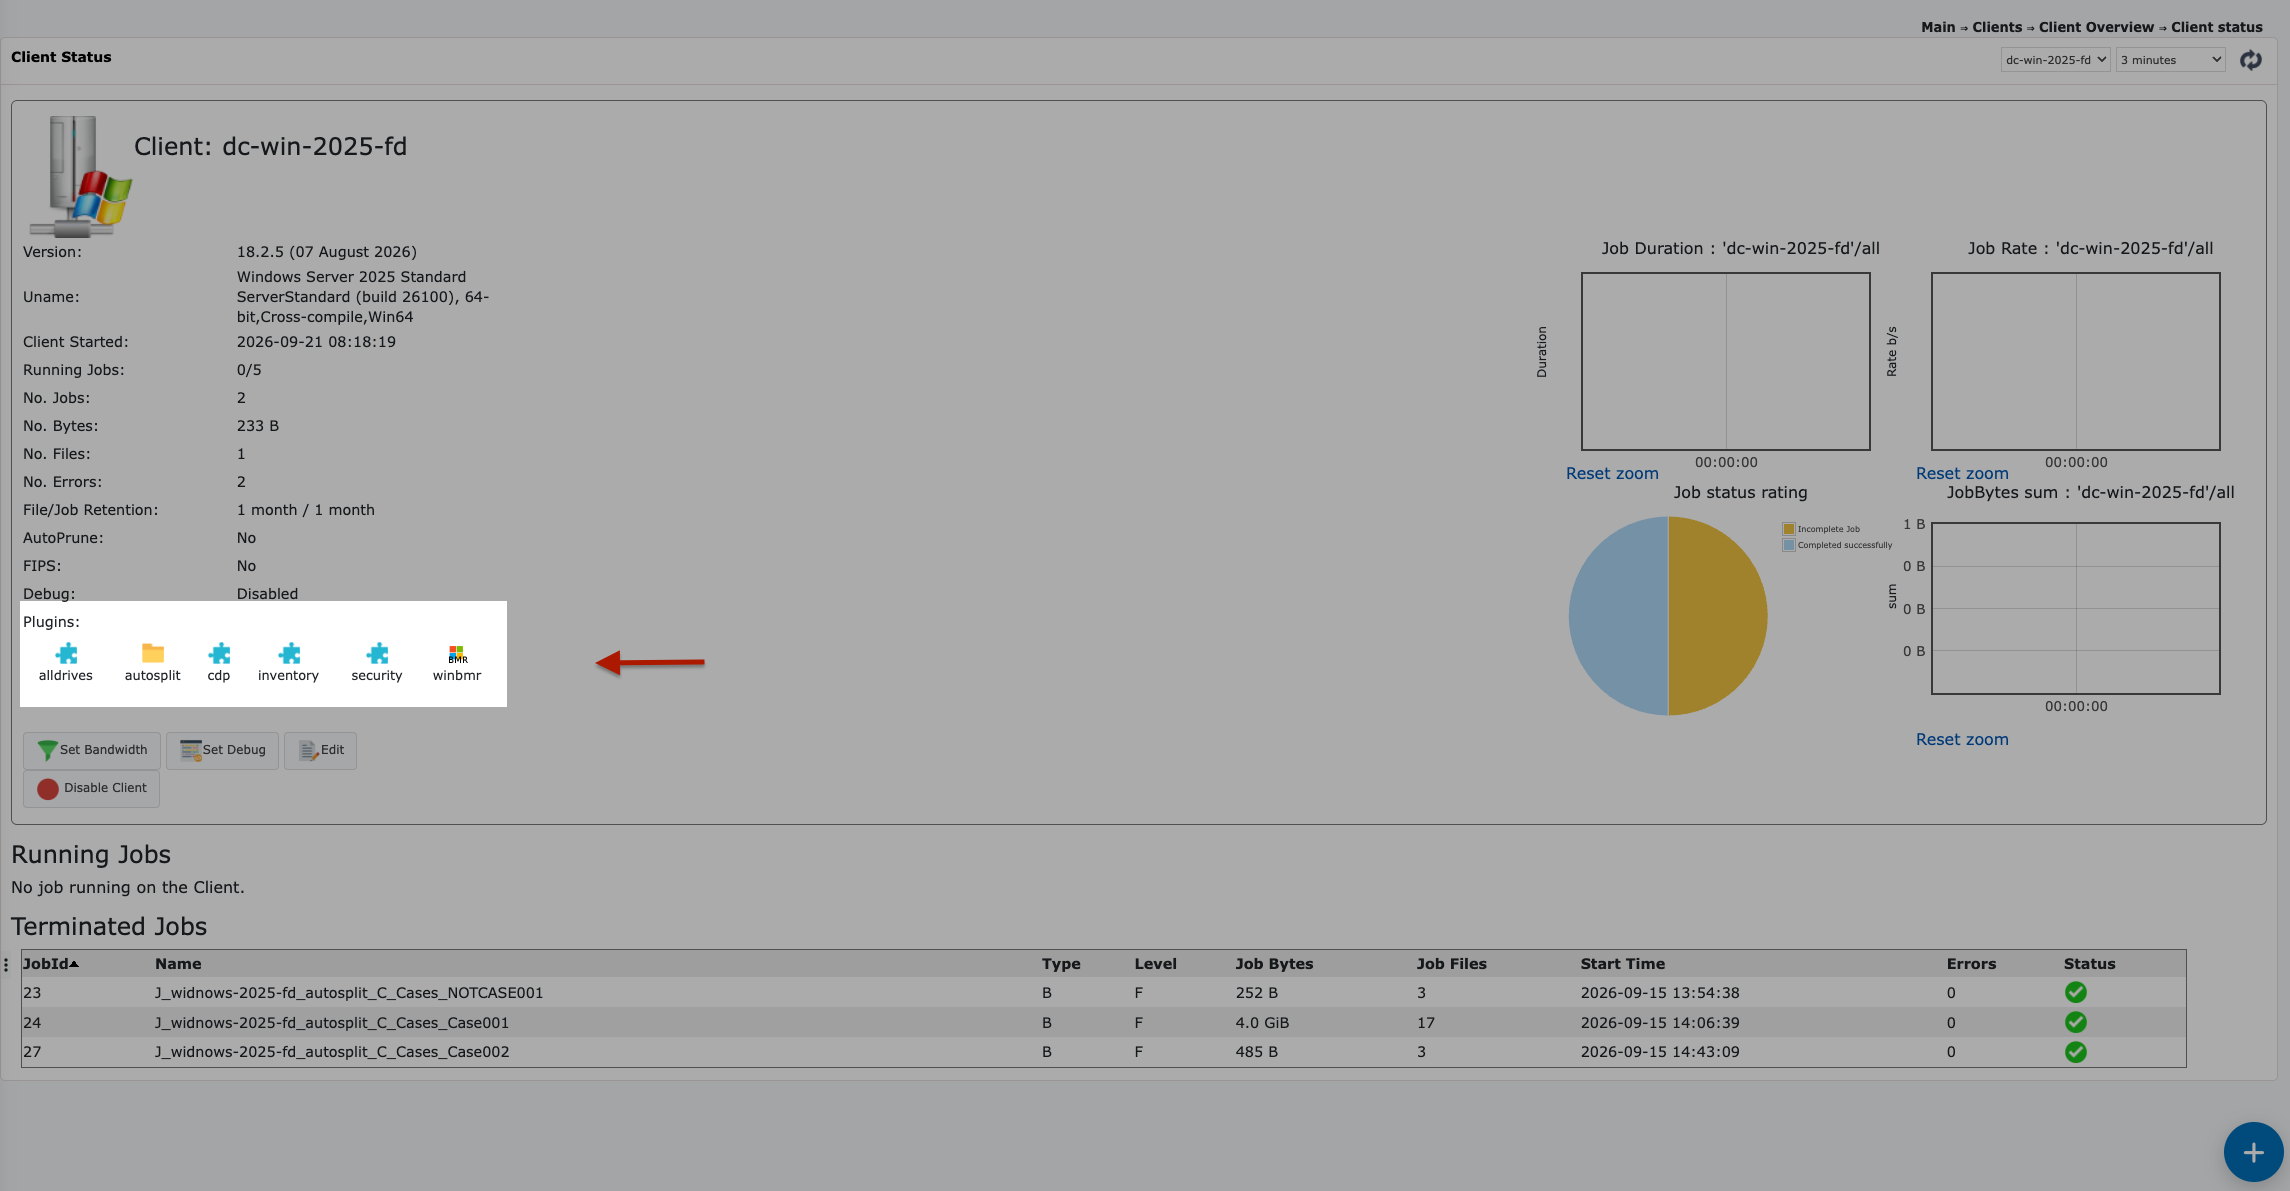
Check the plugins loaded on the Client.
Note
The Client name and plugin list vary depending on your environment. Verify the list against the plugins installed on your Client.
Note
The same operation is also possible from bconsole using
status client=ClientName, where ClientName is the name of
the Client resource configured in the Director. Check the plugin
information in the returned status.
See also
Previous articles:
Next articles:
Go back to: Linux: Install Components.