Creating Automated vSphere Backup Environment Using BWeb
EnterpriseBacula Enterprise Only
This solution is only available for Bacula Enterprise. For subscription inquiries, please reach out to sales@baculasystems.com.
The purpose of this wizard is to create an automated configuration whereby all VMs managed by a particular ESXi host or vCenter server are backed up. As new VMs are added, they will automatically be backed up, and as VMs are decommissioned, they will be disabled (or removed) from the backup configuration.
It is possible to exclude VMs from this automatic configuration based on their names, or VM tags, etc., but the steps to do this will come after creation of the default “Backup all VMs” configuration is complete.
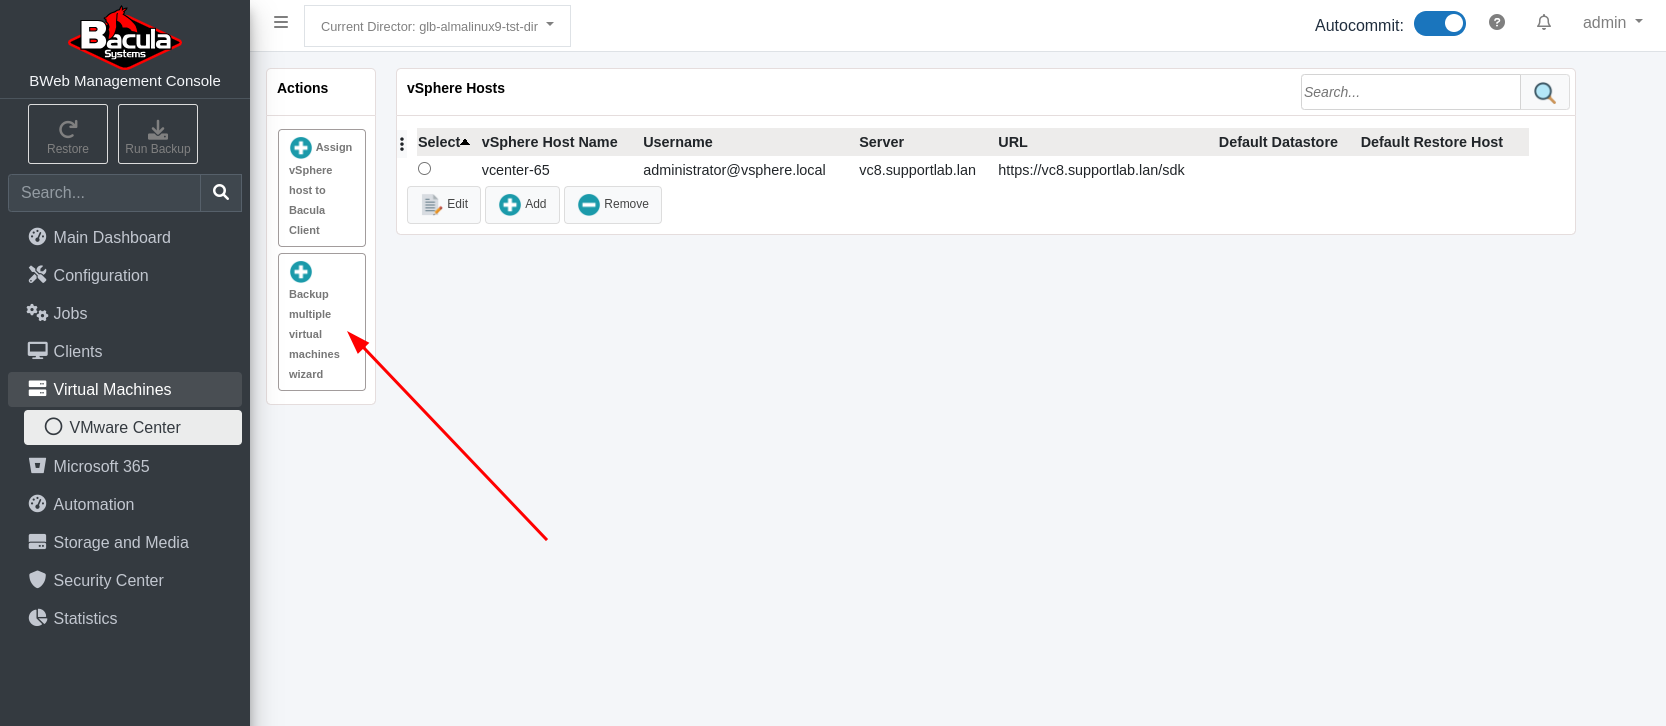
On the BWeb main menu, expand “Virtual Machines” and click “VMware Center”. You will be taken to the page with the vSphere Hosts listing, which should currently have at least one vSphere host defined. If there are no hosts in this list, follow the Configuring New vSphere Host article to create one and assign it to a Bacula Client first. Click on the “Backup multiple virtual machines wizard” button on the left.
Note
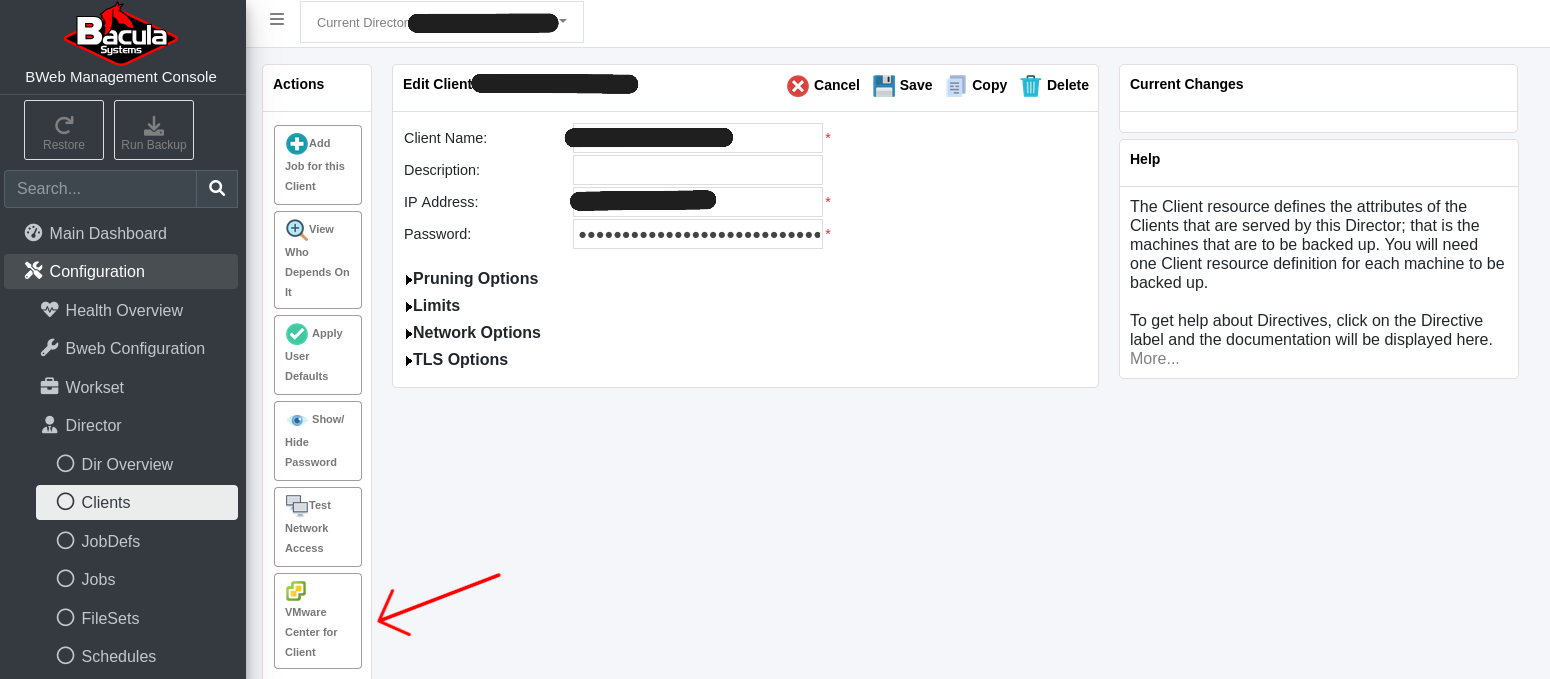
The menu for VMware Center will appear immediately after the initial VMware backup job has been executed, or by selecting the “VMware Center for Client” button located on the left side under “Configuration -> Director -> Clients”.
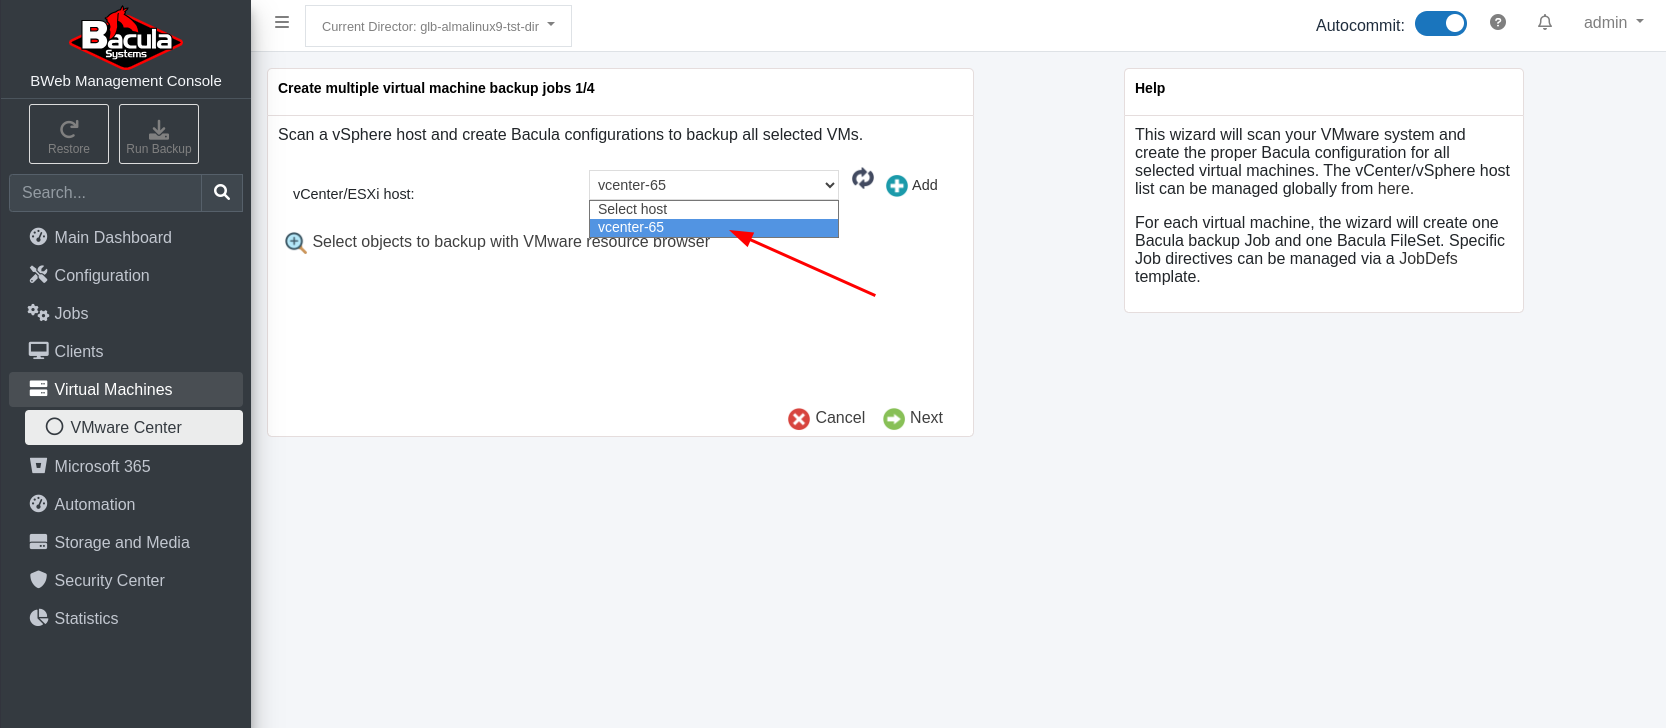
You will be taken to Step 1 of 4 of the Wizard.
Select a vSphere host from the “vCenter/ESXi host” drop-down list.
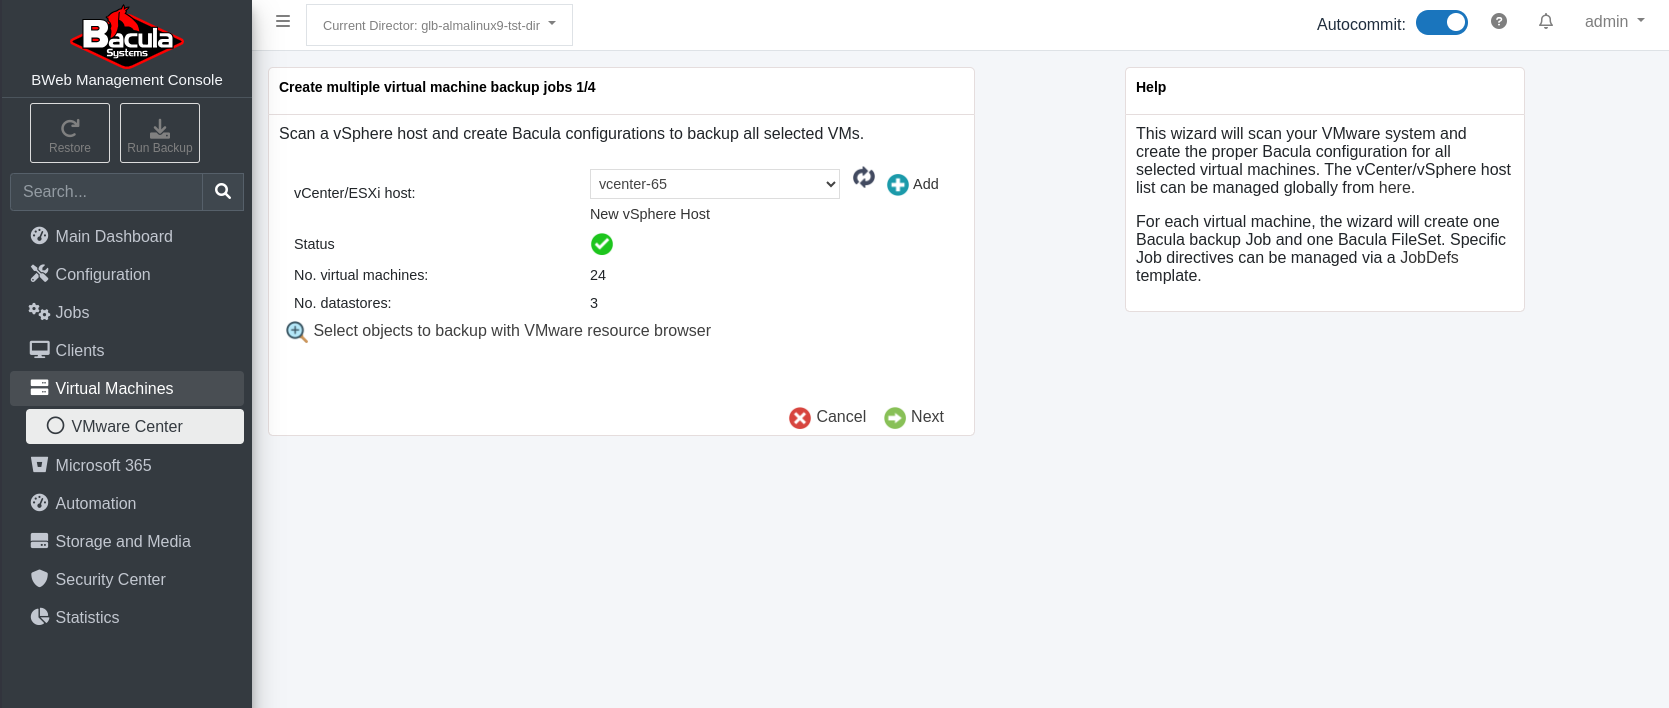
Click the circular arrows icon to obtain information about the VMs and Storages managed by this vCenter server.
Click “Select objects to backup with VMware resource browser” and you will be presented with a “VMware resource browser” pop-up dialog. Since this “vcenter-65” vSphere host is a vCenter server, there will initially be a top-level “Datacenter” listed. In this case the Datacenter is called “vc8”.
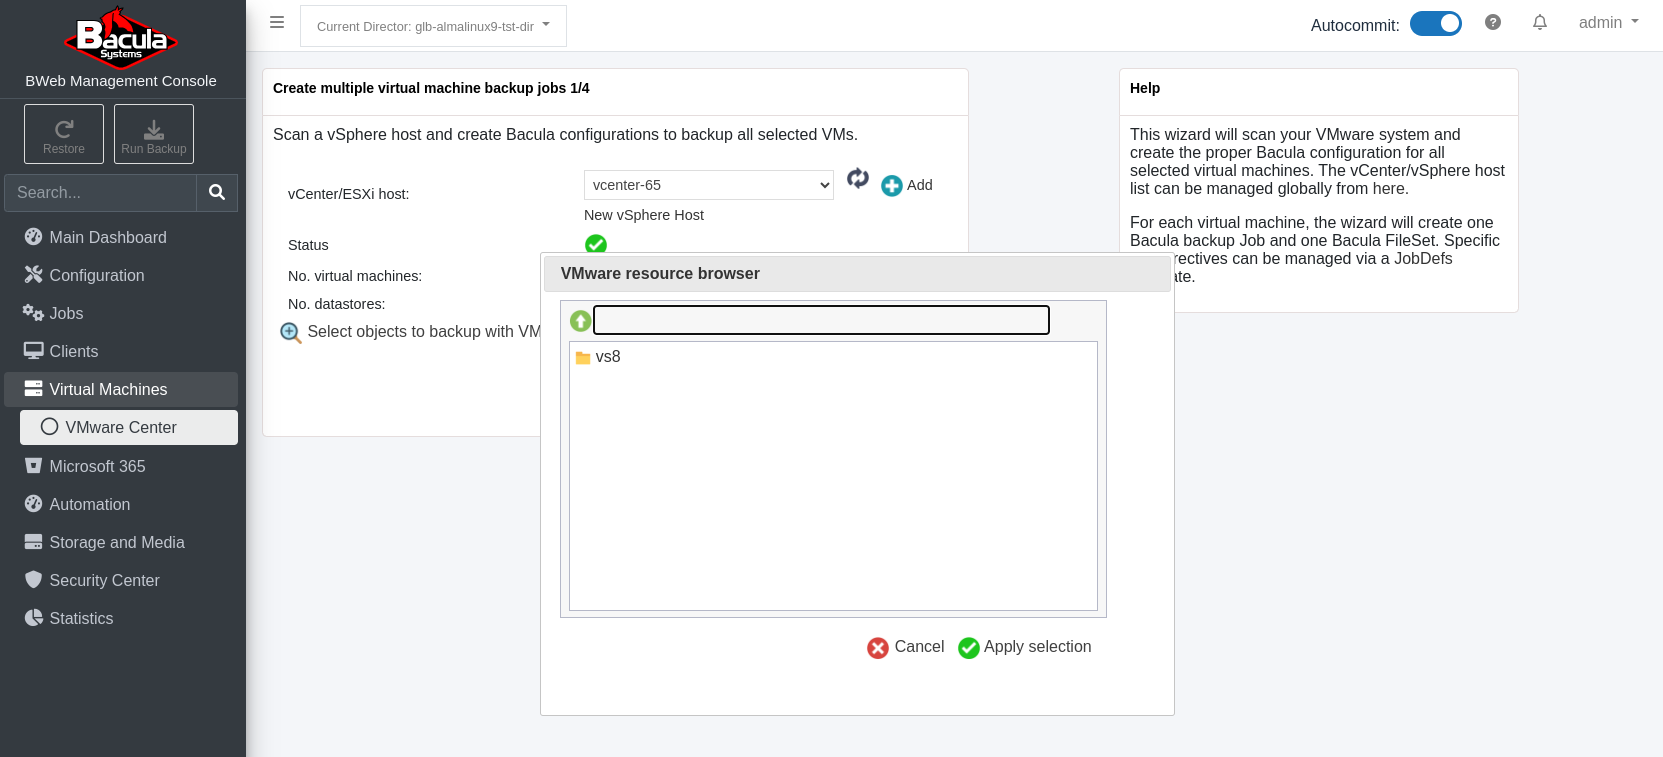
Click on the Datacenter icon to reveal the VM, ResourcePool, and Datastore folders.
In this example we will be focusing on backing up all VMs managed by this vCenter server.
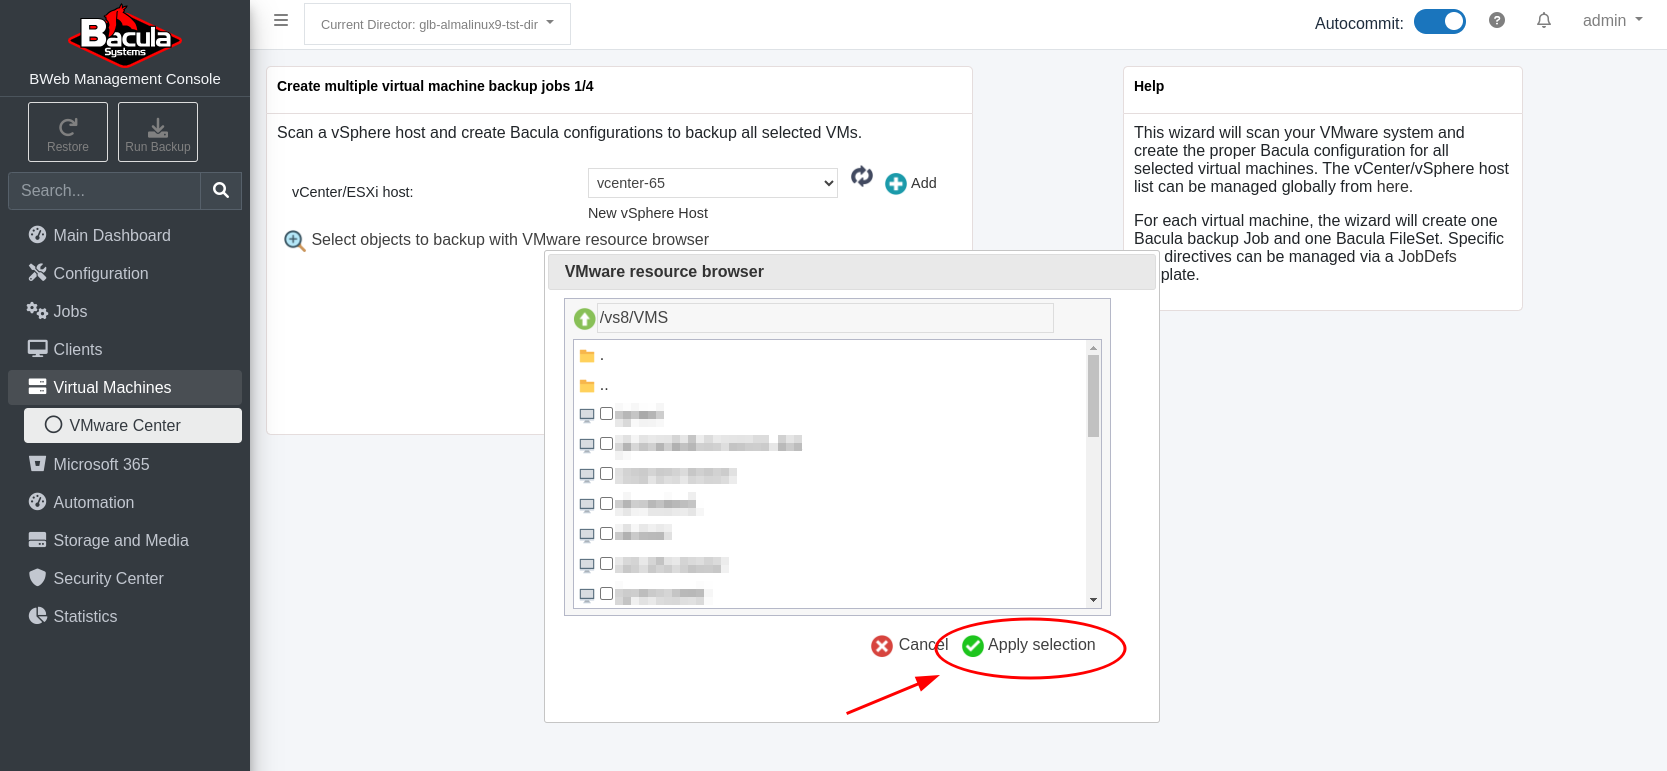
Click on the VMs folder icon to see a list of VMs managed by this vCenter host. Do not check any boxes, and simply click the “Apply selection” green check icon.
You will be taken back to the “Create multiple virtual machine backup jobs 1/4” dialog box. Just click “Next” here.
You will be taken to the step 2/4 dialog box where the options for the Filesets to be created may be set.
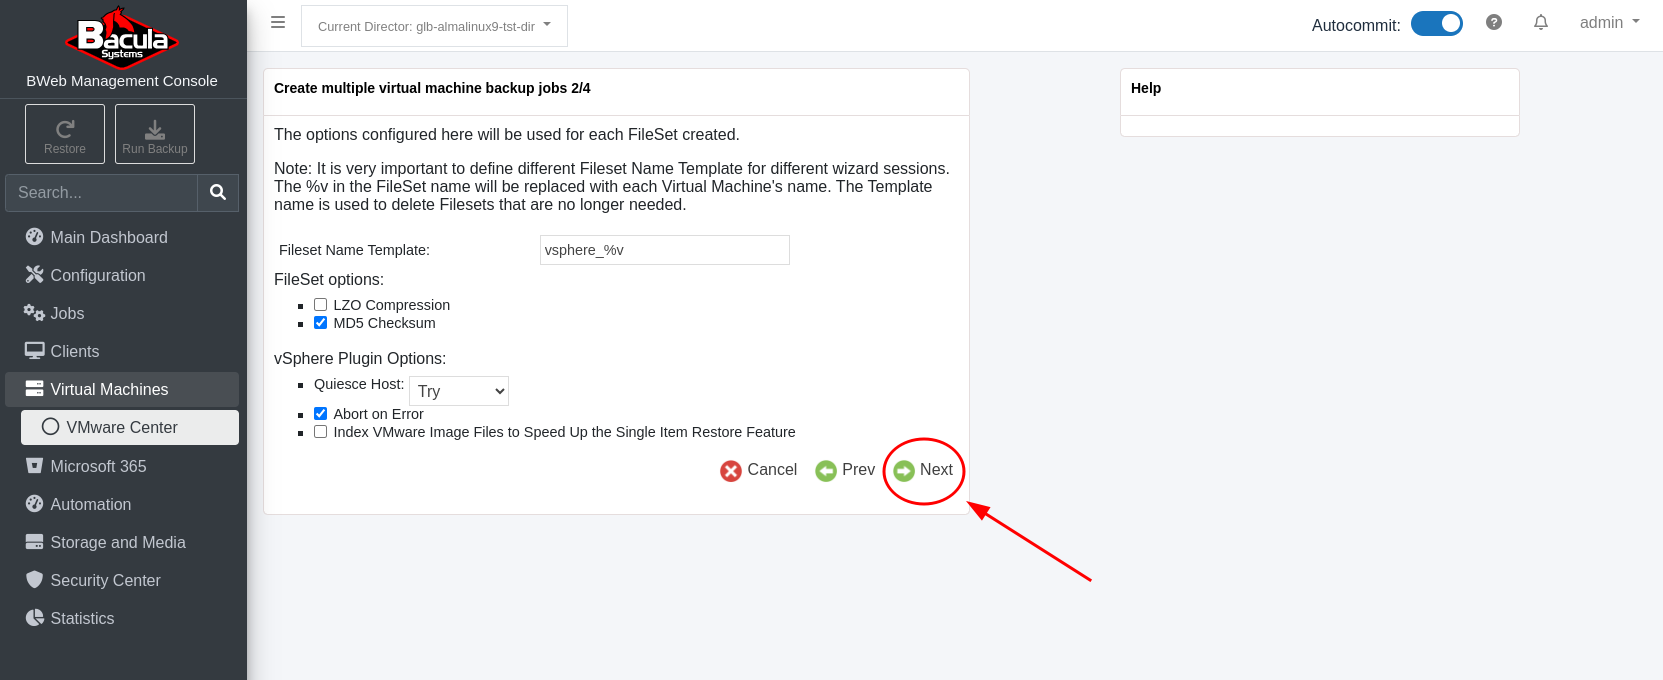
In the “Fileset Name Template:”, the “%v” will be replaced with the name of each VM found.
Leave the settings at their defaults for now and click “Next”.
You will be taken to the step 3/4 dialog box where the options for the Jobs to be created may be set.
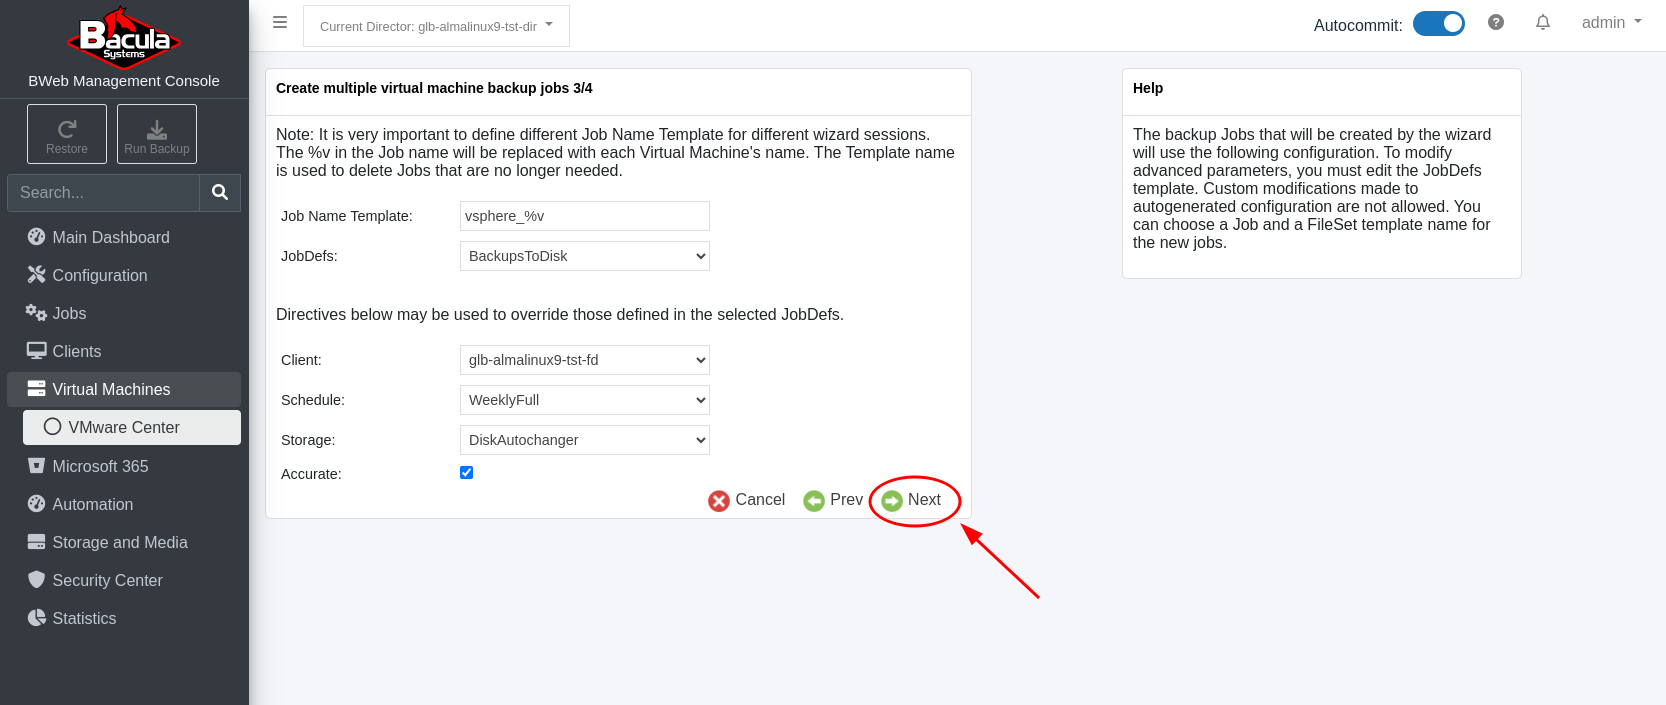
In the “Job Name Template:”, the “%v” will be replaced with the name of each VM found.
Be sure to choose the appropriate Client, Schedule, and Storage for these jobs. If you are performing Incremental or Differential backup of your VMware VMs, then the “Accurate” mode must be enabled, so normally it is recommended to leave this checkbox checked. Click “Next”.
You will be take to the step 4/4 dialog box.
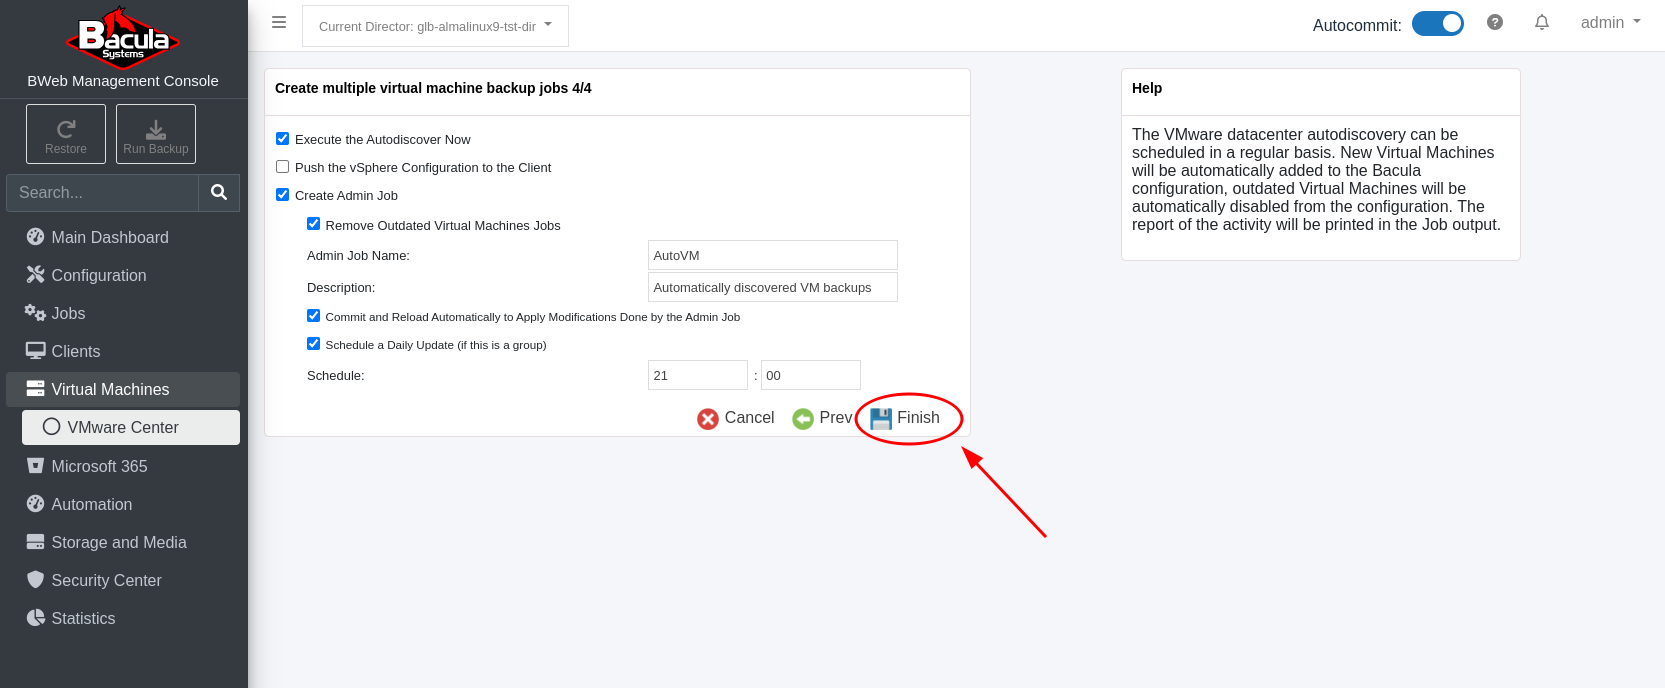
Here, leave the “Execute the Autodiscover Now” checkbox checked, leave the “Push the vSphere Configuration to the Client” Checkbox unchecked, and then check the “Create Admin Job” checkbox - more options will be revealed.
Enter an appropriate “Admin Job Name” and “Description” for the automatic discovery job, then check the “Commit and Reload…” and “Schedule a Daily Update” box - more options will be revealed.
Set the “Schedule” time before your nightly VMware plugin backup jobs are expected to run. This will ensure that the work of creating new Jobs/Filesets for newly discovered VMs and disabling jobs for decommissioned VMs happens before the VMware backup jobs are queued.
Click “Finish”.
After a few seconds, the “Result executing autodiscover now” dialog box will pop up showing what has been done.

Notice that BWeb has added Jobs and Filesets for All VMs managed by this vCenter server called “vcenter-65”, and there were no existing Jobs/Filesets discovered, and none removed, nor disabled.
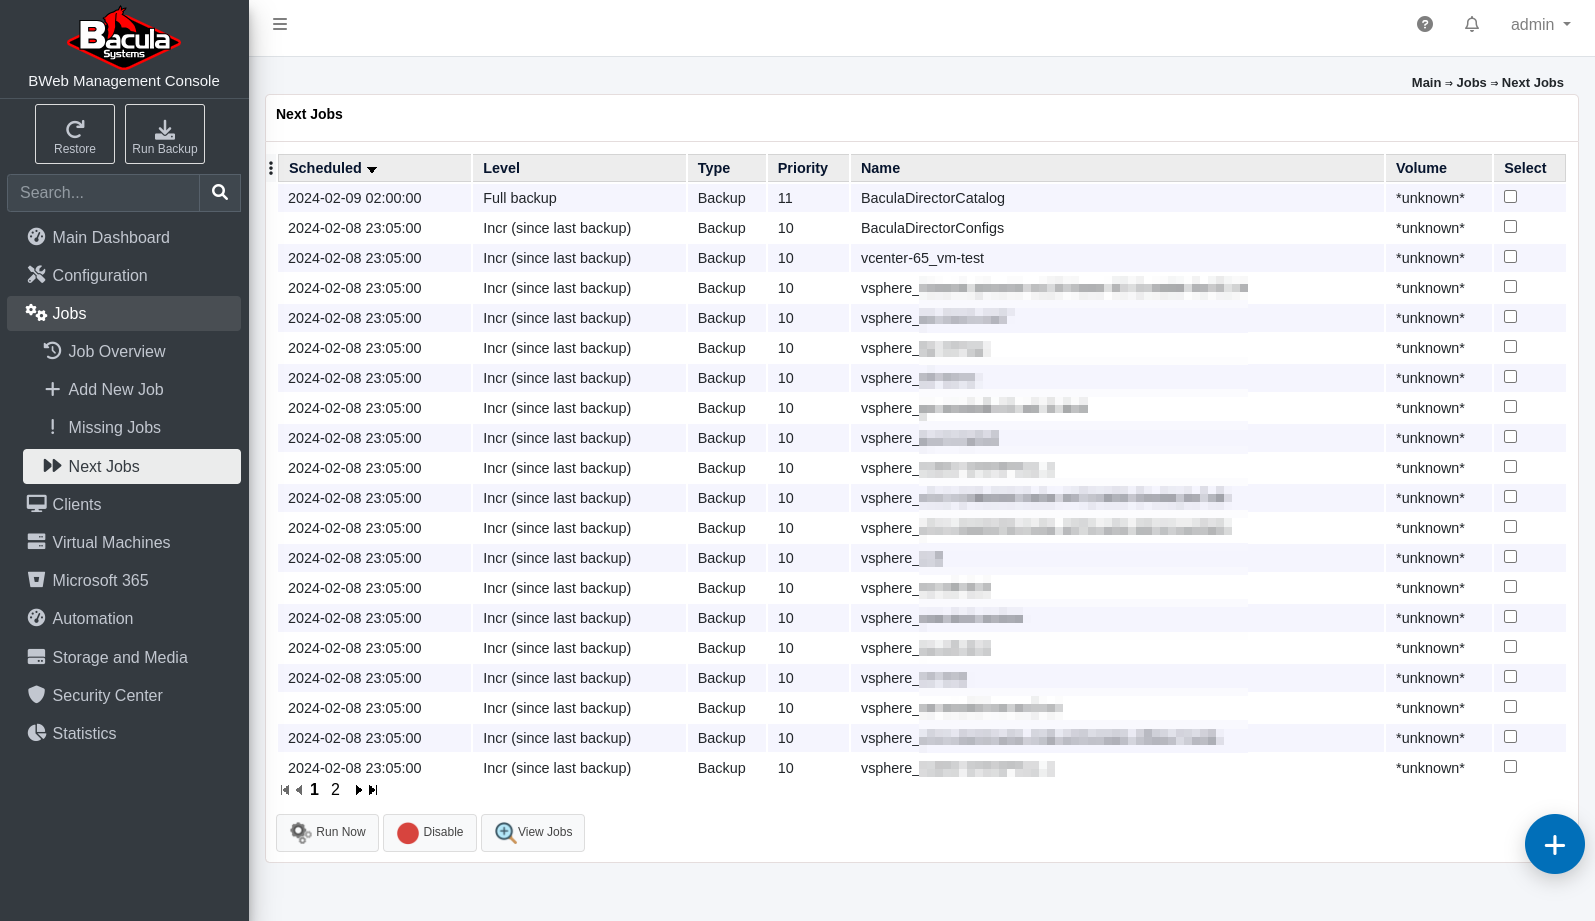
At this time, you may click on “Jobs” or “Filesets”, or “Schedules” to see the new resources created by the Autodiscovery process.
Exit configuration mode by clicking on the “BWeb Management Console” at the top left of the main menu.
Expand “Jobs” and click “Next Jobs”. If you had selected a schedule in step 4/4 above, then you should see your new “vsphere_XXXX” jobs in this list of “Next Jobs”.
See also
Previous articles:
Next articles:
Go back to: BWeb VMware Center Module.