Configuration
After you have successfully installed the Bacula REST API, you will need to do a bit of customization of the configuration files that are appropriate for your system. This is a three step process:
Configure the lighttpd web server.
Configure the REST API authentication
Configure the Users allowed to access the REST API interface
lighttpd Configuration
The first part to configure is the lighttpd web server that the
Bacula REST API uses. Note, it is possible to configure the REST API
server on an Apache server, but due to the complexity of doing so on
different systems, we have standardized on lighttpd and do not support
Apache. For a sys admin that uses Apache, the Lighttpd examples should
be very instructive for configuring Apache.
The default configuration file is located in:
/opt/bacula/rest-api/etc/lighttpd.conf
Points to consider are:
The default server port is 443. If that port is already used, you must change it to an unused port.
The default installation uses the secure https protocol. If you do not wish to use encrypted communications, you will need to disable the ssl engine.
The installation process creates a default ssl certificate for you, providing you have openssl installed on your system. If you do not have openssl installed, the installation process uses a pre-prepared stock certificate. If you would like to use a certificatee of your own, you will need to copy it to the appropriate place in the directory:
/opt/bacula/rest-api/etc
or change the server ssl definitions to point to the appropriate directory and file.
Once, you have checked and possibly modified the server conf file, you can start it with one of the two following commands.
/etc/init.d/bacula-enterprise-rest-api start
or
/opt/bacula/rest-api/bin/lighttpd.redhat start
REST API Configuration
If the above lighttpd configuration is successful or has been
successfully done during the package installation, you should enter the
following URL into your web browser:
https://localhost/
where you should see initial configuration wizard for REST API. If you get an error, you will need to turn on debugging in the lighttpd server, and restart it, then examine the lighttpd log files to find the problem. The Trouble Shooting chapter explains how to do so in detail.
Language Selection
Welcome Panel
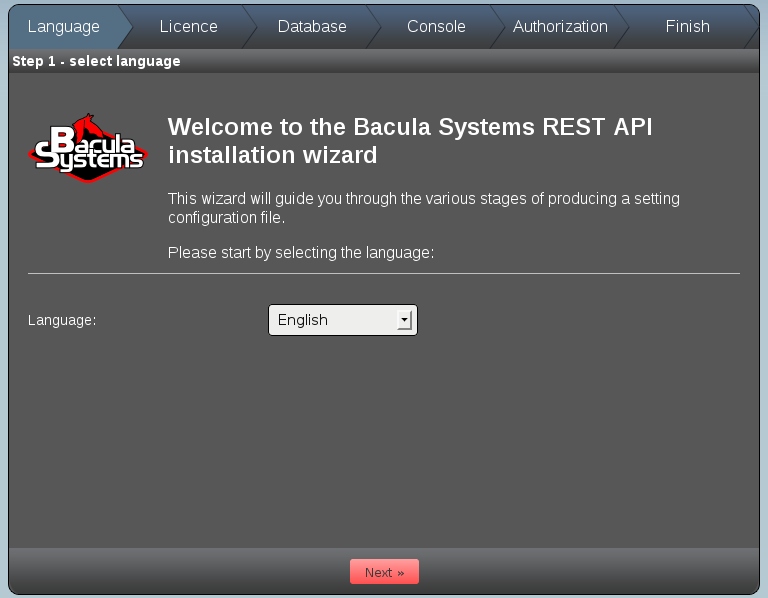
If the https://localhost/ command works, you should get a screen that
looks like Figure Welcome Panel.
At the moment, English is the only language, so you should click on the
Next >> button.
License Acceptance
License Panel
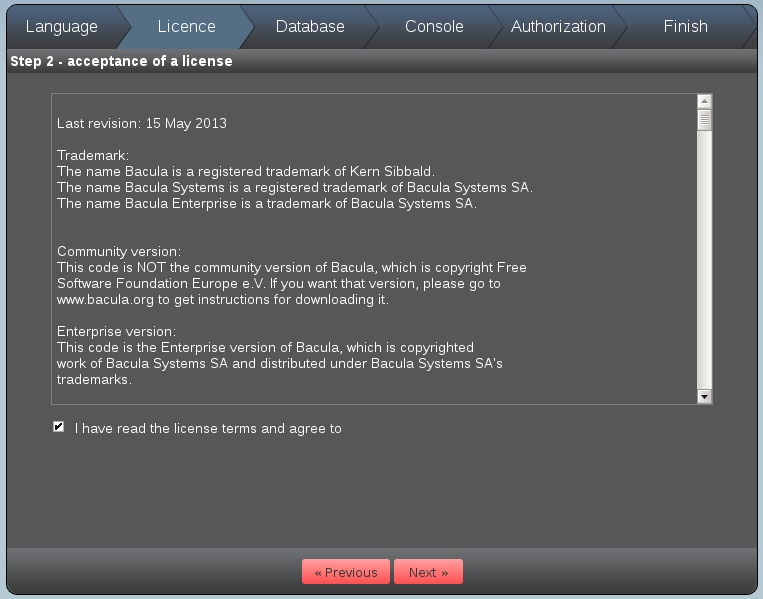
You will then be presented with the License (Figure License Panel,
which you should read, then check the box saying you have read and agree
with it, and finally click on the Next >> button.
Database Selection
Database Panel
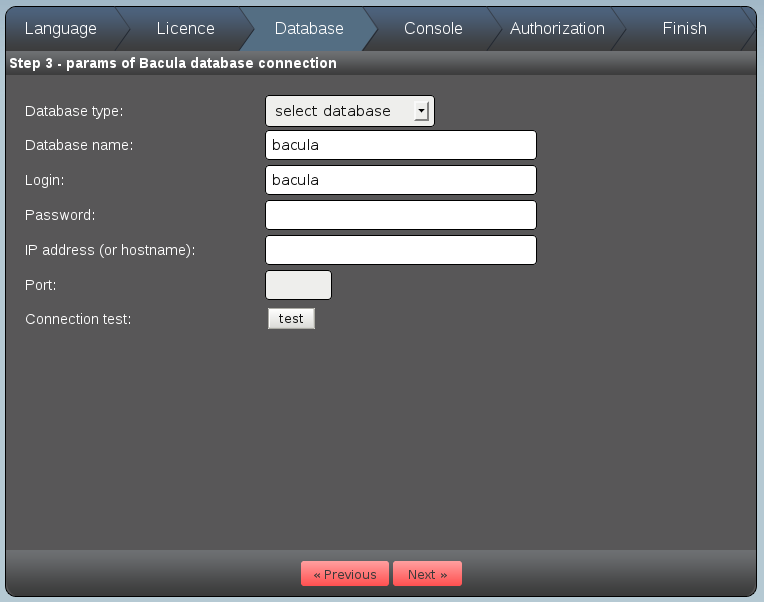
You should then be at the database panel (Figure Database Panel).
The first thing to do is to select a database, which is the type of database your Bacula Director uses. Then, if you do not use the standard database name or login (bacula), you should change those fields as well as enter the database password.
If you do not enter an IP address or hostname or a Port, the REST API will assume that the database is located on the machine you are running on and will attempt to connect to the database through the standard Unix socket. If you database resides on another machine, you should fill in the IP address or hostname and possibly choose a different port.
Please note: on some systems, notably Ubuntu Precise, the packagers have
incorrectly placed the Unix socket in /tmp rather than in the standard
location in /var, and consequently, this often produces database
connection problems.
If you click on the test button, the REST API will immediately
attempt to connect to your SQL server, and if it does, it will show a
green check mark with a green OK. See Figure Completed Database Panel, which shows
how to connect to a database on a different machine (with no password).
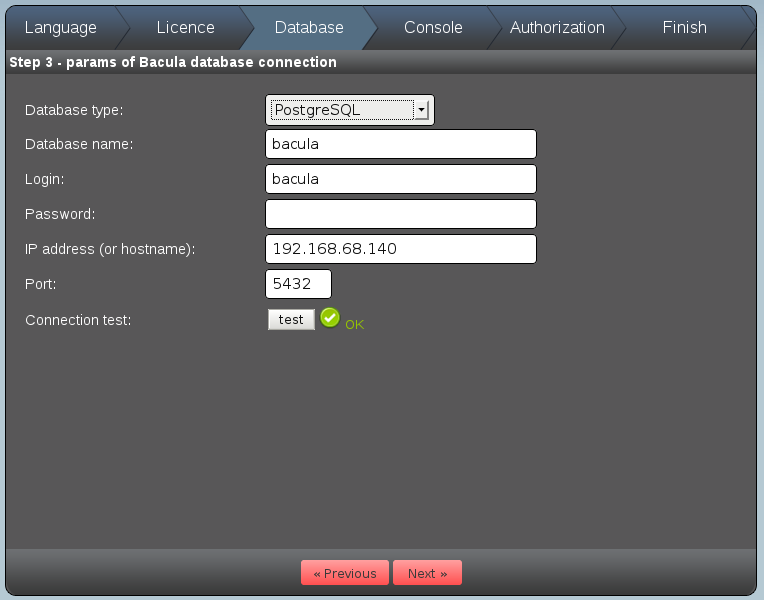
Completed Database Panel
Click on the Next >> button to go to the Console configuration
panel.
bconsole and bxxjson Tools
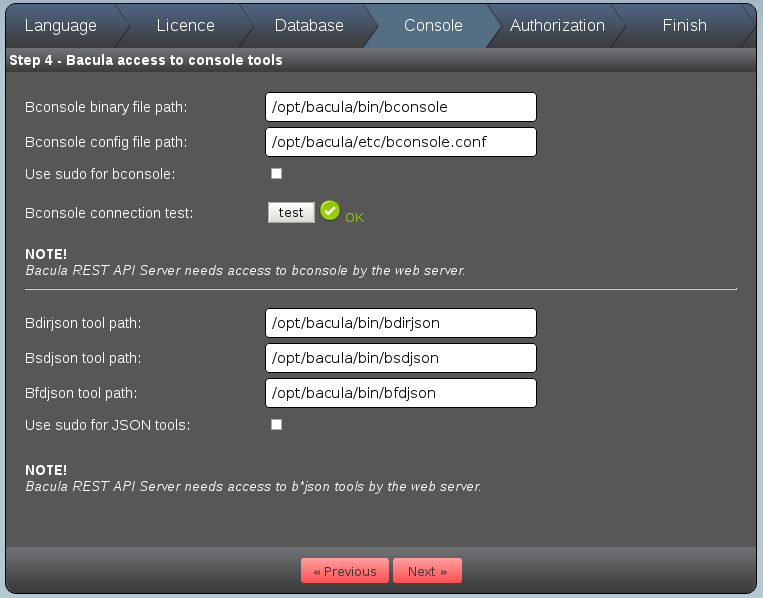
Console Panel
The screen shown in Figure Console Panel. This is where you configure
REST API’s access to bconsole and the bxxxjson tools that it needs to
work with the Bacula Enterprise Director. The configuration fields are
all filled with the default, which for a standard installation should
work. If you want to see if the REST API has a proper connection to your
Director, click on the test button. If you do not get the green
check mark and OK, you will need to fix the problem. Most often, it is
due to permissions.
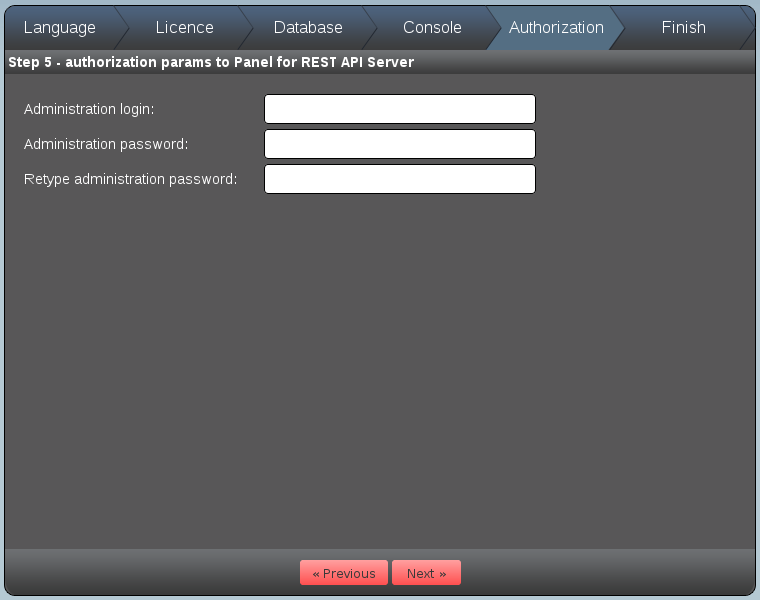
Once bconsole is working, click on the Next button and you will
get the Authorization panel.
Finish Panel
The Finish Panel will show you a summary of everything that you have
configured. If it looks correct click on the Save button to save the
results. If you need to modify any of the configuration items later, you
can simply re-execute the https://localhost/installation-wizard command
to go through the Installation Wizard again.
After clicking on the Save button, you will be asked to confirm that
you want to save the data (create the settings.conf file) as well as
install the OAuth2 SQL tables in the the catalog database.
Creating User OAuth2 Accounts
If clicking the Save button on the Finish Panel is successful, you
will arrive at the login panel that looks like Figure
Login Panel.
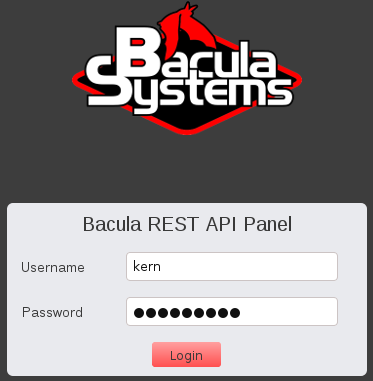
Login Panel
If your browser has not already filled in your administrator’s name and password that you just put into the Authorization Panel, please fill them in and click on the Login button.
Now you should be on a screen where you can create a REST API User account. The user account ID and User Secret key will be generate that will permit that user to have access to the REST API functions. You can create as many users as you want. To begin, click on the Add REST API User button and you will get a screen as shown in Figure Filled Add User Panel.
Please fill in the User Name, then click on the red generate buttons
for User Id and User Secret. The REST API will create appropriate random
strings. These strings (especially the User Secret Key) should be kept
secret and will be needed in the OAuth2 process to get access to the
REST API.
Also, please enter the Redirect URI which if you are testing or
using the built-in REST-API OAuth2 server, should be:
https://localhost/
Please include the trailing forward slash. In other case, such as interfacing to cPanelthe Redirect URI must point to your application for authentication.
Unless you have your own or a special OAuth server. Using localhost here
will indicate to the REST API to use its own built-in OAuth server.
Leave the Scope field at the default value (full access). Scopes can
be used to limit the REST API access for a particular user to a
particular or set of Categories. For more details on Scopes, see section
Using Scopes.
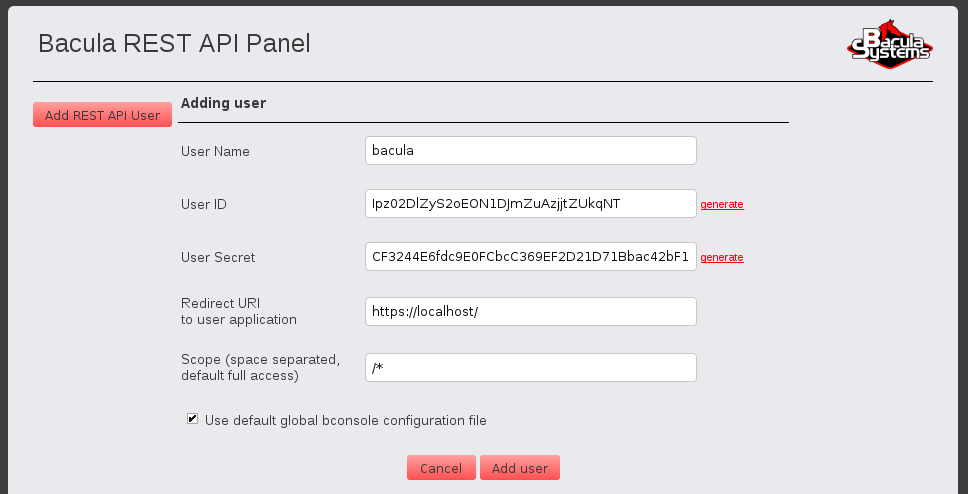
Filled Add User Panel
Then click on the Add user button at the bottom of the panel to
actually create the user (Figure Filled Add User Panel).
If the user is correctly created, you will have a screen as shown in Figure User Panel.
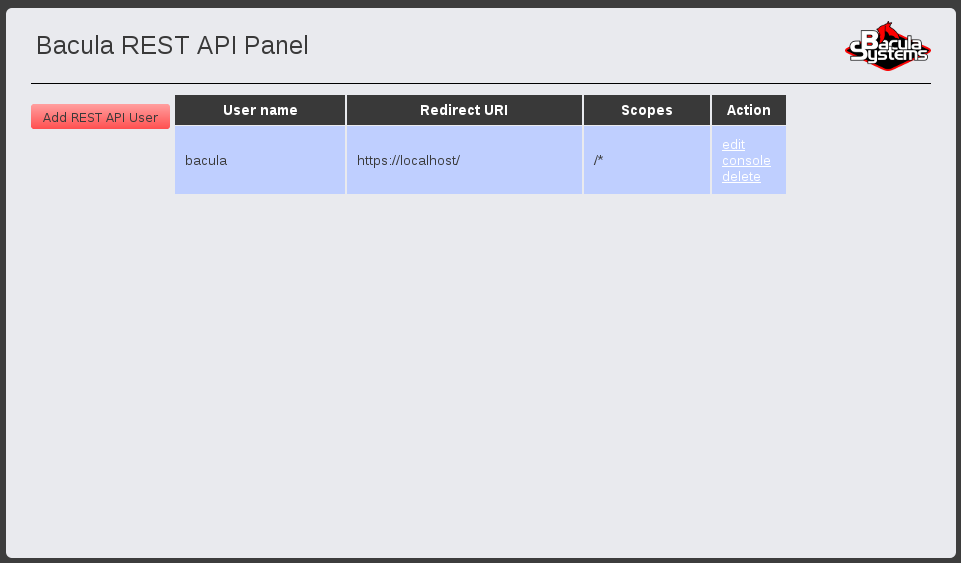
User Panel
If you need to know the User ID and/or User Secret Key, simply click on the edit Action, and you will get the screen shown in Figure Edit User Panel.
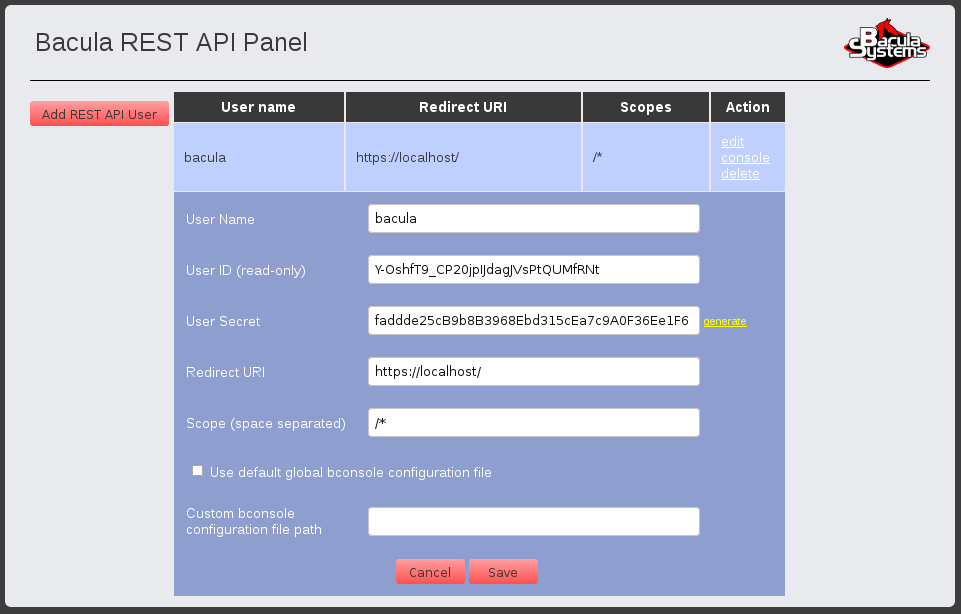
Edit User Panel
If you want to create a new User Secret Key, in case the user lost
his/her key or the key was compromised, click on the generate
button. All the fields that are available in this panel with the
exception of the User ID, which is the way the user is identified by the
system. If you wish to change the User ID, you must first delete the
User entry, then create a new one.
OAuth2 Testing
Once you have create at least one REST API User, you can proceed to testing the API. To do so, you must put the User ID (random string) and the User Secret Key into the program that will be used to access the REST API and that uses web POST requests. If you have such an application, you can try it.
You can test the REST API interface by going to:
https://localhost/panel/
and loging in as the administrator, and then click on the console item under the Action column for any user. This will bring up a console Window that will allow you to enter REST API commands. The results of those commands will be displayed in the Window. See OAuth2 Console Test Panel.
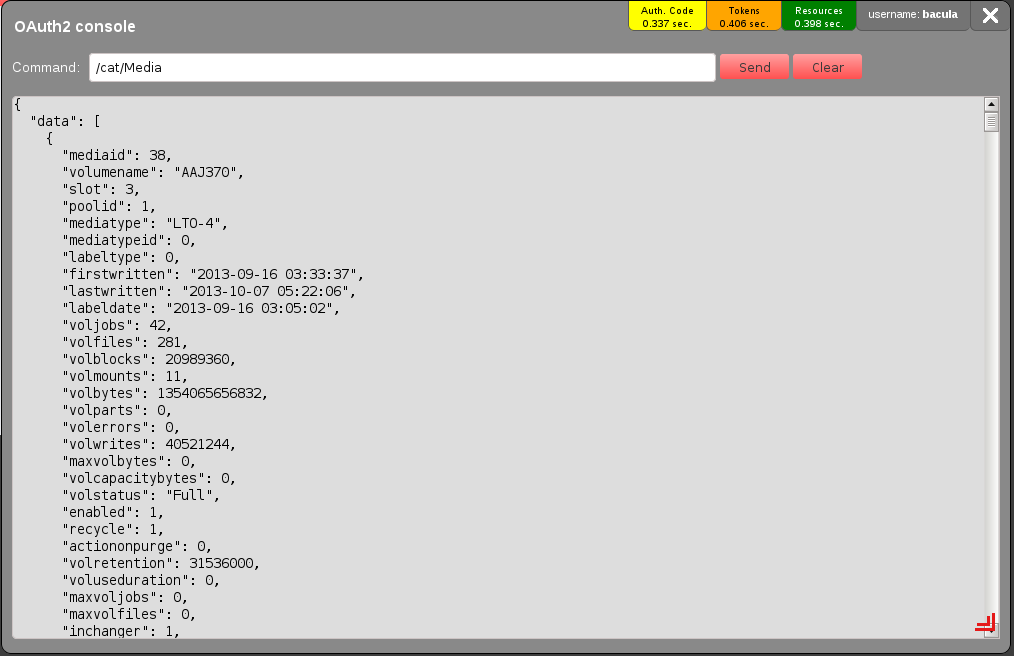
OAuth2 Console Test Panel
Finally, another way to test the REST API is to use the oauth2cli.sh shell script that comes with the REST API. It is installed in:
/opt/bacula/rest-api/scripts
Normally, you will only need to enter the User Id and User Secret and other information on the following lines that are near the top of the oauth2cli.sh program:
readonly USER_ID='Y-OshfT9_CP20jpIJdagJVsPtQUMfRNt'
readonly USER_SECRET='faddde25cB9b8B3968Ebd315cEa7c9A0F36Ee1F6'
readonly USER_REDIRECT_URI='https://localhost/'
readonly USER_SCOPE='/*'
readonly USER_STATUS=3
readonly SERVER_RESOURCES='https://localhost/'
where the above two lines have been modified to have the same values created during the creation of the user bacula.
You can then execute the script with:
/opt/bacula/rest-api/scripts/oauth2cli.sh
and it should produce the following output:
Please input request for send to Bacula REST API Server.
Requests should be input WITHOUT http://yourhost/ prefix (please look into
below examples).

Examples:
        GOOD:
                /cat/Media/
                /cmd/list?jobs
                /cat/Client?regex=^abc
        BAD:
                cat/Media/
                https://yourhost/cat/Media/
                /yourhost/cat/Media/

============================================


Bacula REST API UserApp https://localhost>
at which point, you can enter on of the suggested commands and if your Bacula database has some jobs, for the first two, you should get output, and for the third one, you will probably get and error since abc is unlikely to be a valid Client name. You will probably get something like:
{
   "error" : 10,
   "data" : "Client does not exist."
}
Status: OK (tokens refreshed)

Bacula REST API UserApp https://localhost>
Use ctl-C to stop the shell script.
OAuth2 compatible endpoints
Since version 8.8.3, a new “v2” OAuth2 interface has been introduced because of compatibility issues in the initial interface of the OAuth2 specification.
Initial OAuth2 endpoints:
Authorization URL: /authorize
Access token URL: /request_token
Refresh token URL: /refresh_token
New “v2” compatible OAuth2 endpoints:
Authorization URL: /v2/authorize
Access token URL: /v2/request_token
Refresh token URL: /v2/refresh_token
See also
Go back to:
Go to:
Go back to the REST API chapter.
Go back to the main Advanced Features Usage page.
