BWeb Management Console
EnterpriseBacula Enterprise Only
This solution is only available for Bacula Enterprise. For subscription inquiries, please reach out to sales@baculasystems.com.
Bacula Enterprise Microsoft 365 Plugin can be managed from a dedicated user friendly Web console, specifically designed to facilitate tasks as the authentication process for new tenants or the fileset configuration process.
Note
This feature is available starting with version 14.0 of Bacula Enterprise.
Connection
The purpose of this screen is to show a list of the currently connected tenants that are already registered. The presence of each line in the table means that a tenant has been configured at some point.
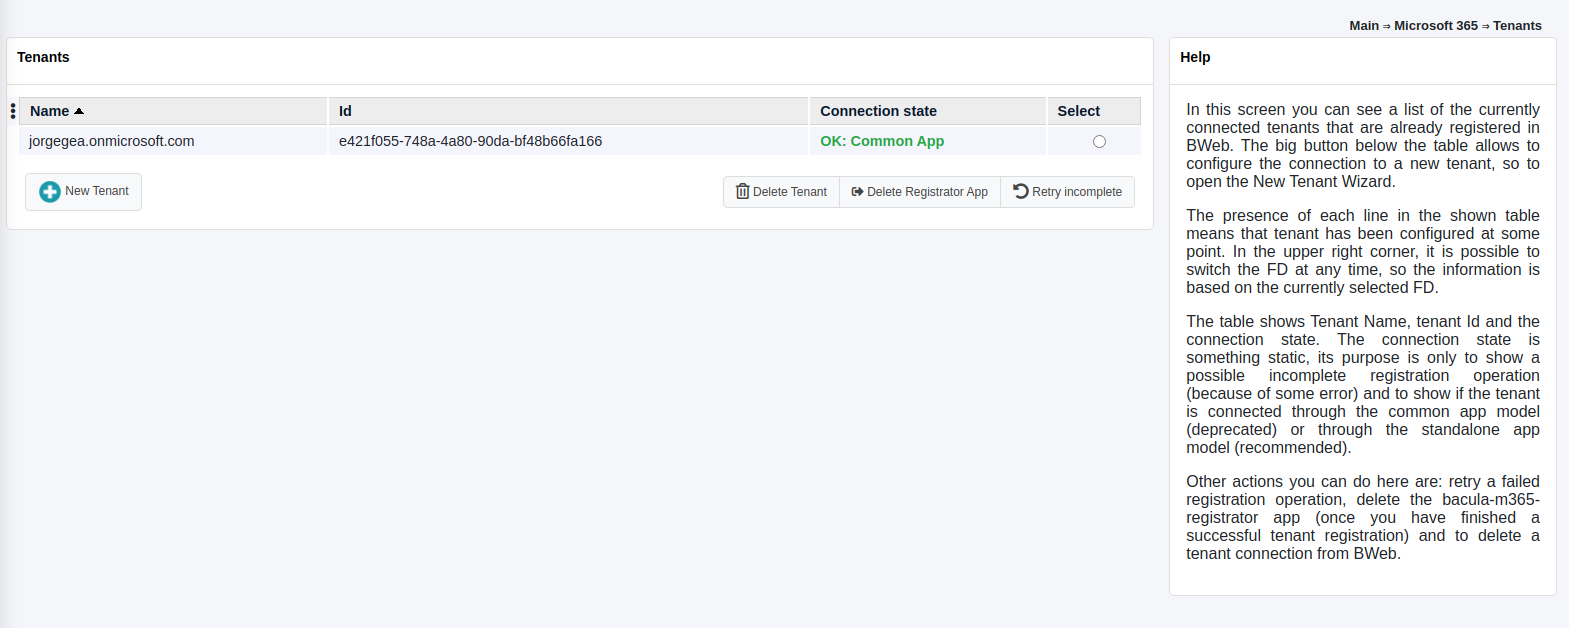
In the upper right corner, it is possible to switch the FD at any time, so the information is based on the currently selected FD. After the first time a FD is selected, the information will be remembered using cookies for the next time and for any other M365 Console windows.
The table shows tenant name, tenant id and the connection state. The connection state can indicate a possible incomplete registration operation (because of some error), otherwise it will indicate a successful connection and the type of connection: through the common app or through the standalone app.
The big button placed at the bottom of the table allows us to configure the connection to a new tenant, so it will open the ‘New tenant wizard’ that is described in the section below.
Other actions that can be performed from this tenant list window are:
Retry operation: It allows to retry a possible incomplete registration, so re-launch the proper internal query command (add-app or the objectid command) using a selected tenant.
Delete registrator: It allows to delete the registrator app inside the selected tenant. It is not possible to delete a registrator if registration is incomplete . In this case, you must retry operation or delete tenant. This is a possibility only offered for security concerns, as the registrator app has some elevated permissions.
Delete tenant: It removes the tenant from the internal BWeb configuration.
New tenant wizard
When opening new tenant wizard, we can select the registration model to be used: Standalone or Common.
Details of each model are shown in the images and you can also read more information in this chapter under the Authorization section.
It is needed to provide the tenant id, which can be found following the chapter instructions placed under the same Authorization section.
It is recommended to use the Standalone model (first one to appear in the web interface) and be using the common model only for testing purposes.
Once we proceed with one of the models, an URI of Microsoft website will be suggested and you need to provide the needed permissions, then, Microsoft will redirect you to a Bacula Systems page (same as shown in the Authorization section).
BWeb will automatically guide you until the end of the process where you will see your tenant correctly added into the tenant list screen.
Logged in users
In this screen a list of logged in users is shown.
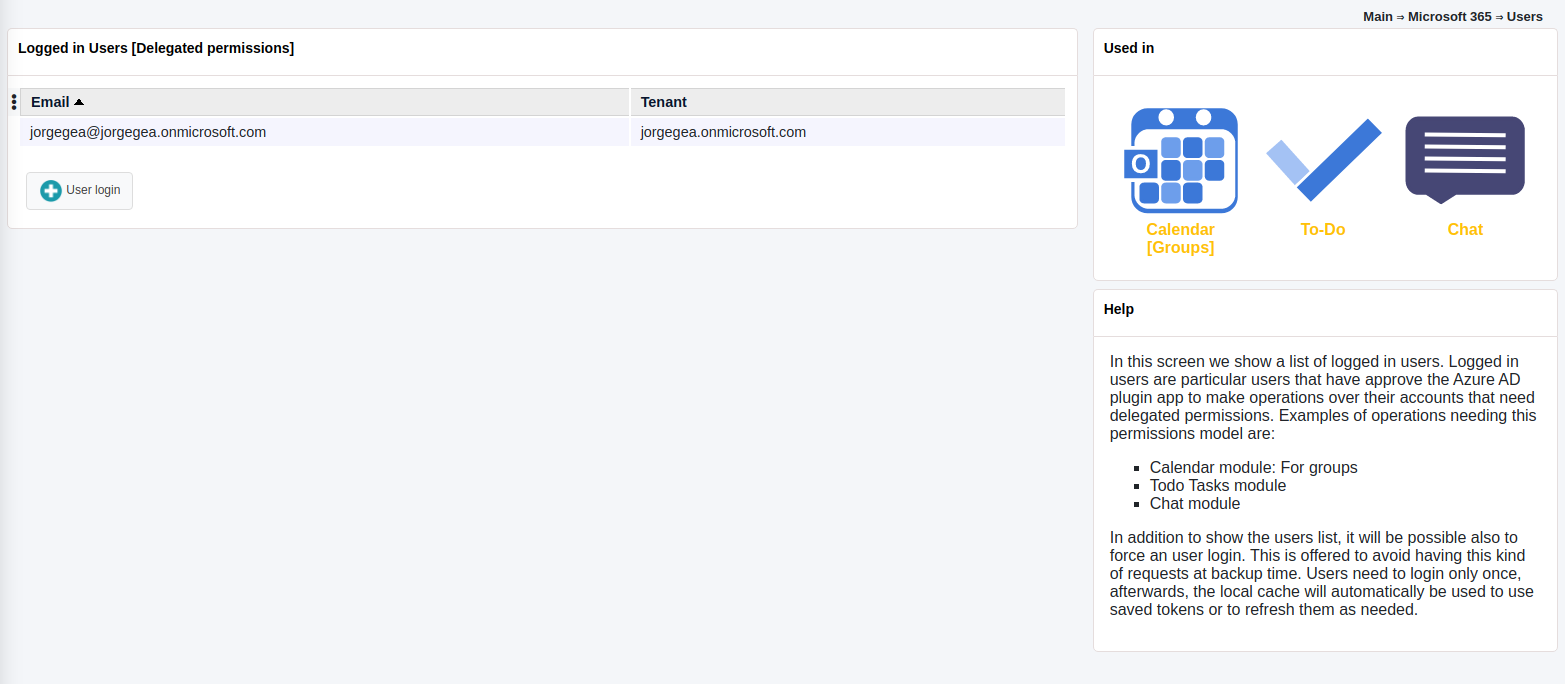
Logged in users are particular users that have approved the Azure AD plugin app to make operations over their accounts that need delegated permissions.
Examples of operations needing this permissions model are:
Backup of calendar of groups
Todo Tasks module
Chats module
In addition to show the users list, it is also possible to force an user login. This function is offered to avoid having this kind of requests at backup time.
Users need to login only once, afterwards, the local cache will automatically be used to use saved tokens or to refresh them as needed.
For more information about delegated permissions, please take a look to <./m365-delegated-permissions>
Filesets
The purpose of the Filesets page is to control all the filesets of Microsoft 365 Plugin, so we will see them listed in the main screen:

From there it is possible to create a new M365 Fileset in an user friendly way:
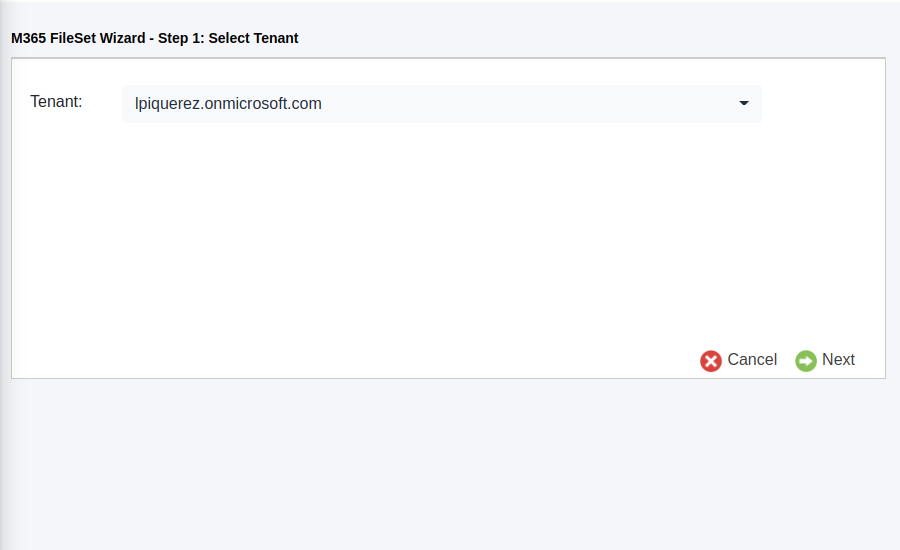
We need to select the tenant to work with as a first step:
The second step is to select the entities to protect: they can be users, groups or sites. All the services of M365 are ‘owned’ by any of those entities:
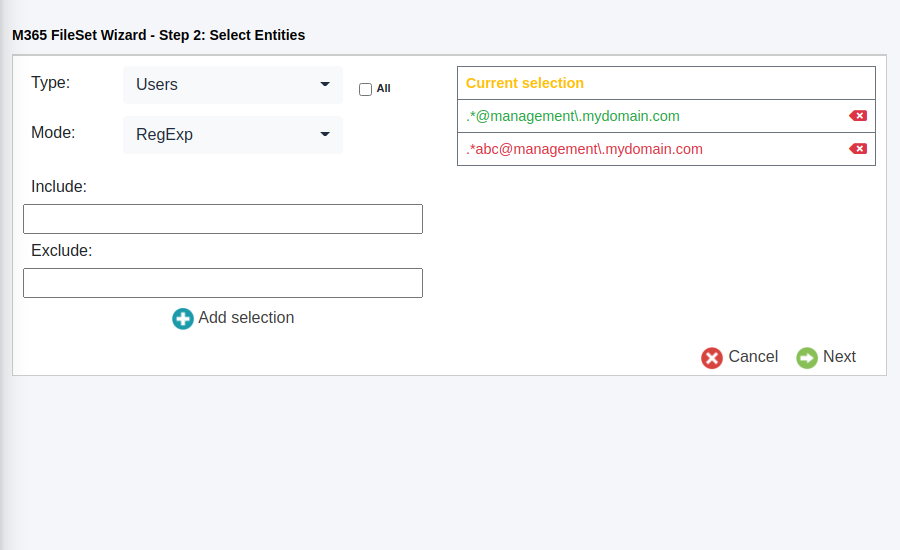
It is possible to dinamically add or remove them, the wizard will store your final selection.
The third step allows us to select the services to protect in a similar way than the entities step, with multiselection allowed, and where we can remove or add services at will:
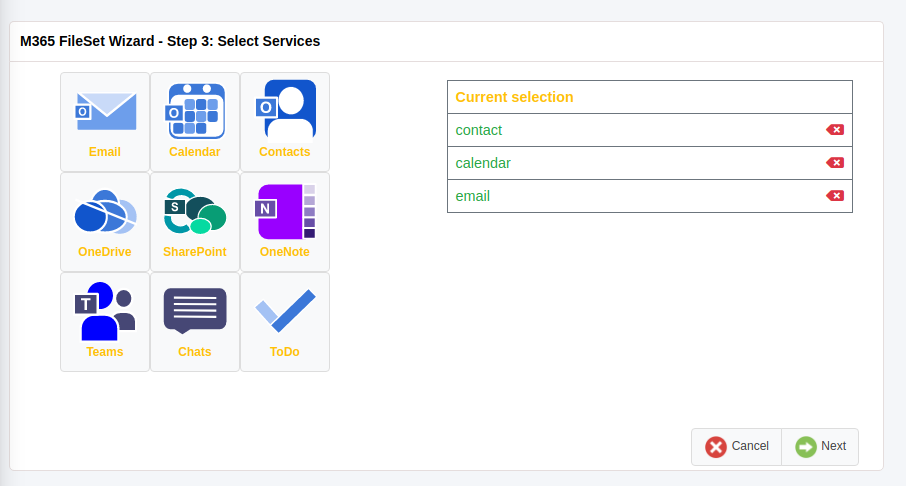
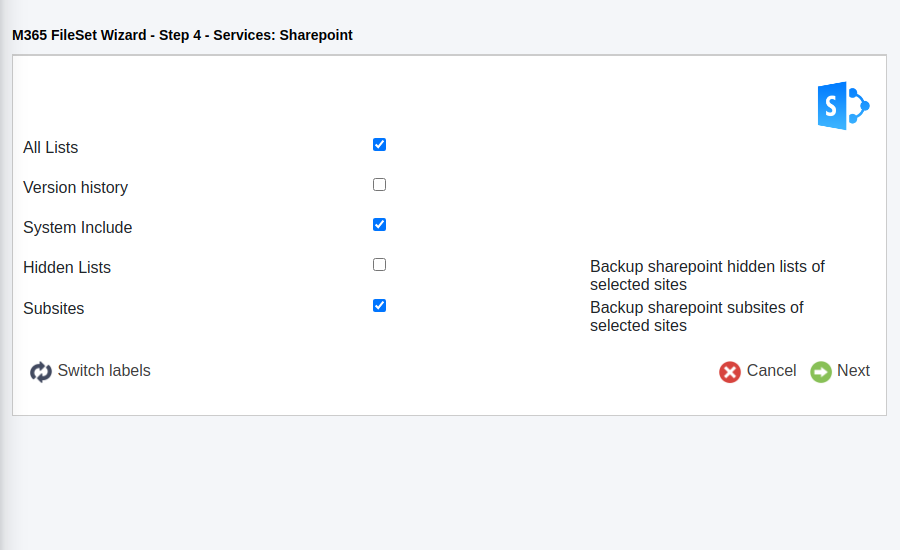
After selecting the services, we will have one independent screen for each selected service where we will enter the particular configuration for each of the services implied. In the screenshot below, we can see the Sharepoint services:
As a final step, it is possible to setup some advanced parameters and then finish the configuration:
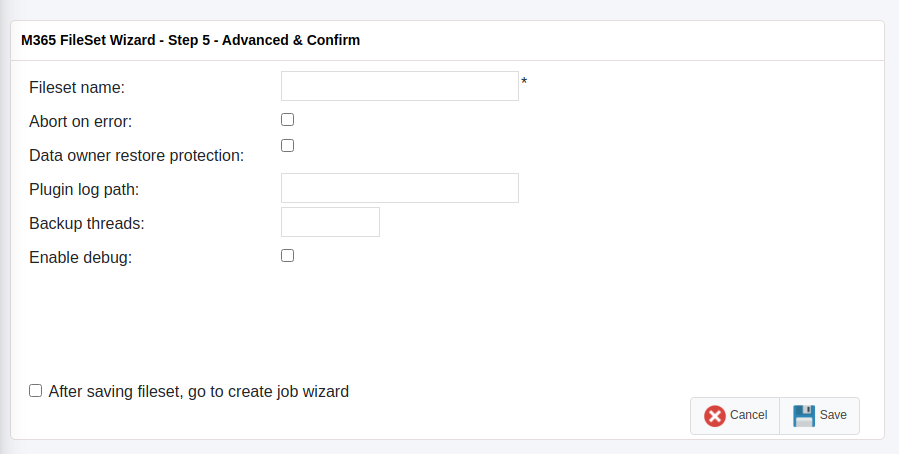
From this final screen is possible to go directly to the job configuration wizard and finish a backup configuration or to return to the previous fileset list page.
Please, note that this Wizard contains the most common parameters and it is intended to help to configure the most common use cases. In case you need to setup more advanced parameters or to edit existing filesets, BWeb will allow you to do it using the regular Fileset editor where you will find all plugin parameters.
See also
Previous articles:
Next articles:
Go back to: Microsoft 365 (M365) Plugin.