PostgreSQL Plugin: Quick Start
EnterpriseBacula Enterprise Only
This solution is only available for Bacula Enterprise. For subscription inquiries, please reach out to sales@baculasystems.com.
Important
This PostgreSQL Plugin: Quick Start article is a condensed, easy-to-follow version of the full documentation designed to help readers get started quickly with the essential information needed to work with the PostgreSQL Plugin. We encourage you to explore the more detailed articles available on the main PostgreSQL Plugin documentation page for deeper guidance.
The PostgreSQL Plugin is designed to simplify the backup and restore procedure of PostgreSQL clusters, so that backup administrator does not need to know about internal details of Postgres backup techniques or write complex scripts. The plugin automatically handles the backup of essential information such as configuration, users definitions and tablespace.
The PostgreSQL Plugin supports both Dump and Point-In-Time Recovery (PITR) backup techniques.
The PostgreSQL Plugin is compatible with Copy/Migration jobs. Read Replication: Copy/Migration Jobs for more information.
Installation
The PostgreSQL Plugin for Bacula Enterprise can be installed as part of the File Daemon (FD) component. It can be installed using the Bacula Installation Manager (BIM):
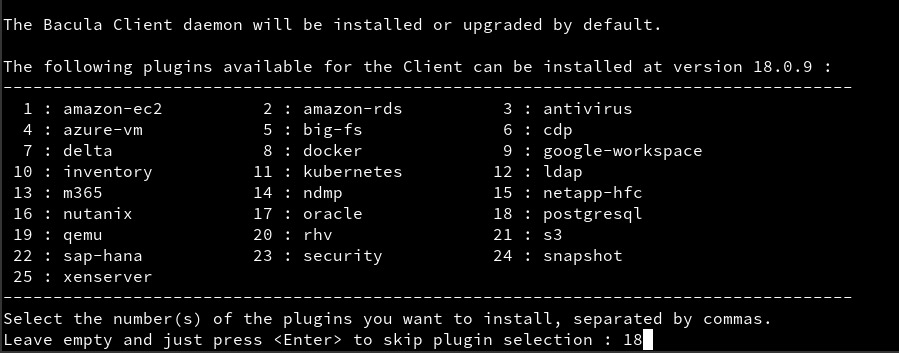
The procedure includes verifying prerequisites, selecting the appropriate Bacula version, installing the desired plugins, and configuring firewall rules to ensure seamless operation.
Alternatively, it can be installed using the package manager directly.
The installation of the PostgreSQL Plugin does require the File Daemon component to be running on the same host. To install the File Daemon, visit the File Daemon installation page.
Configuration
To configure the PostgreSQL Plugin in Bweb:
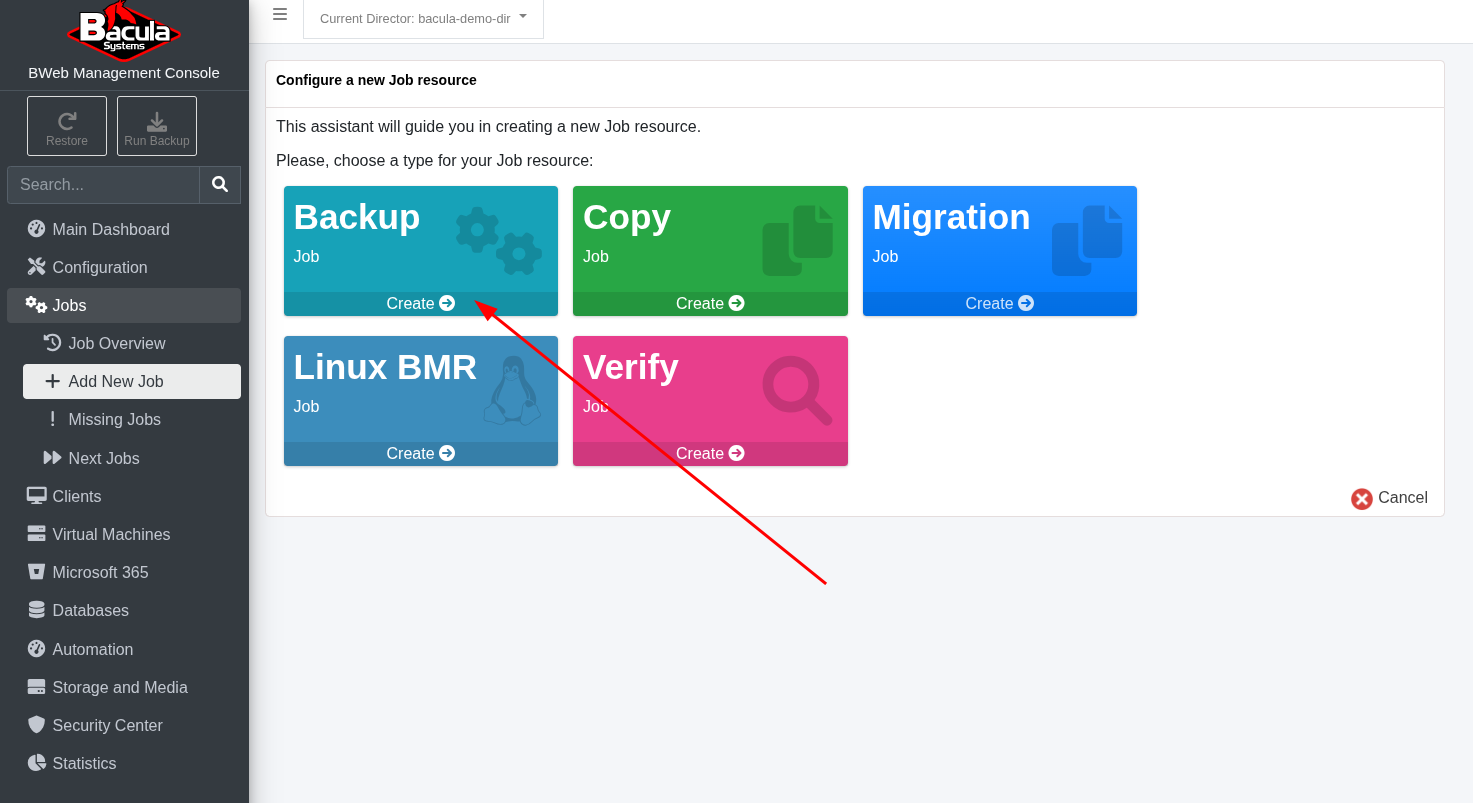
Click the plus icon at the bottom right corner, and select Add Job.

Select Create in the Backup tile.
Enter a name for the job, choose a description and select BackupsToDisk as the Job Template.

Select the Client.

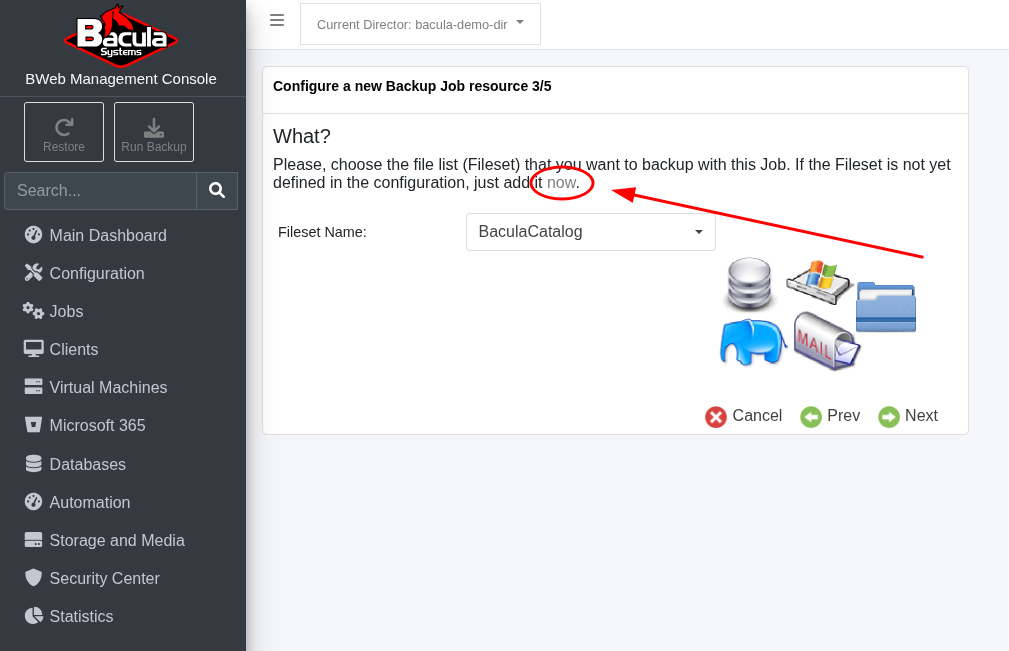
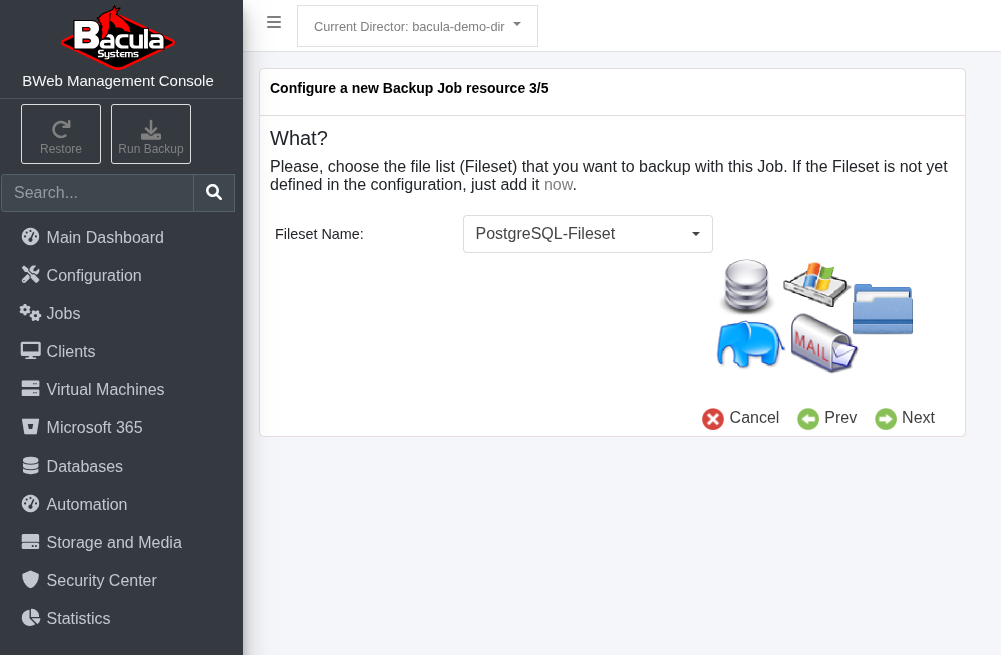
Select a Fileset. If none was has been defined yet, click now.
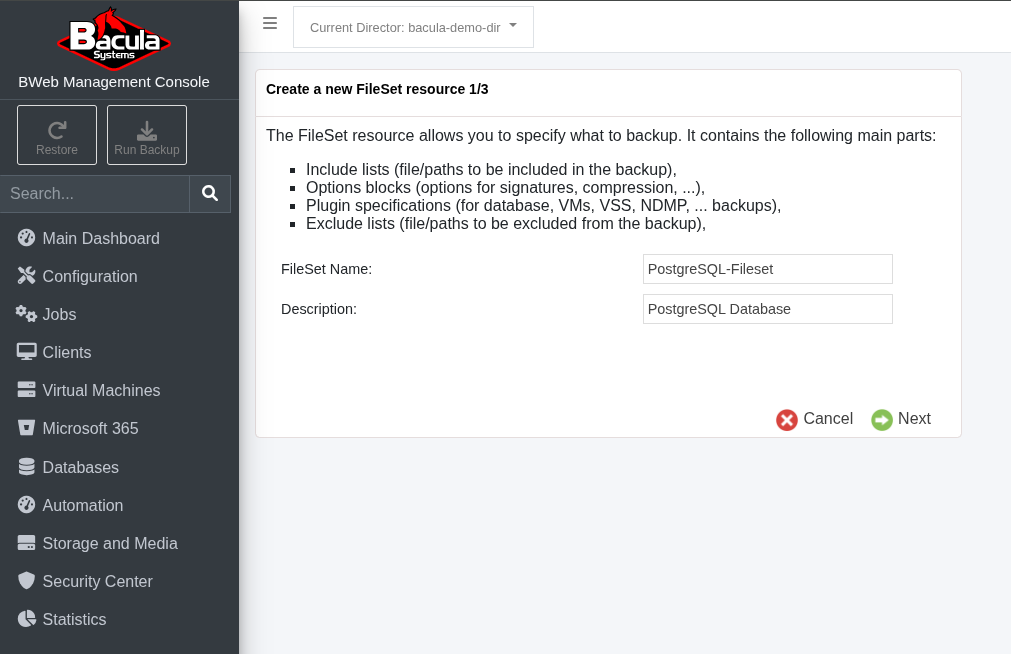
5.1. Choose a Name and Description for the new Fileset.
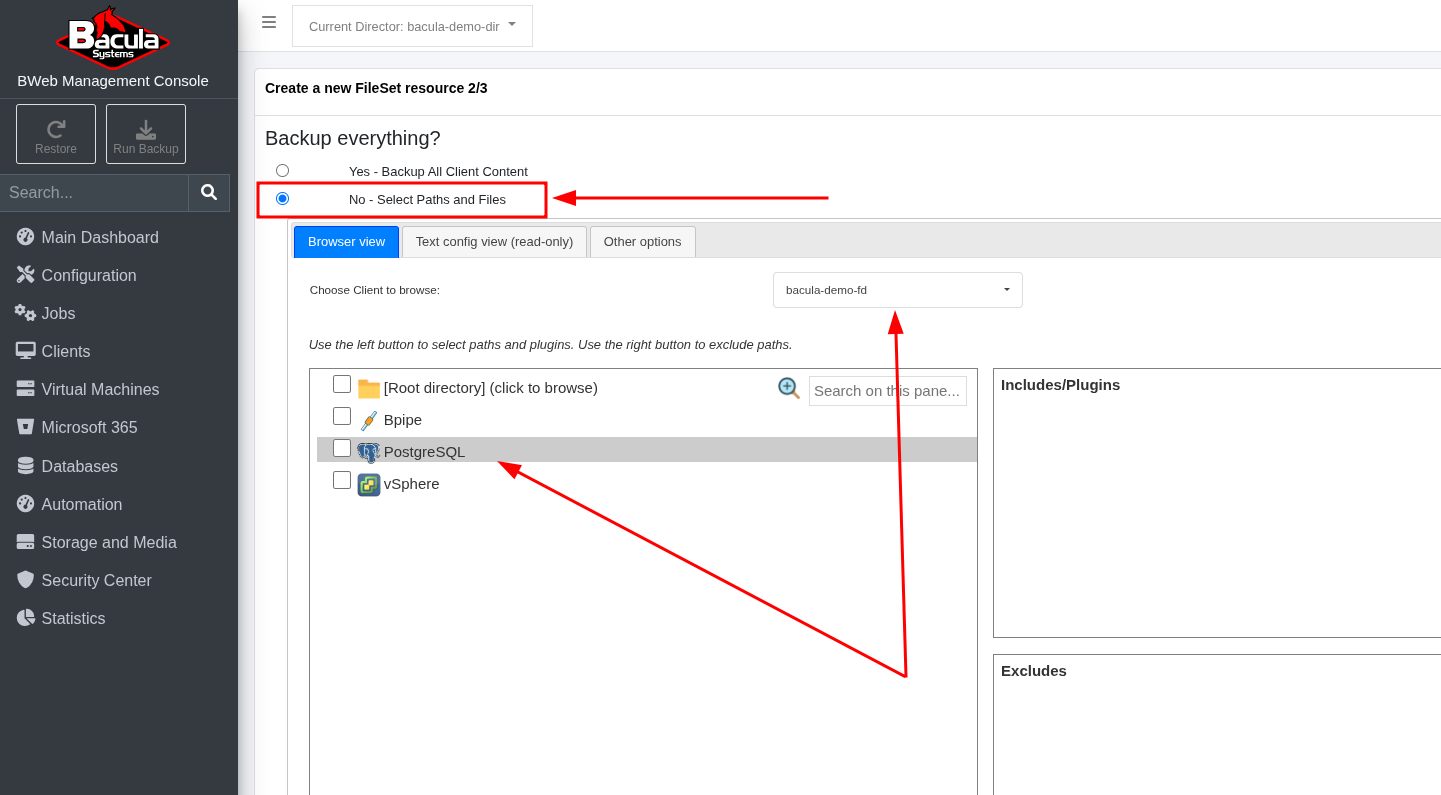
5.2. Choose Select Paths and Files. Then, select the right Client and click on the PostgreSQL Plugin.
5.3. Choose a Backup Mode, the PostgreSQL User and the Database. Then, click Submit and Next.

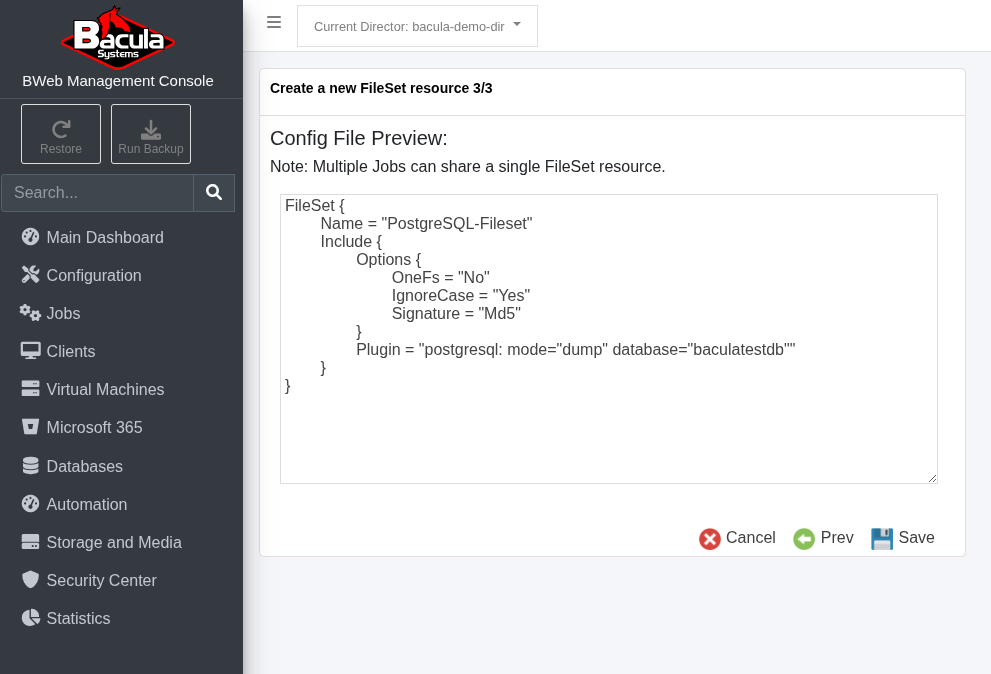
5.4. Review the Fileset options and click Save.
With the newly created Fileset selected, click Next.
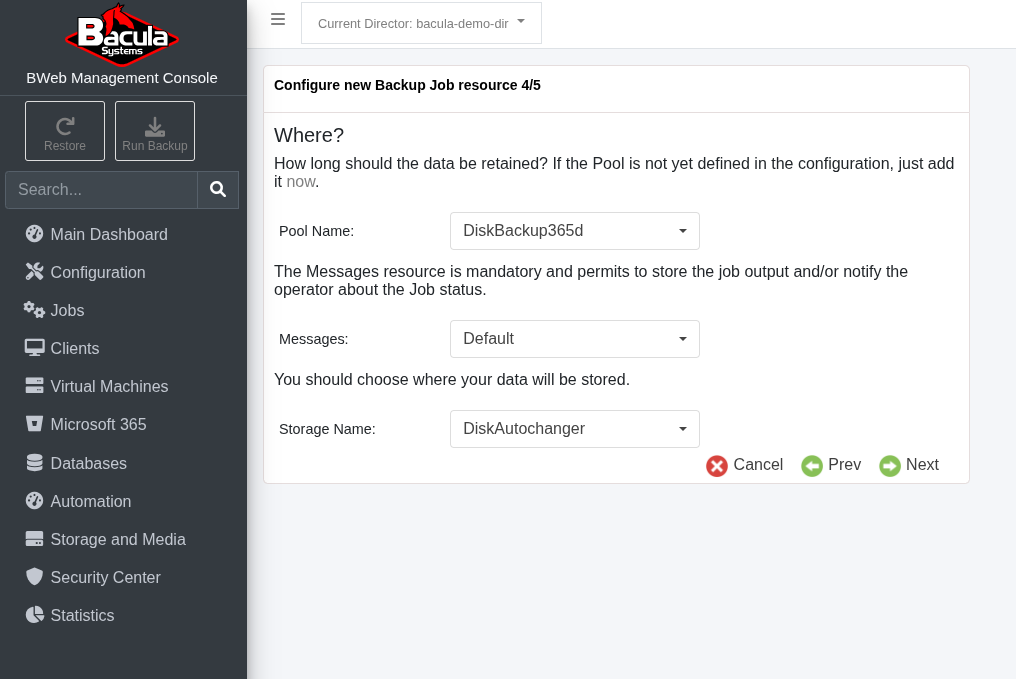
Choose the Pool Name, Messages resource and the Storage.
Choose a Schedule and click Next.
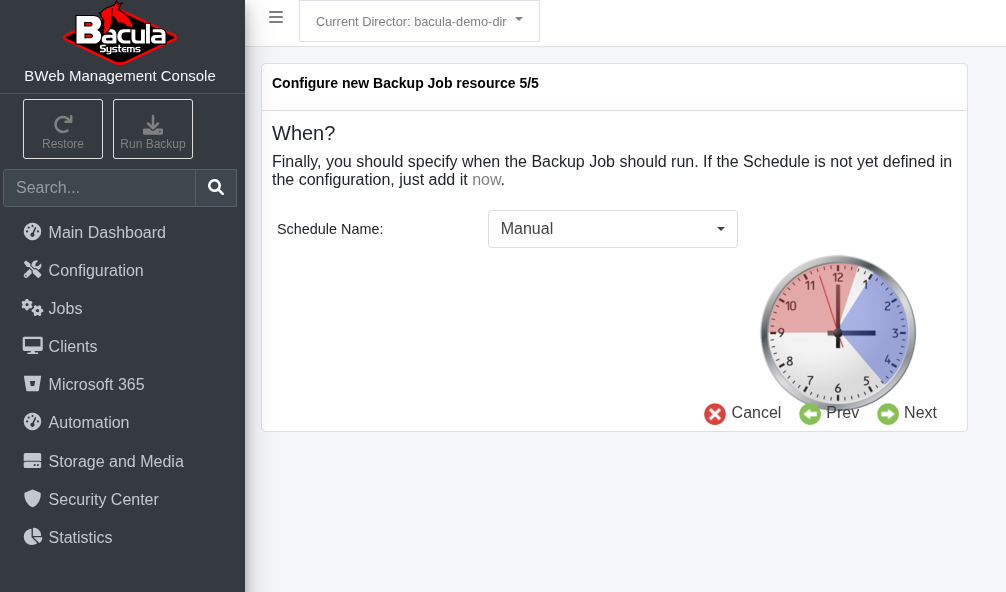
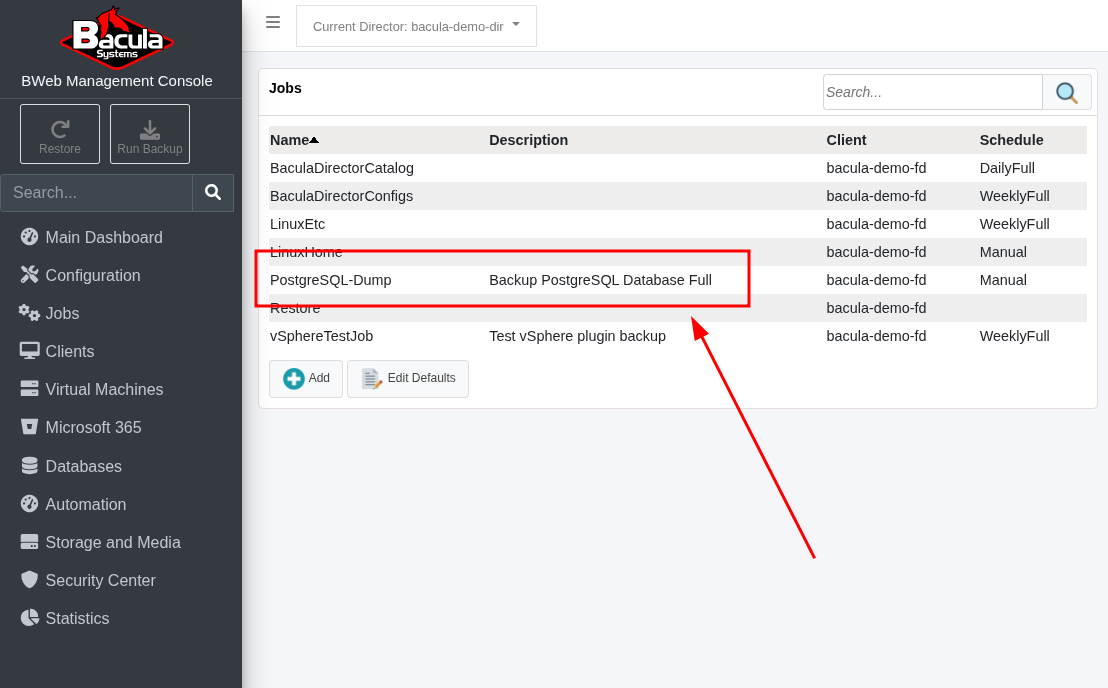
Verify the new job appears in the Jobs list.
This basic setup enables the plugin to handle PostgreSQL backups.
For detailed configuration options and advanced settings, refer to the official documentation: PostgreSQL Plugin Configuration Guide.
For learning about Bacula’s basic operations, visit: Guide to Basic Operations.
Backup Example
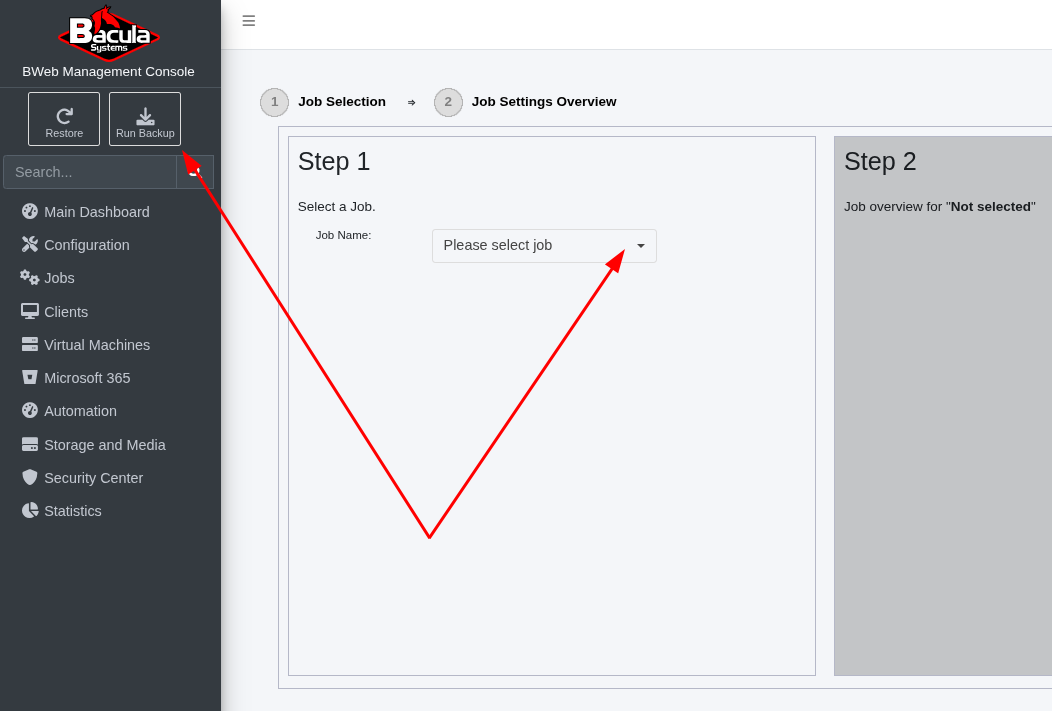
Click Run Backup, and in Step 1, select the previously defined Job from the drop-down menu.
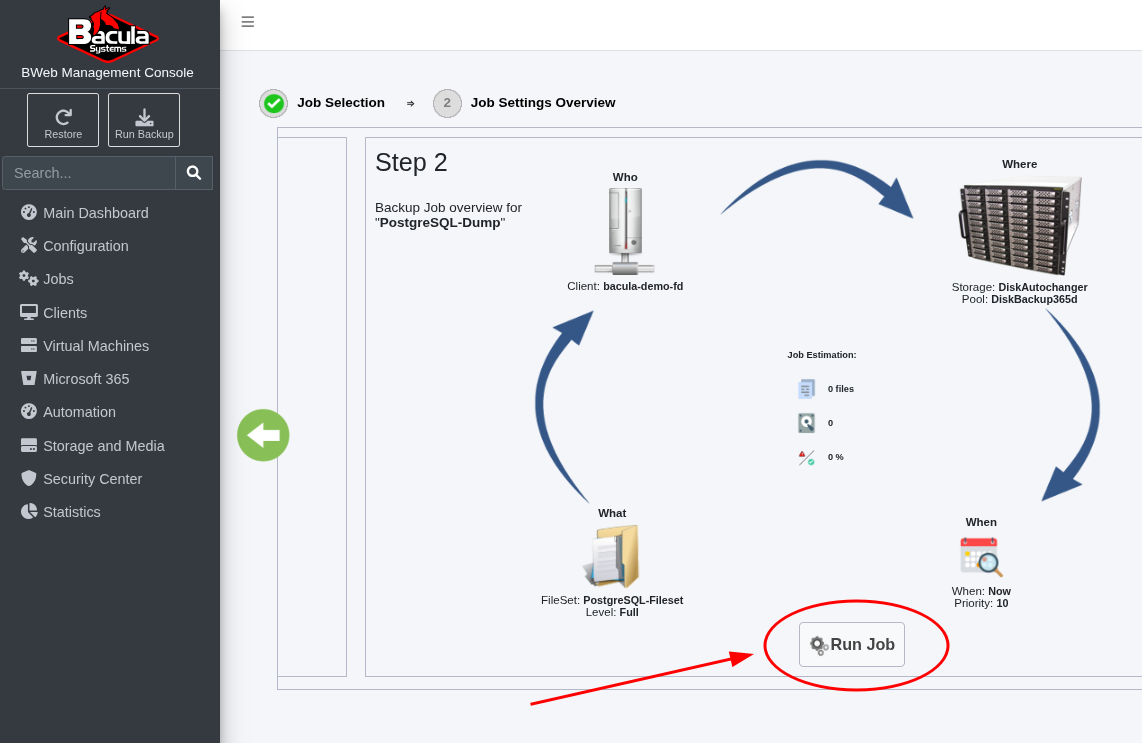
Review the Job Report after the Job has completed.
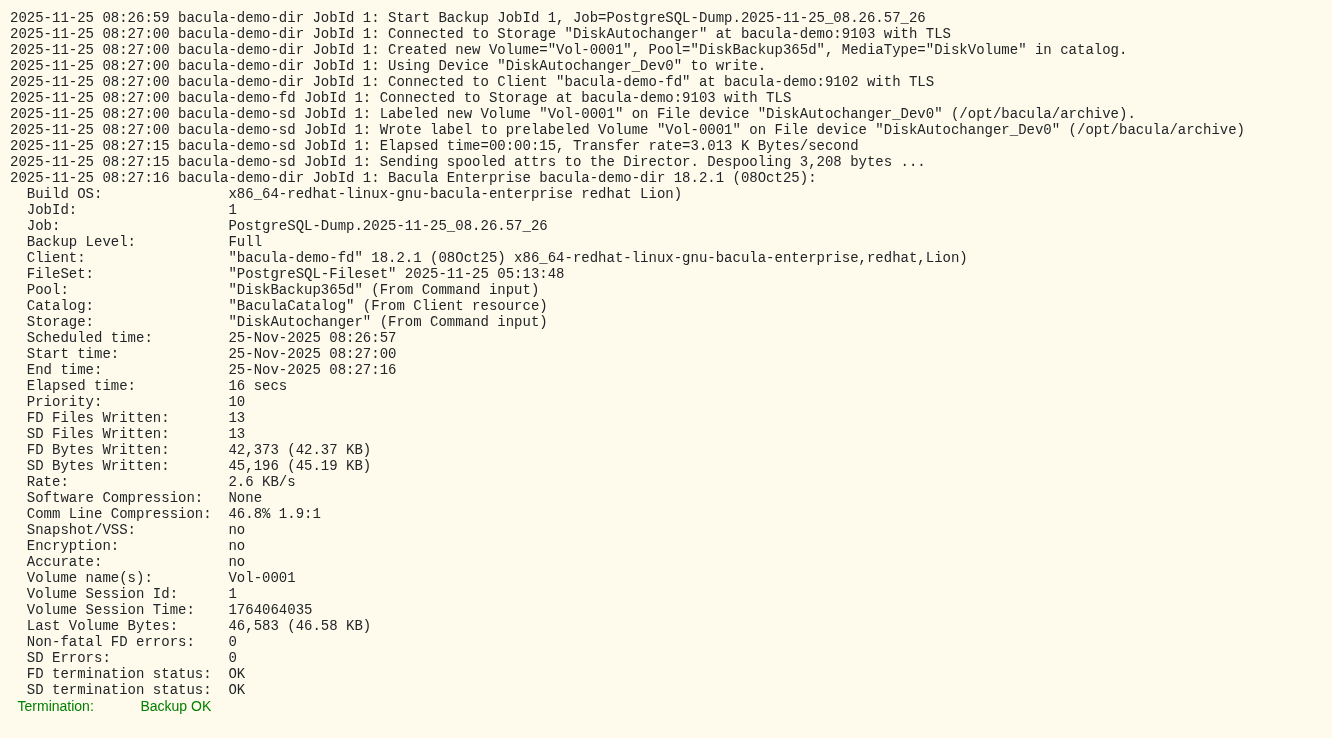
You can verify data, check the termination status or restore using the information dialog.

Congratulations, you have successfully run a PostgreSQL Database backup job.
Restore Examples
Case 1
Restore SQL files containing commands required to restore your Database.
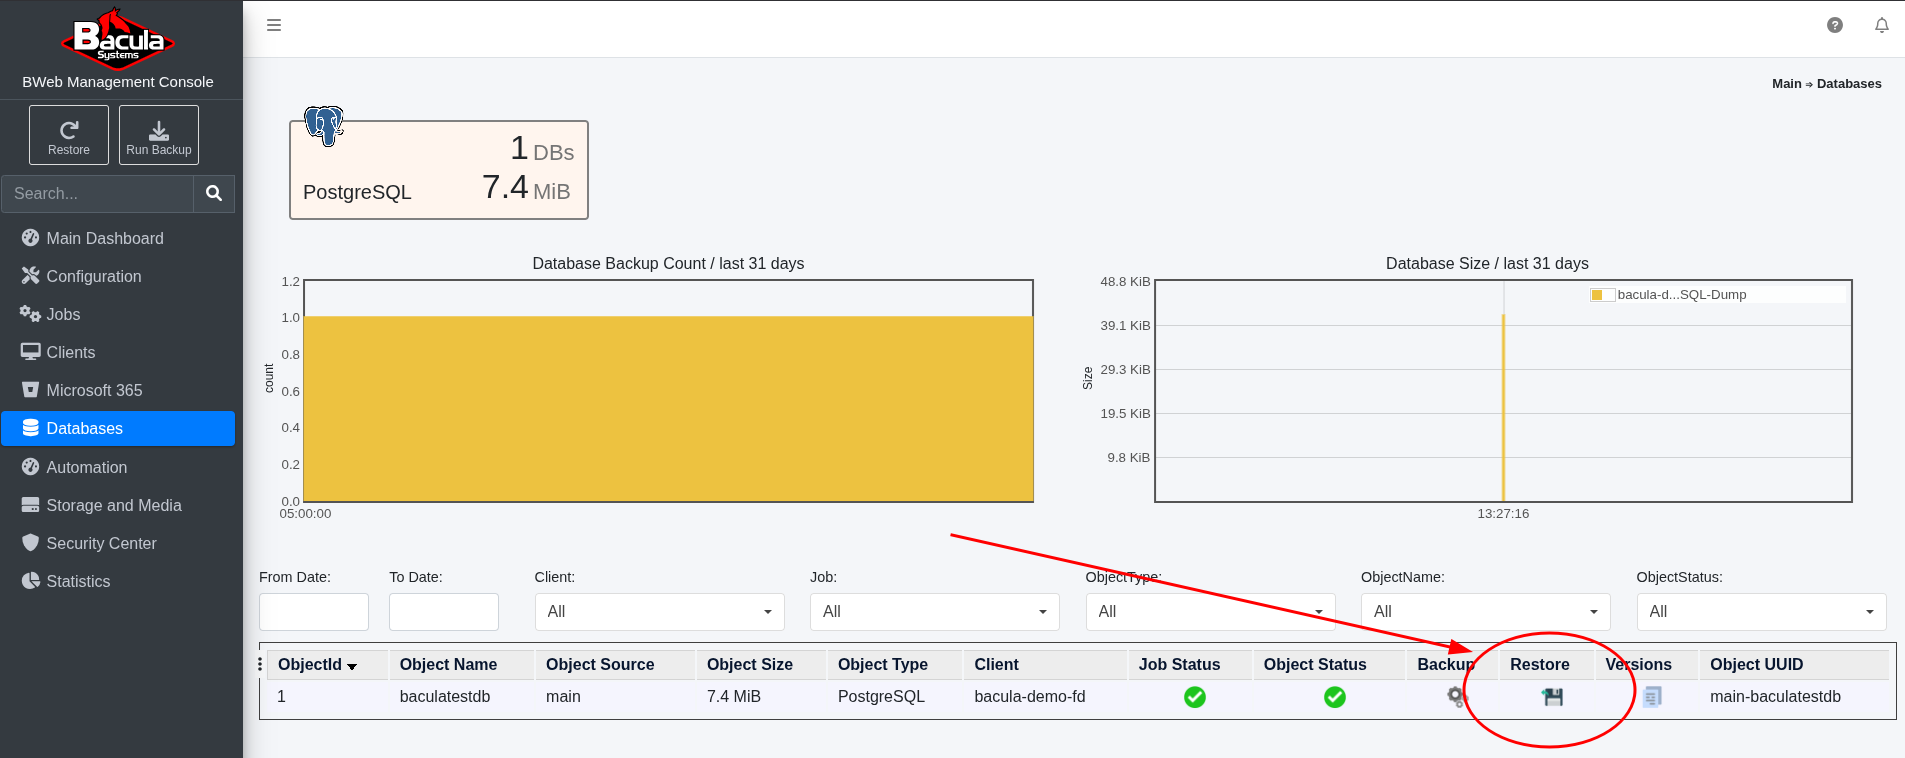
In the left menu, go to Databases and click the Restore icon at the bottom.
Click Run Restore.

Review the Job Report with the Job termination status.
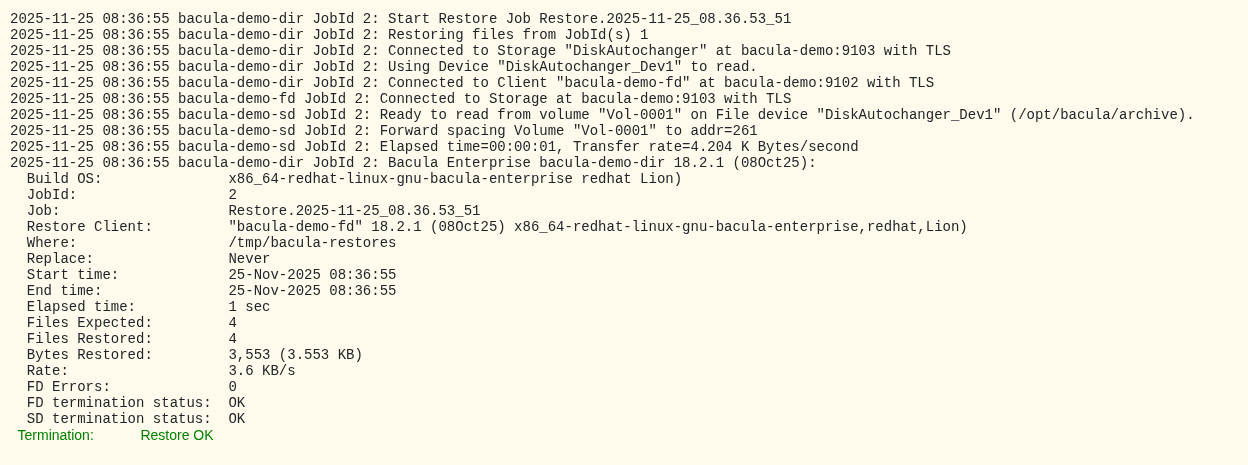
The instruction files for restoring the database will be located in the
/tmp/bacula-restores/folder.

Case 2
Restore to a new Database.
In the left menu, go to Databases and click the Restore icon at the bottom.

In the Postgresql tab, choose a new database name, and click Run Restore.

Tables will be recreated, and the Job Report will display the backup status once the Job has completed.

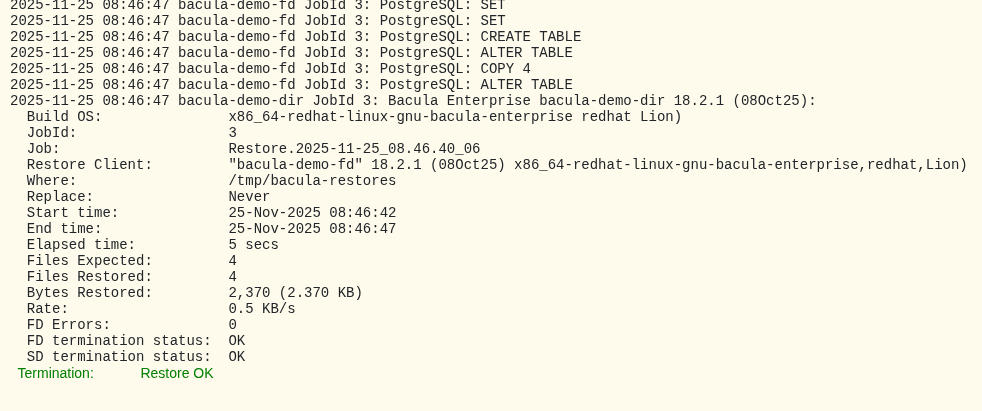

Congratulations, you have successfully restored your database!
See also
Next articles:
Go back to: PostgreSQL Plugin.