Standard Recovery Procedure
EnterpriseBacula Enterprise Only
This solution is only available for Bacula Enterprise. For subscription inquiries, please reach out to sales@baculasystems.com.
Bare-Metal Recovery itself is done by booting the target system from the BMR image which should have already been created as described in section Creating LinuxBMR Rescue Media. Depending on the target computer’s setup, booting from the BMR image may require some BIOS settings changes or interaction during the boot process – check with the system’s manual if unsure!
Starting the Recovery System
Once the BMR system boots, you are first presented with the
Isolinux language selection screen which will look similar to the
one in the screenshot below. Use the up or down arrow keys
on the keyboard to get to your language and then press enter.
Note
You are selecting the language of the Linux Desktop environment, but the BMR tool itself is available only in English.
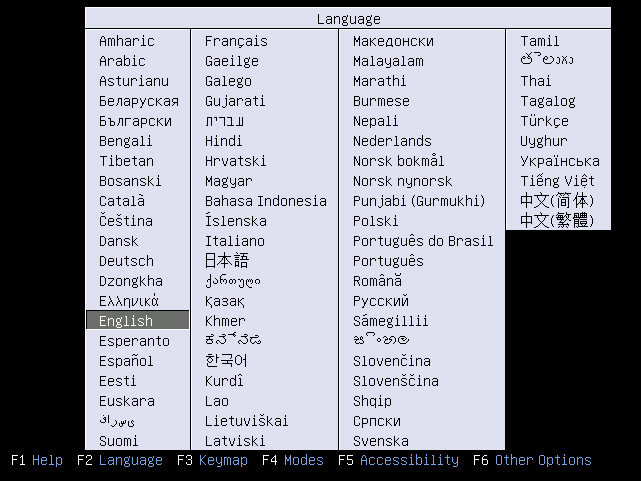
The BMR Boot Screen – Language Selection
Then press F3 to select your keyboard mapping:
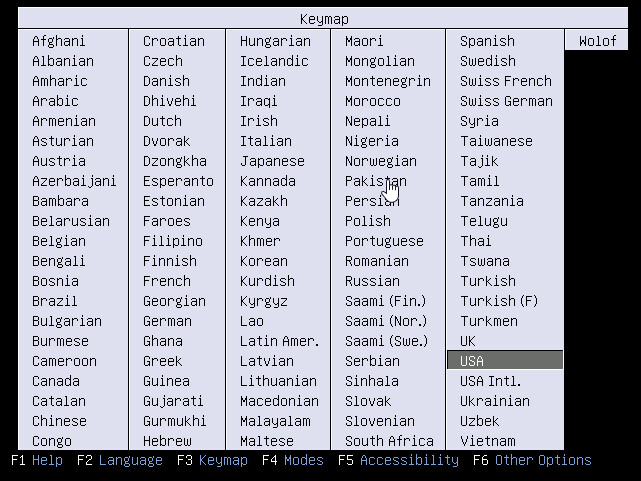
The BMR Boot Screen – Keymap Selection
Finally select “Start Bacula LinuxBMR” and press Enter.
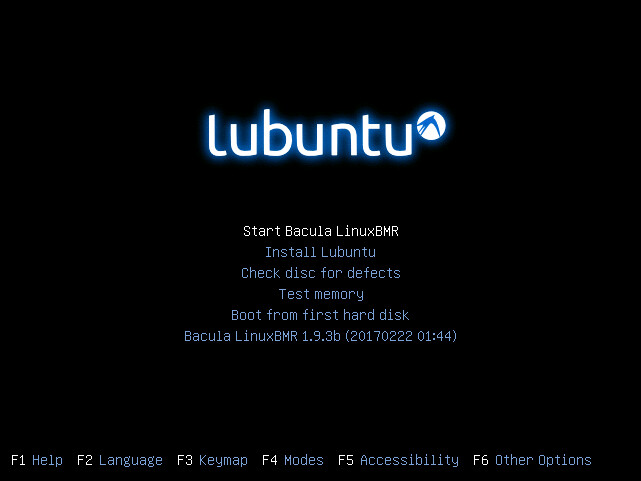
The BMR Boot Screen – Boot
After a short time, the Recovery system will be booted into a graphical desktop as shown below:
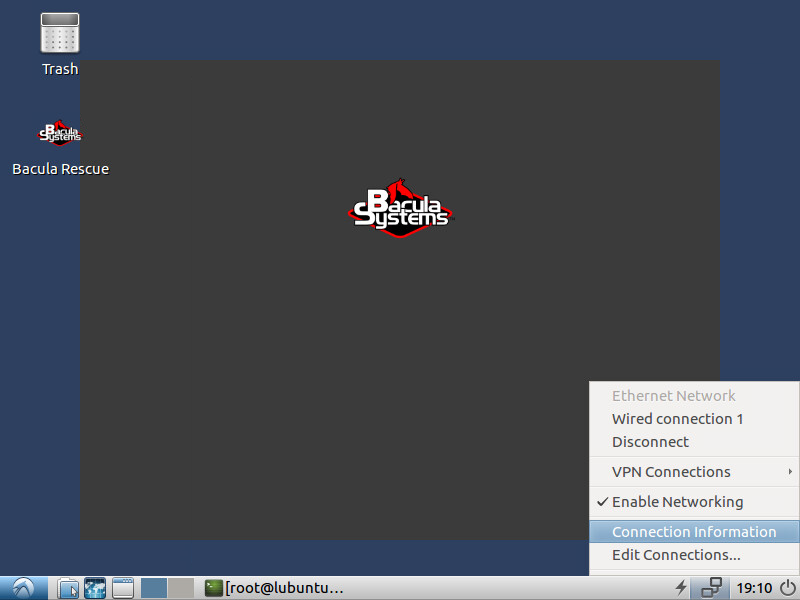
The BMR System’s Desktop
Before starting the BMR process itself, it may be useful to verify that the automatically determined network settings fit your environment. This is especially important if there is more than one network card (i. e., a production network and a dedicated backup network), or VLANs are used and no automatic address assignment is available. In these cases, manual configuration of the network settings may be required.
To do that, click the Network Manager tray icon in the bottom right
of the screen (left of the clock) as shown above.
Starting the BMR Process
Once the network is configured correctly, you can start the Bacula Rescue session by double-clicking its icon on the desktop.
The first screen presented is a welcome message:
Welcome Page
The menu and the 3 tabs in the windows top left corner are explained in section
Linux BMR: GUI and Support Tools. Click Next to continue.
Configuration Screen
The next screen is the Configuration screen:
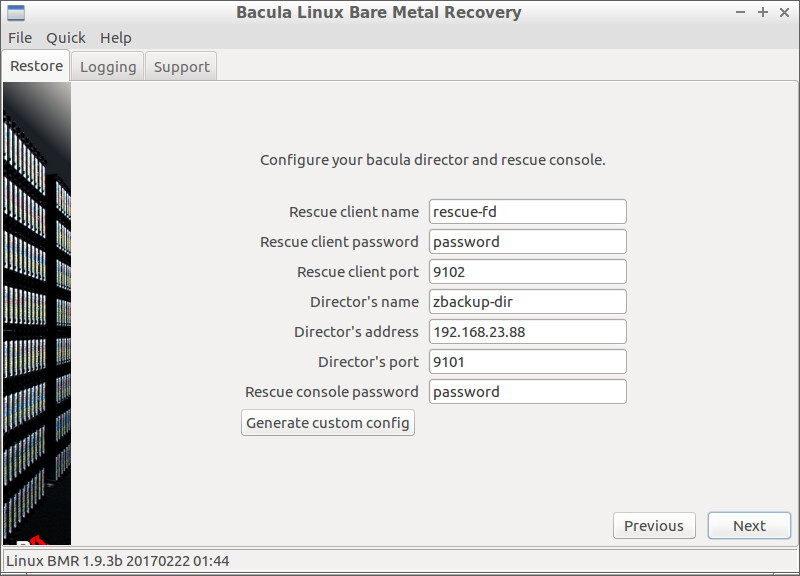
Bacula Configuration
The Rescue client name, password and port have to match the ones defined in the the Client resource in Preparing BMR Restore.
The Director name, address and port are required to connect to your
Director. Make sure you can connect to your Director from your
machine: that the network is well configured, that the Name resolution
(DNS) will resolve the name of your Director if you are not using an
IP address, and that on the other side, your firewall will not block the
incoming packages. The Rescue console password is the password set in
Preparing BMR Restore. These values are used to create the client and
console configuration files bacula-fd.conf and bconsole.conf in
the directory /bs-rescue.
The “Generate custom config” button creates a copy of the client
configuration file into bacula-fd.custom and opens it in a text
editor. You may modify it and even add directives as needed. For example
you can add TLS or data encryption to your configuration. Once saved,
this file will be used by the BMR Client.
Click “Next” to check if the configuration is correct and then go to the next step (for connection troubleshooting see section Linux BMR: Troubleshooting).
Now the client daemon is running. It is accessible from the Director, and the client and server-side programs will communicate to restore data.
Selecting What to Restore
Now is the time to choose the system to be restored to the current host. For this purpose, the BMR tool presents you with a list of all clients known to the Director in alphabetical order, which looks like the one shown in the screenshot below. Select the correct client and continue by clicking the “Next” button. If you selected a client which does not have any backups available, a message stating that no backups are available is displayed and you can go back to the client selection step.
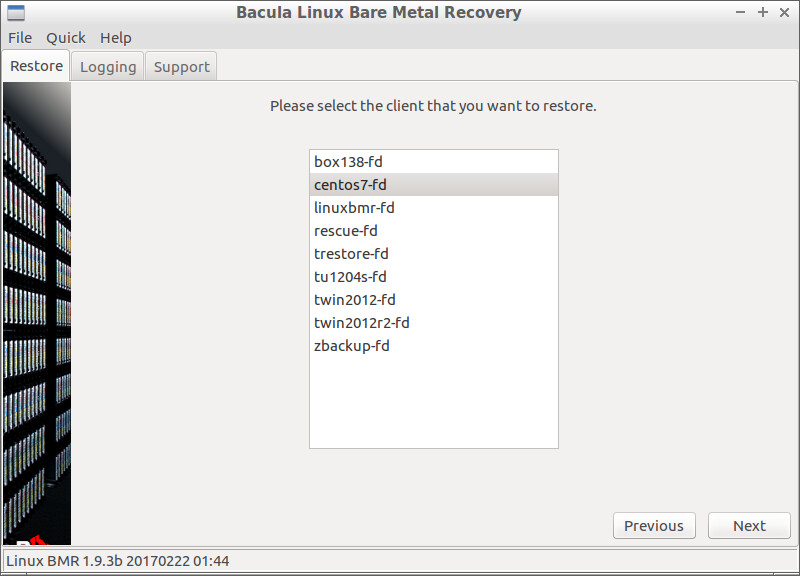
Source Client Selection
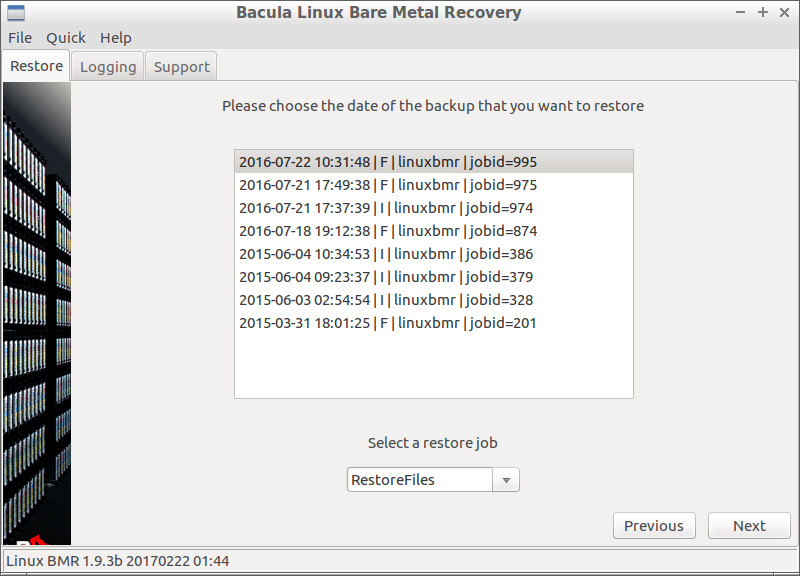
Source Date Selection
The next screen allows you to pick the date you want to restore from. All existing backups for the selected client are shown. You must select a BMR enabled backup. If the chosen job is not a good one, a dialog box will warn you. Previous versions of the LinuxBMR product were filtering the list of backups, to display only the BMR enabled backups, but this was sometimes too slow, so the filter has been removed (a simple and reliable solution is to clearly name all jobs that are BMR-enabled, for example with a job name prefix or suffix of “LinBMR”).
A restore job that does not have any RunScript directives is automatically selected. You can choose a different one in the combobox at the bottom of the screen.
Selecting Where to Restore to
If a suitable backup was chosen, the BMR tool loads information about the disk layout of the source host. The same layout, or part of it will be reproduced on the target host, then the data will be restored to the freshly formatted disk(s) and finally the tool will configure the boot loader.
The process is split into the following operations:
Disk mapping and exclusion
Partition and volume resizing
Partitioning
Volume mapping and exclusion
Restoring the data
Configuring the boot loader
When the source and your target systems are identical, clicking “Next” will do the job most of the time. If the systems are different, the proposed setup will often give good results, but you should double check and then validate with “Next”, or adjust the inputs to meet your needs.
A small glossary for the following sections:
A disk is a physical or virtual hard-disk.
A partition is a part of a disk.
A volume is a partition, a logical volume built on top of LVM, or a device created by the Linux RAID Software, that holds a filesystem and can be mounted to a mount point.
A mount point is a path inside the filesystem where a volume is mounted. We will often use the path as an alias to refer to the underlying volume.
Disk Mapping
The next screenshot shows what the Disk mapping screen looks like. The two lists on the left show the disks of the source host (from backup) and the ones available on the target host. The right panel shows how volumes and their related mount points depend on the underlying disks of the source host.
The task here is to map and align every disk of the source host to one disk of the target. This is useful if you have disks that are different in size or speed.
Use the up and down arrows on the left to move a selected disk up and down in the left list. Use the right arrows to move the selected disk on the right list.
If the number of disks on both systems does not match, then some disks
get excluded and are moved below the — excluded — separation line in
order to have the same number of disks above the line for a one to one
mapping.
You can move some disks below this separation line yourself to exclude them during the restore process.
Note
Existing LVM and RAID software information on these excluded disks
will be deleted to avoid name collisions, but the partitions will remain
untouched.
All volumes and filesystems that are related to these excluded disks will not be created and are shown in orange on the right panel.
The first disk of the target host will be the one the boot loader is installed to. It must also be chosen as the bootable disk in your BIOS. This is often the first disk in the list.
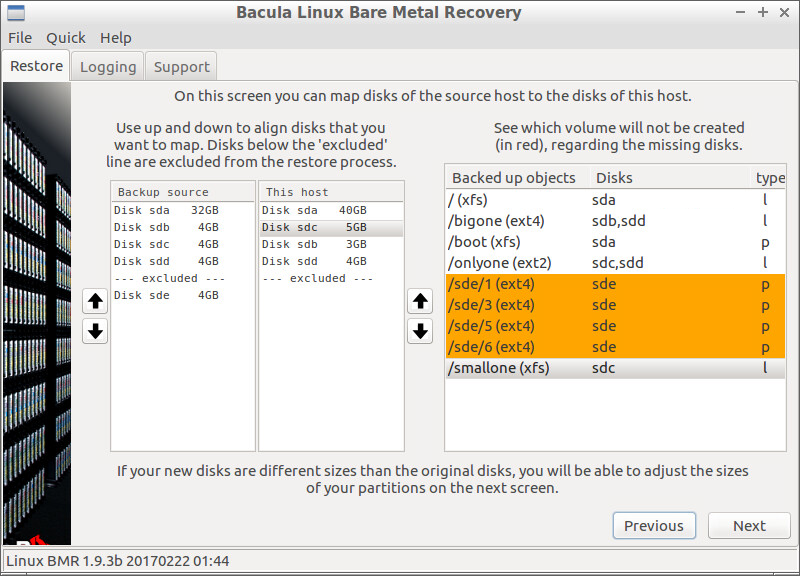
Disk Mapping between Source and Target hosts
In the screenshot above you can see that the target host does not
have a 5th disk. Thus, the 4 volumes /sde/[1356]
in orange on the the right panel will not be created. We could choose to
exclude another disk but assume that sde is fine. You can also see
that we swapped sdb and sdc, because the new sdc is bigger
and we want to give this extra space to the /bigone volume.
Adjusting Partitions and Volumes Sizes
The same partitions and volumes as backed up will be created on the target host. You cannot add or remove any of them. If your disks are bigger or smaller than the source disks then you will have to choose which partitions or volumes will grow or shrink.
In the next screenshot you can see, on the left side, all partitions and volumes, and on the the right side the information related to the selected object on the left. For now, ignore the Partitioning method part on the bottom right that is described at the end of this section.
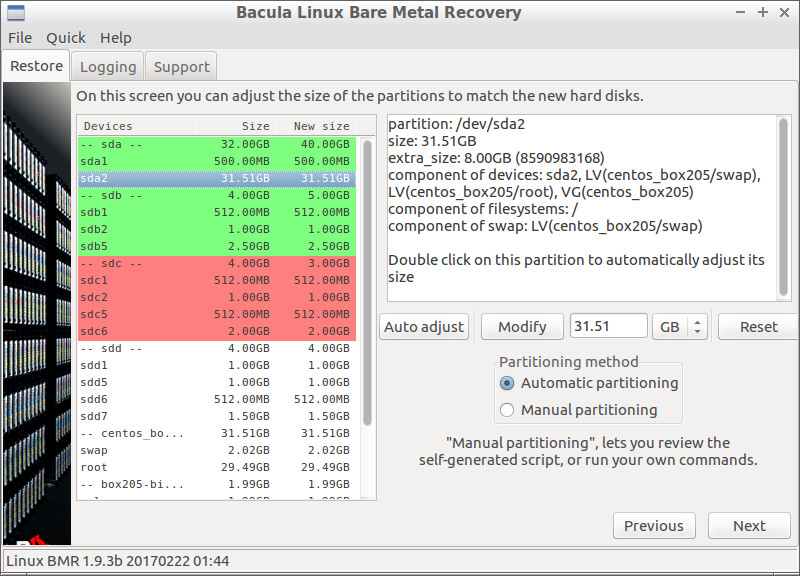
Disk Resizing sda
The areas in green have some extra space that can be assigned to the partitions and Logical Volumes. The areas in red will require some of their components to be shrunk.
sda is shown in green, used to have a size of 32GB on the source system and
can now take advantage of 8 more GB. We can distribute this extra space between
its partitions sda1 and sda2.
To do that you must select the first partition sda1, then type the
new size in the field at the right of the “Modify” button and click
“Modify”. You will see the new size allocated to the partition. Then
select the other partition and do the same. To go faster you can give it
all the remaining space by clicking the “Auto adjust” button. When all
the extra space is allocated the disk and its partitions are not
highlighted anymore.
Often you don’t want to divide the extra space and just give it all to one partition or volume. To go faster, double click on the partition that must grow (or shrink) and all the extra space is added (or lowered) to (or from) this partition or volume.
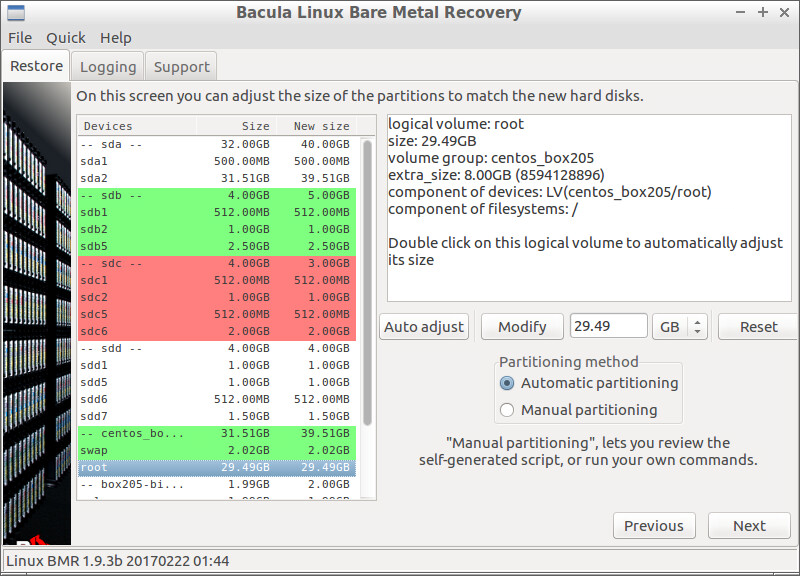
Disk Resizing Root
This is what we did with partition sda2. The sda disk is not green anymore,
but the “Volume Group centos_box205” has become green. This Volume
Group that got some extra space from the enlargement of sda2 has
2 Logical Volumes that hold a swap area and the root
filesystem. As we don’t want to increase the swap space, we double-click
the root volume to give it all the space. See the result in the next
screenshot below.
Now we handle the sdc disk that is smaller on the new system. We
must shrink one ore more partitions to save 1GB. Double clicking on
sdc1 would return an error because the partition is too small to
take all space difference on its own. We choose to double click and
shrink sdc6 instead.
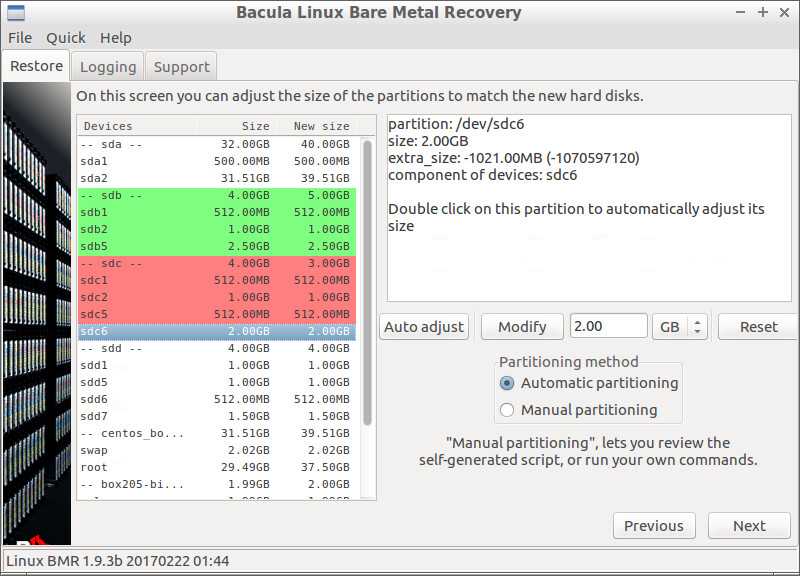
Disk Resizing sdc6
Finally we see that sdc6 has lost 1GB.
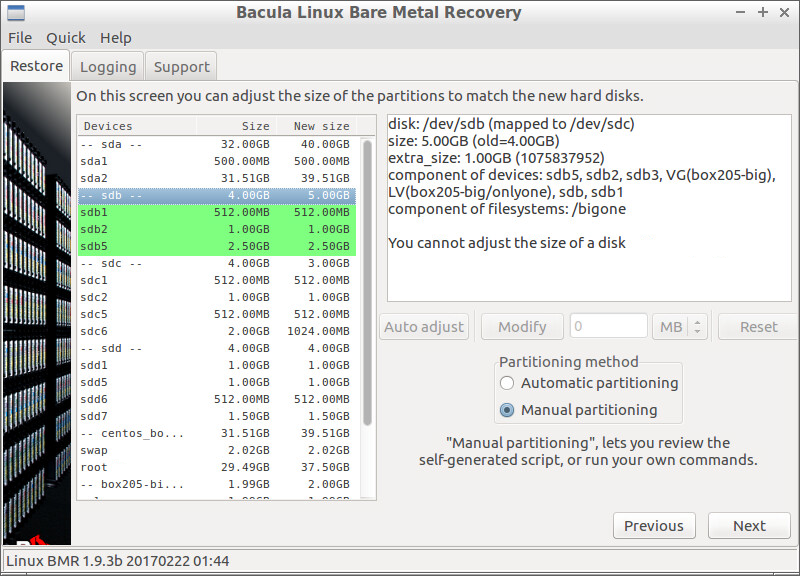
Disk Resizing Final
And finally we increase the size of sdb2 and give more space to the
/bigone filesystem (not visible in screenshot because that
filesystem is at the bottom of the list).
Note
Most of the sizes here are approximate because tools used to create the
partitions and LVM objects depend on their own alignment rules and
granularity constraints. To make it work, we let the tool make the
adjustments on the last partition of the disk or the last Logical Volume
of the Volume Group. This means that the last object will be a few KB or
MB smaller than expected.
For your information, the program displays an entire disk or Volume Group in green or red if the difference between the expected size and the available size is more than 4MB.
Even though there should never be any green or red areas left, the
program will not complain about it and will try to have the partitioning
and LVM tools do the adjustment on the last partition or Logical
Volume. If the adjustment cannot be done (for example because there is
no more space to create any partition or Logical Volume the
partitioning will fail.
If you need precise sizing you can tweak the partitioning script yourself, which is described in the next section.
Partitioning
Finally we are done with the resizing and we can create the partitions and volumes. The BMR tool generates a shell script using the information coming from the source system and the choices made in the last two screens.
If you have selected “Automatic partitioning” and the script causes an error (see example below) you can read this section and fix the problem yourself, or contact the Bacula Systems Support Team.
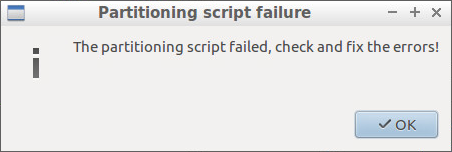
Partitioning Failure
If the generated script ran without error then the BMR tool skips the manual partitioning screen. Continue to read Volume Mapping.
If you are not interested in creating your own scripts or how to tweak the auto generated script, you can skip this section.
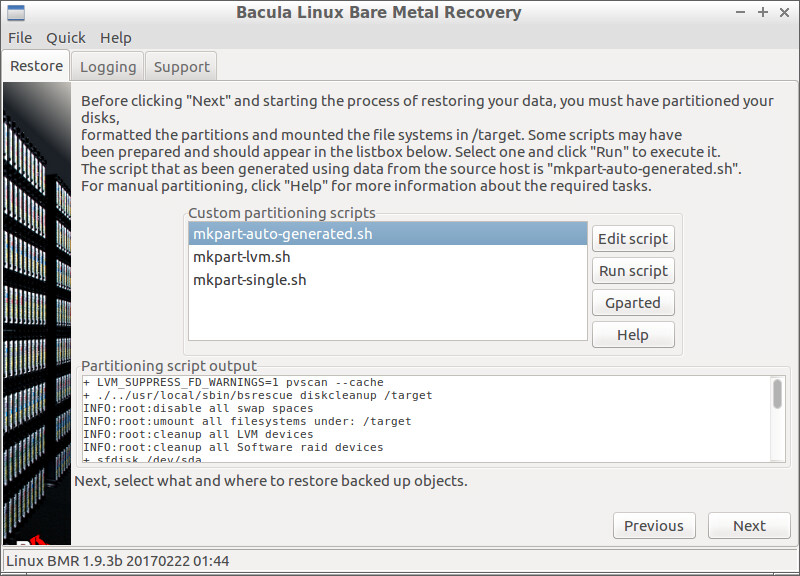
Manual Partitioning
The script mkpart-auto-generated.sh in the list is the one that the
BMR has generated. The two other scripts are here as a reminder that
it is possible to write your own scripts in advance and store them in
the /opt/bacula/rescue/scripts directory of your source host. Such
custom scripts will be shown in the list if their names start with
mkpart-.
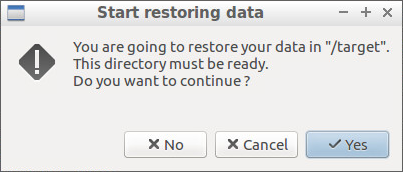
/target Must be Ready to get the Data
You can edit and run the scripts using the “Edit script” button on the right. Their output is displayed in the small window at the bottom. The “Help” button provides information about what you have to do, how you can do it, and all the details about the source system.
Before leaving this screen, the BMR program reminds you that it is
going to restore the data, and that the directory /target must be
mounted and ready to receive the data.
Volume Mapping
We are one step away from restoring the data and the purpose of the next screen is to match the volumes that have been backed up from the source host with the volumes that have been created by the Partitioning process on the target host.
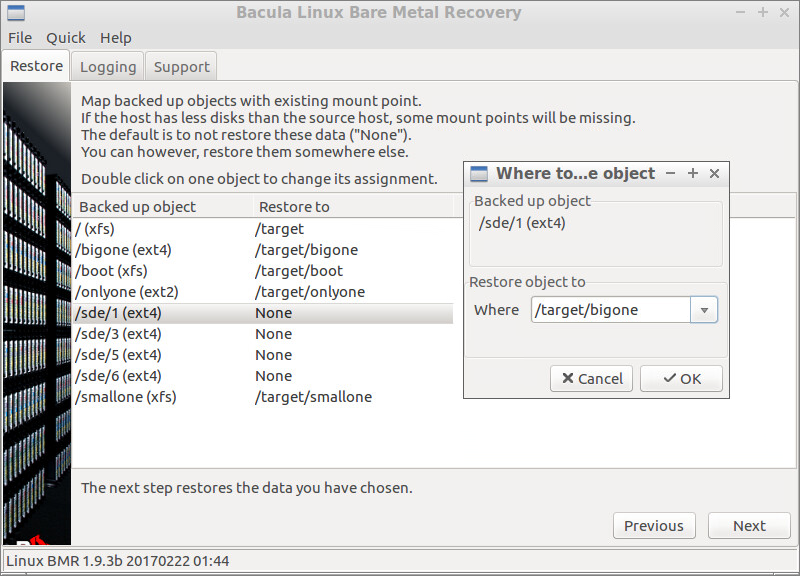
Volume Mapping
In our example, we had no 5th disk to map the disk
sde. As seen in the figure above, the program will
not restore data in the directories that were stored on the missing disk
– this is why it says None in the “Restore to” column. But we are in
the process of redirecting the data in directory /sde/1 to directory
/target/bigone which we know to be big enough to fit the extra data.
You can double click on any volume of the source system and change the directory on the target system.
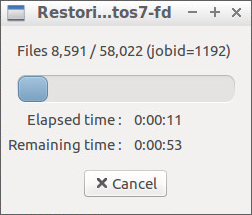
When done, click “Next” to start restoring your data. A progress bar will keep you informed about the status of the restore.
Restore Gauge
Go back to: Linux BMR: Performing BMR.