Creating vSphere Plugin Backup Job and FileSet in BWeb
Manually Creating vSphere Plugin Backups With BWeb
Before proceeding with this section, be sure to follow Configuring New vSphere Host article guide where you will be shown how to add vSphere hosts to the BWeb “VMware Center”. The purpose of this section is to demonstrate how to manually create Bacula vSphere Plugin backup Jobs and their associated FileSets to backup your VMware VM(s) with the use of BWeb.
Creating New vSphere Plugin FileSet
On the BWeb main menu, expand “Configuration -> Director” and click “FileSets”. You will be taken a page where all of the currently configured FileSets are listed.
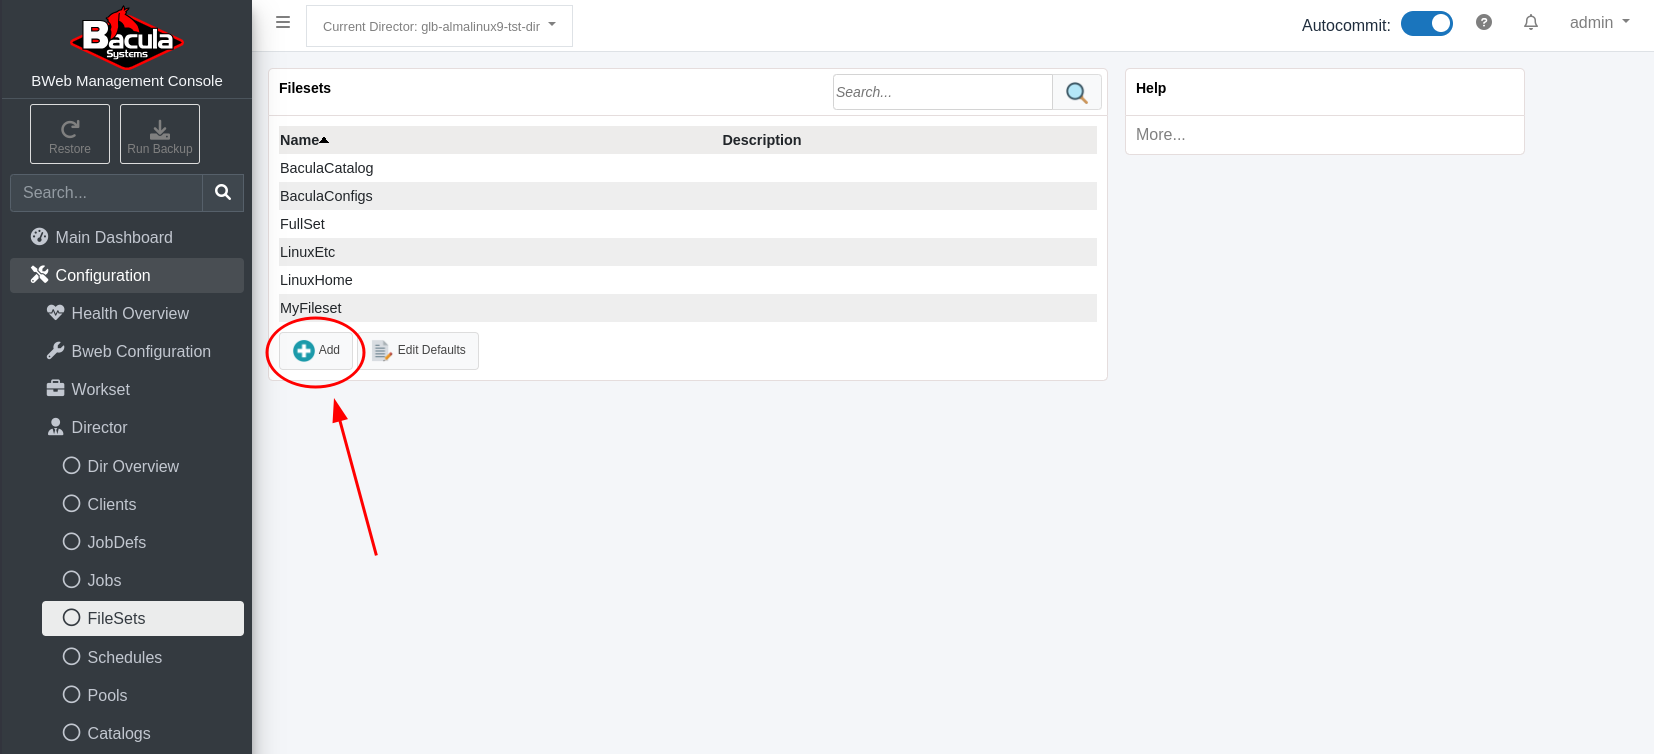
Here, we will start by creating a FileSet which will be used to backup one VMware VM managed by a vCenter server. We will use the ’vcenter-65’ vCenter server which was configured in the “BWeb VMware Center” section of this document.
Click the “+” next to the word “FileSets” in the middle dialog box. You will be taken to a form where this new FileSet will be configured.
Fill in the “Fileset Name:” field with an appropriate name. In this example, the name “vcenter-65_vm-test” clearly indicates that the VM being backed up is called ‘vm-test’ and it is managed by a vCenter server called ’vcenter-65’. Optionally, you may also fill in the “Description:” field.
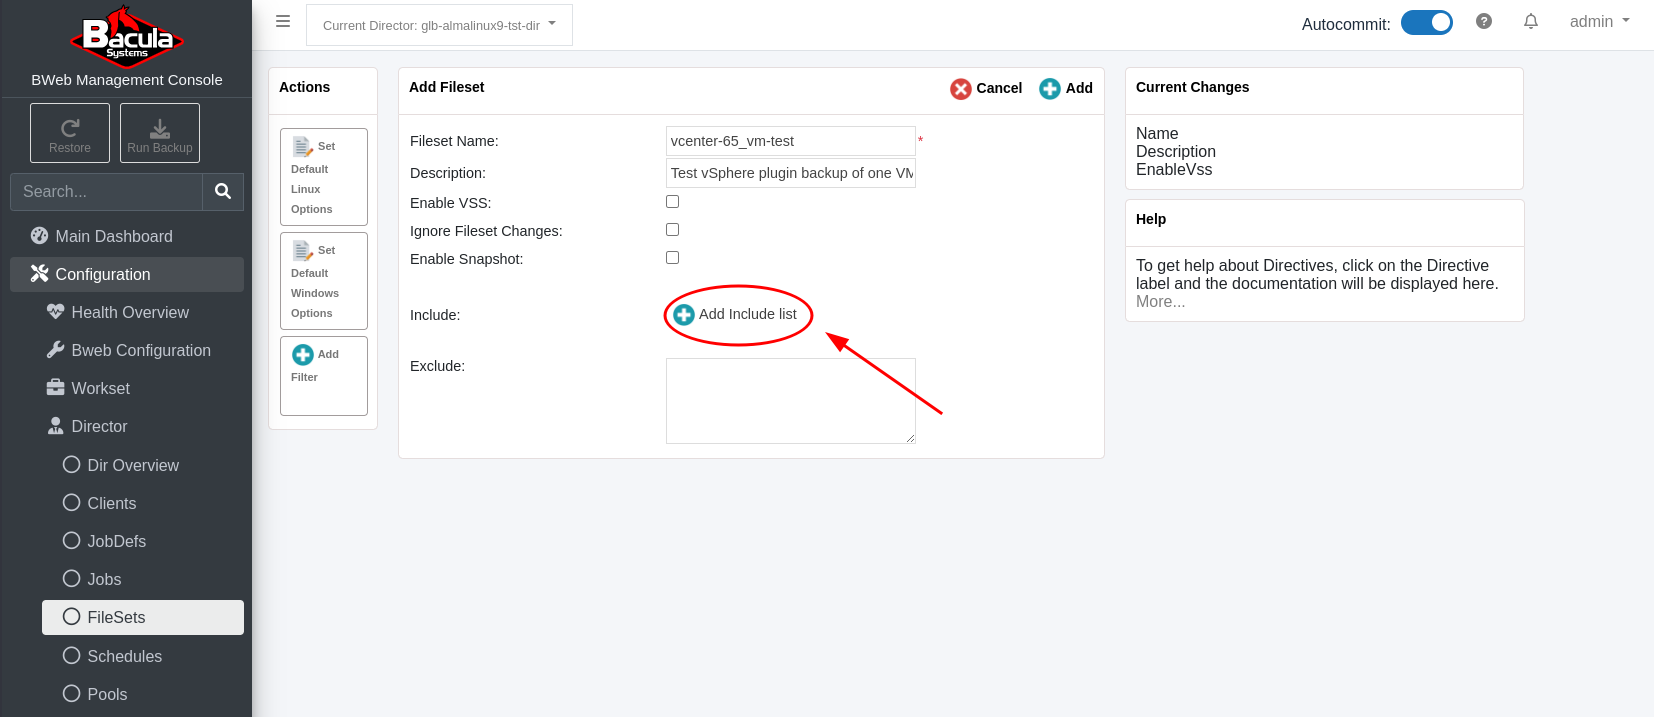
Click “+ Add include list” and you will be taken to the “Configure Fileset” dialog box. In this dialog box, select the client from the drop-down menu. Click the “vSphere” checkbox.
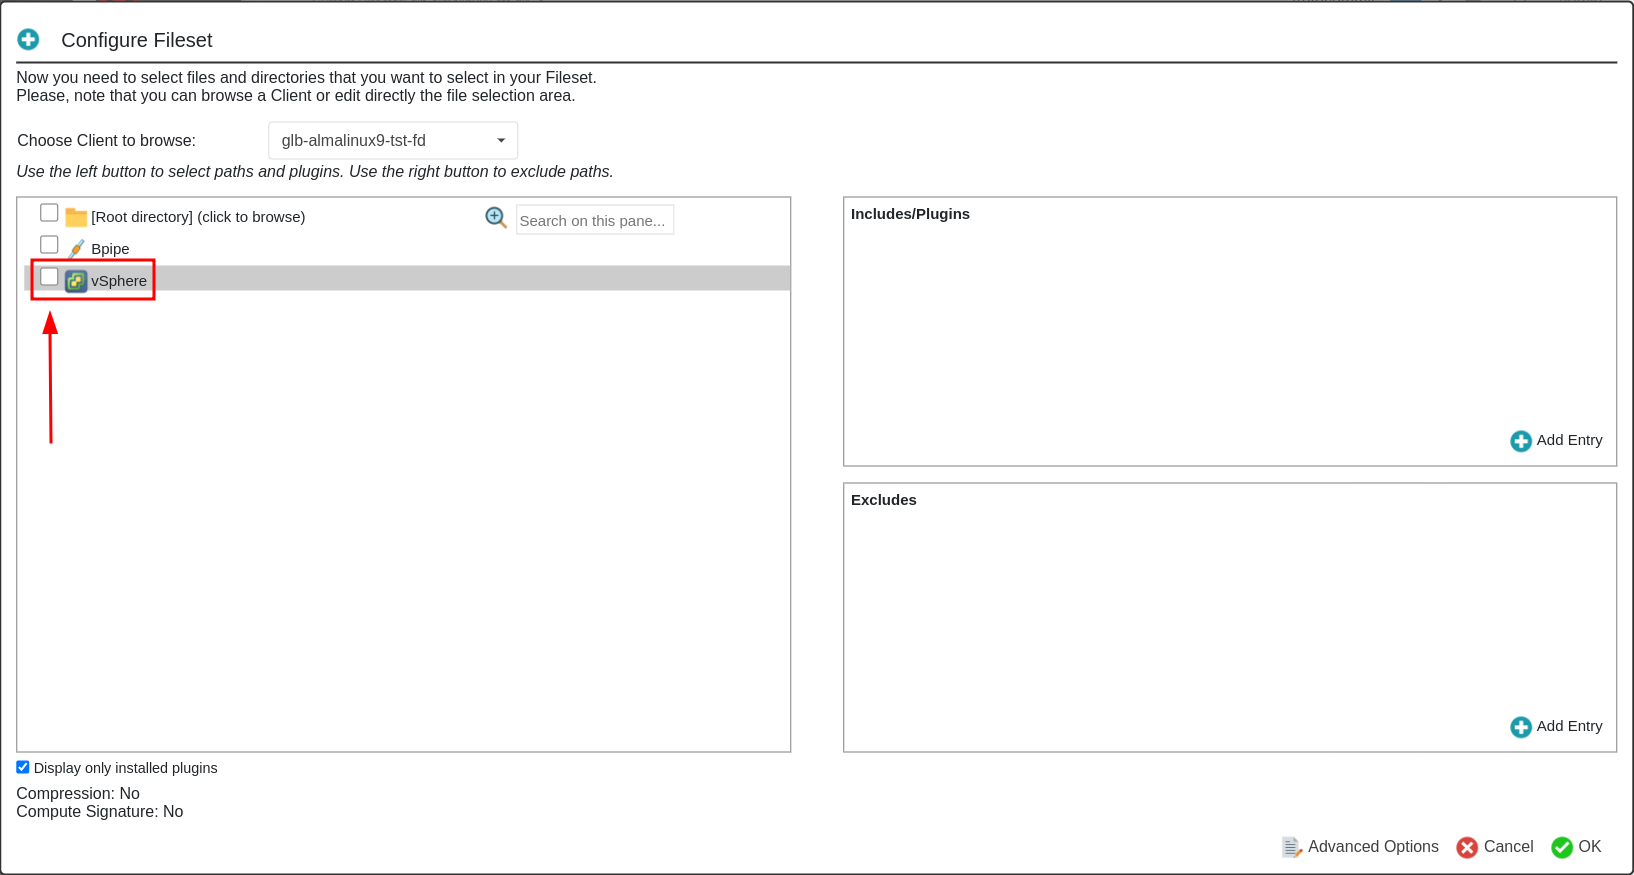
You will be taken to the “Plugin Configuration” dialog box.
Here, after refreshing clicking the circular arrows  , choose
the ’vcenter-65’ server from the “Server:” drop-down menu.
Again, refresh the “Virtual Machine” drop-down menu
, choose
the ’vcenter-65’ server from the “Server:” drop-down menu.
Again, refresh the “Virtual Machine” drop-down menu  and
click the down arrow. You will see a listing of all of the VMs managed
by this vCenter server.
and
click the down arrow. You will see a listing of all of the VMs managed
by this vCenter server.
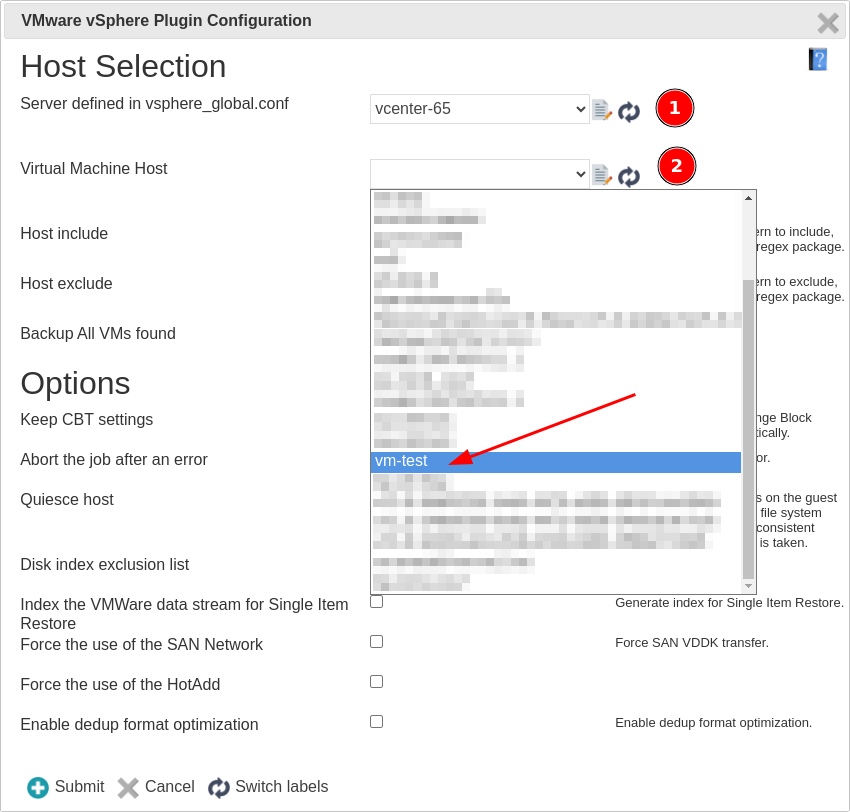
Since we are configuring a new FileSet and Job to backup one specific VM managed by this vCenter server, we will not use the “Host Include” and “Host Exclude” fields. These fields can be used used to backup or exclude VMs based on wildcards like: debian9-* or www-*.
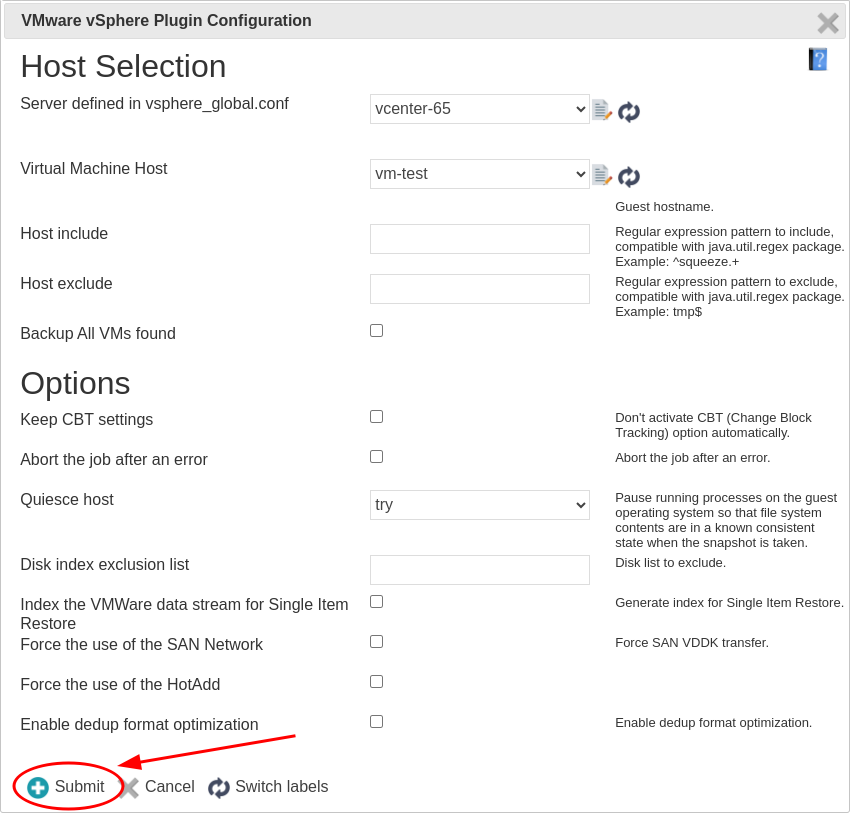
In this example, we will select the VM named “vm-test”, then click “Submit” at the bottom of the dialog box.
You will be taken to the “Configure Fileset” dialog box where you can see in the “Includes/Plugins” box what will be added to the FileSet’s “Include:” section. This is called the “vSphere plugin command line”. In this case, there are only three simple parameters:
The name of the Bacula plugin to use: “vsphere:”
The ESXi host or vCenter server to communicate with: “server=vc8.supportlab.lan”
The VM to be backed up: “host=vm-test”

Just click “Advanced Options” here, and you will be taken to the new FileSet’s “Options:” dialog box. Here we will set an SHA1 “Signature” for all files backed up by this vSphere plugin backup FileSet. The rest of the options may be left as-is.
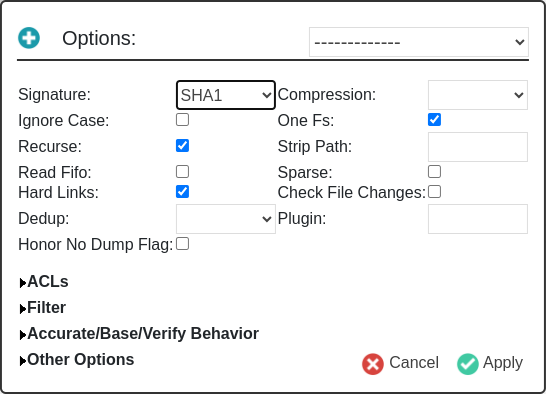
Click “Apply”, and you will be taken back to the “Add Fileset” dialog where you can see the newly created FileSet with the vSphere plugin command line and the optional SHA1 “Signature” which was added to the FileSet:
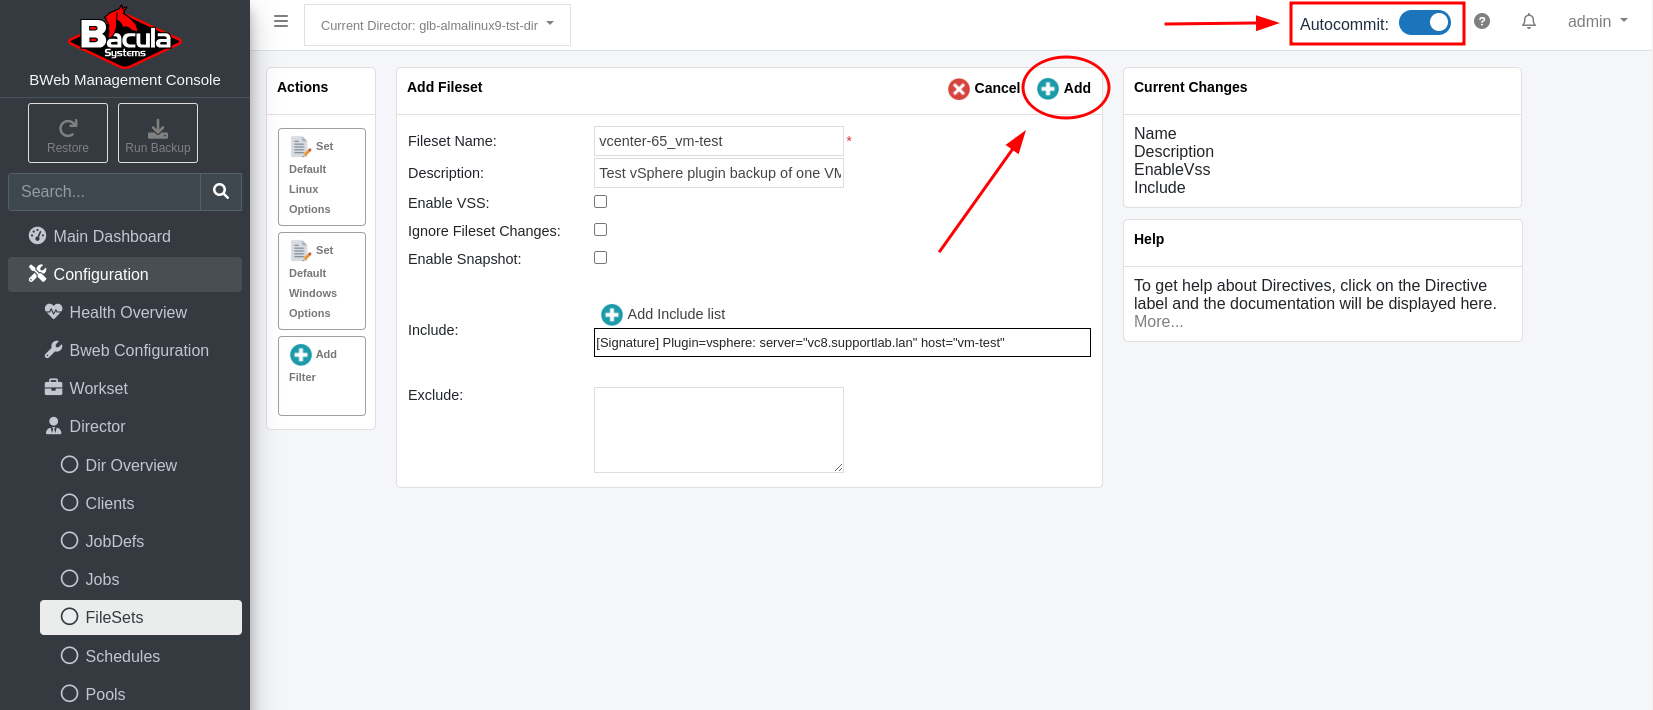
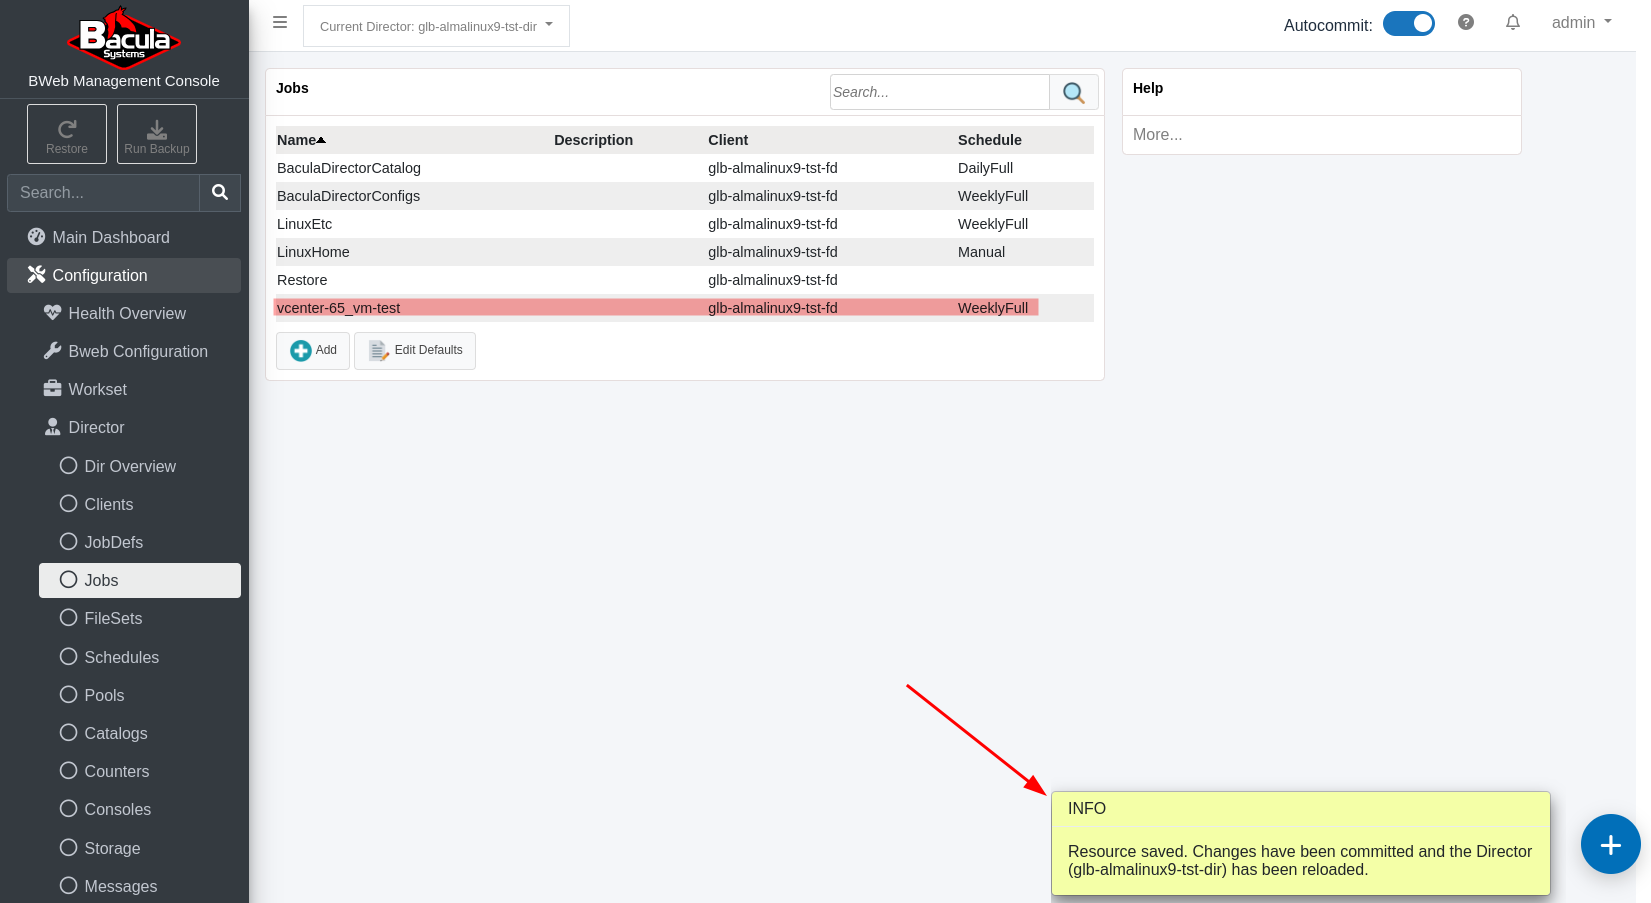
Make sure to toggle “Autocommit” in the top-right corner and click “+ Add” at the top of the “Add Fileset” dialog box. You will be taken to the full listing of all configured FileSets where the new ’vcenter-65_vm-test’ FileSet should be listed:
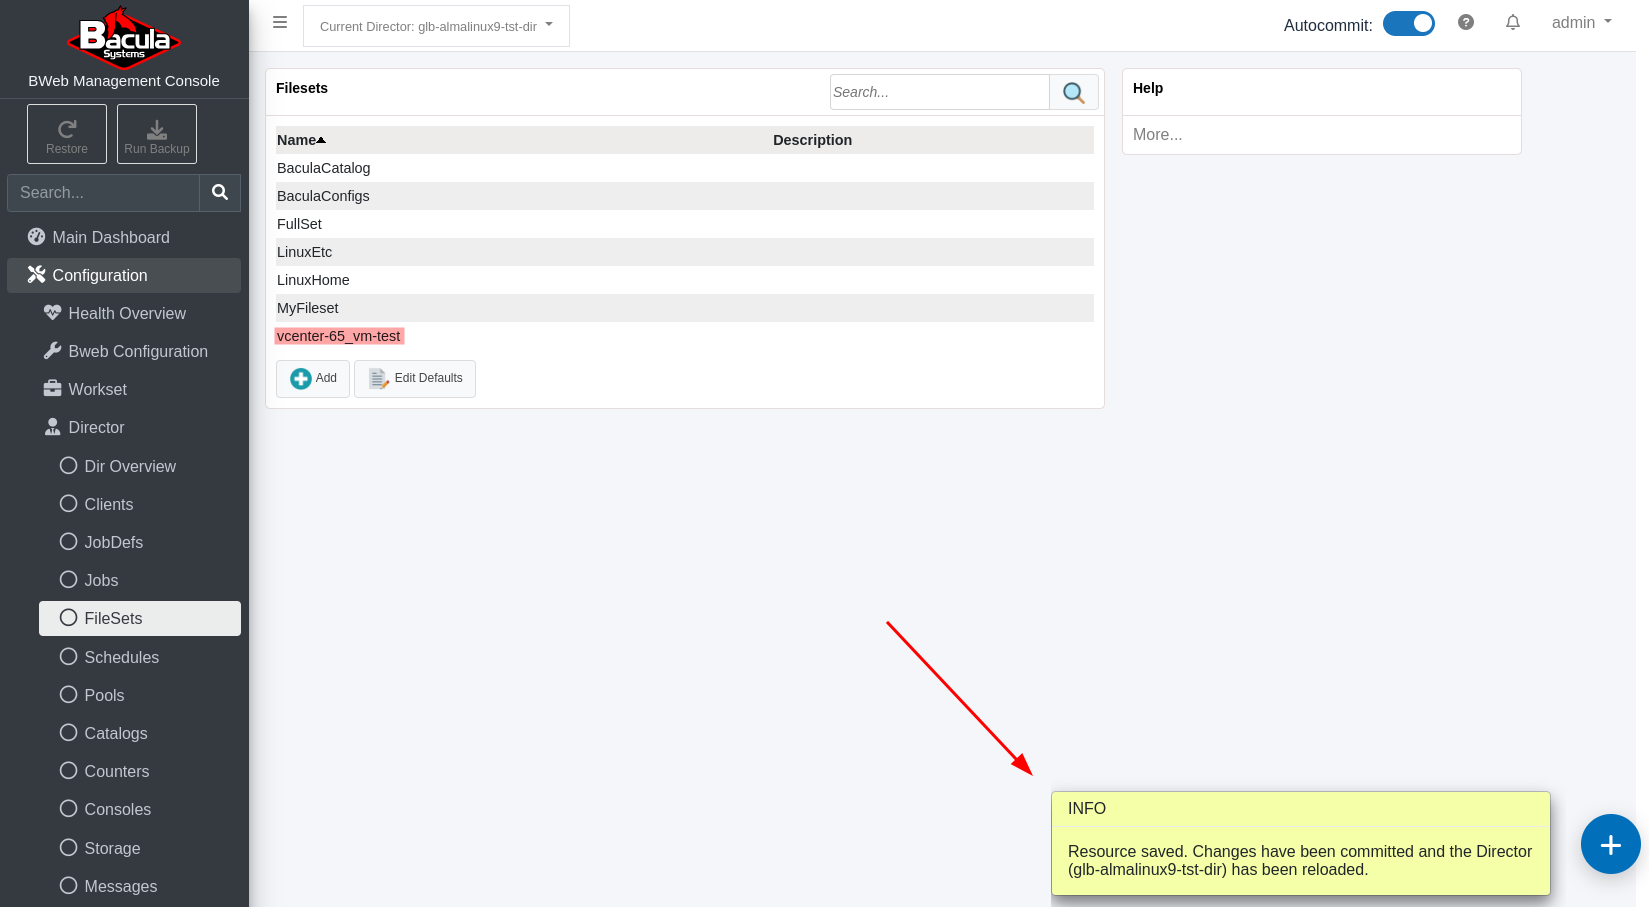
A pop-up window in the bottom-right corner will inform about the successful operation.
Add New Backup Job Which Uses New ’vcenter-65_vm-test’ FileSet
On the BWeb main menu, expand “Configuration -> Director” and click “Jobs”. You will be taken a page where all of the currently configured Jobs are listed.

Click the “+ Add” at the bottom of the dialog box. You will be taken to a form where this new Job will be configured.

In this dialog box, the “Job Name:” field is filled in with a name that matches the Fileset we have previously configured. This is not required but can be a good practice to implement that makes it easy to understand what this Job does.
You may choose a pre-configured “JobDef” from the “JobDefs:” drop-down menu. This will automatically populate several of the other fields with some default settings inherited from the selected JobDef. Take a look at all of these and verify that they are OK for your needs. All the defaults from the JobDef can be overridden here.
NOTE: Since we are configuring a vSphere plugin backup job, the “Accurate:” option must be enabled. To display this option, click on “Backup Options” to open and expand this normally hidden section.
Click the checkbox next to “Accurate:”, then click the “+ Add” at the top of this dialog box to save this new Job. You should be taken back to the list of all configured jobs where this new job should be listed.
At this time, the new vSphere VM backup Job is available to be run manually, or via a schedule.
Running New vSphere Plugin Job
On the BWeb main menu, click “Run Backup” in the upper-left corner. In the “Job name:” drop-down menu, you should be able to select your new VMware backup job. Follow the steps in the manual job run wizard to run this job.
See also
Go back to:
Go to:
Go back to the main BWeb VMware Center Module page.
Go back to the main vSphere Plugin page.