FD Registration - Client to Be Created in BWeb
Steps
Click on the
+button in BWeb (bottom right corner) and choose “Add Client”.Set a name, and optionally a description for this new Client.

Click “Next”.
On the next screen, keep the default communication type: “Standard encrypted communication”.

Click “Next”.
Choose the OS Type (Linux or Windows) according to the operating system of the new client target. The Password can be left as proposed. Fill in the Address with the FQDN, the hostname or the IP address of the new client. The Port should be left as it is.

Click “Next”.
On the next screen, click on
deployin order to access the unique identifier to register the File Daemon.
If Autocommit is disabled, commit your changes created by the new Client wizard if - click
Nexton the screen.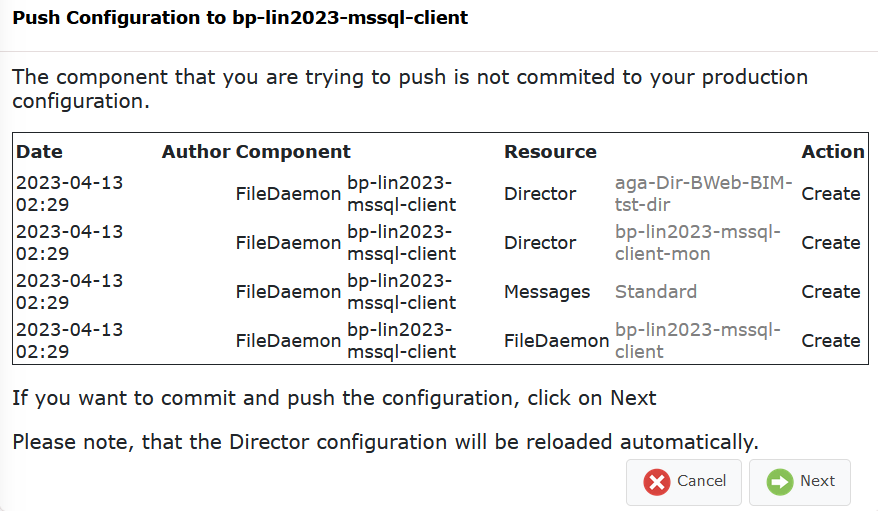
Select QR Code/Registration Wizard, keep the Token validity period to 10 min.
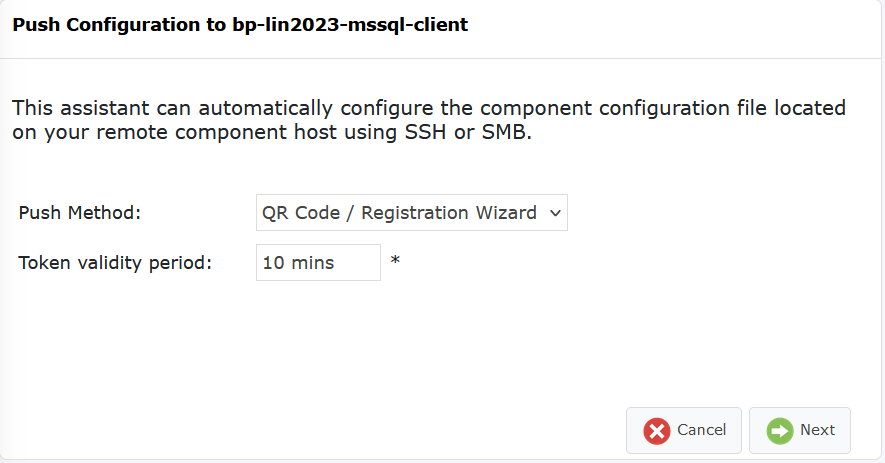
Click “Next”.
On the next screen, click “Copy to clipboard”.

Once copied to the clipboard, go back to Windows: Install File Daemon (Client) or Linux: Install File Daemon (Client) in order to paste it in one of these executables.